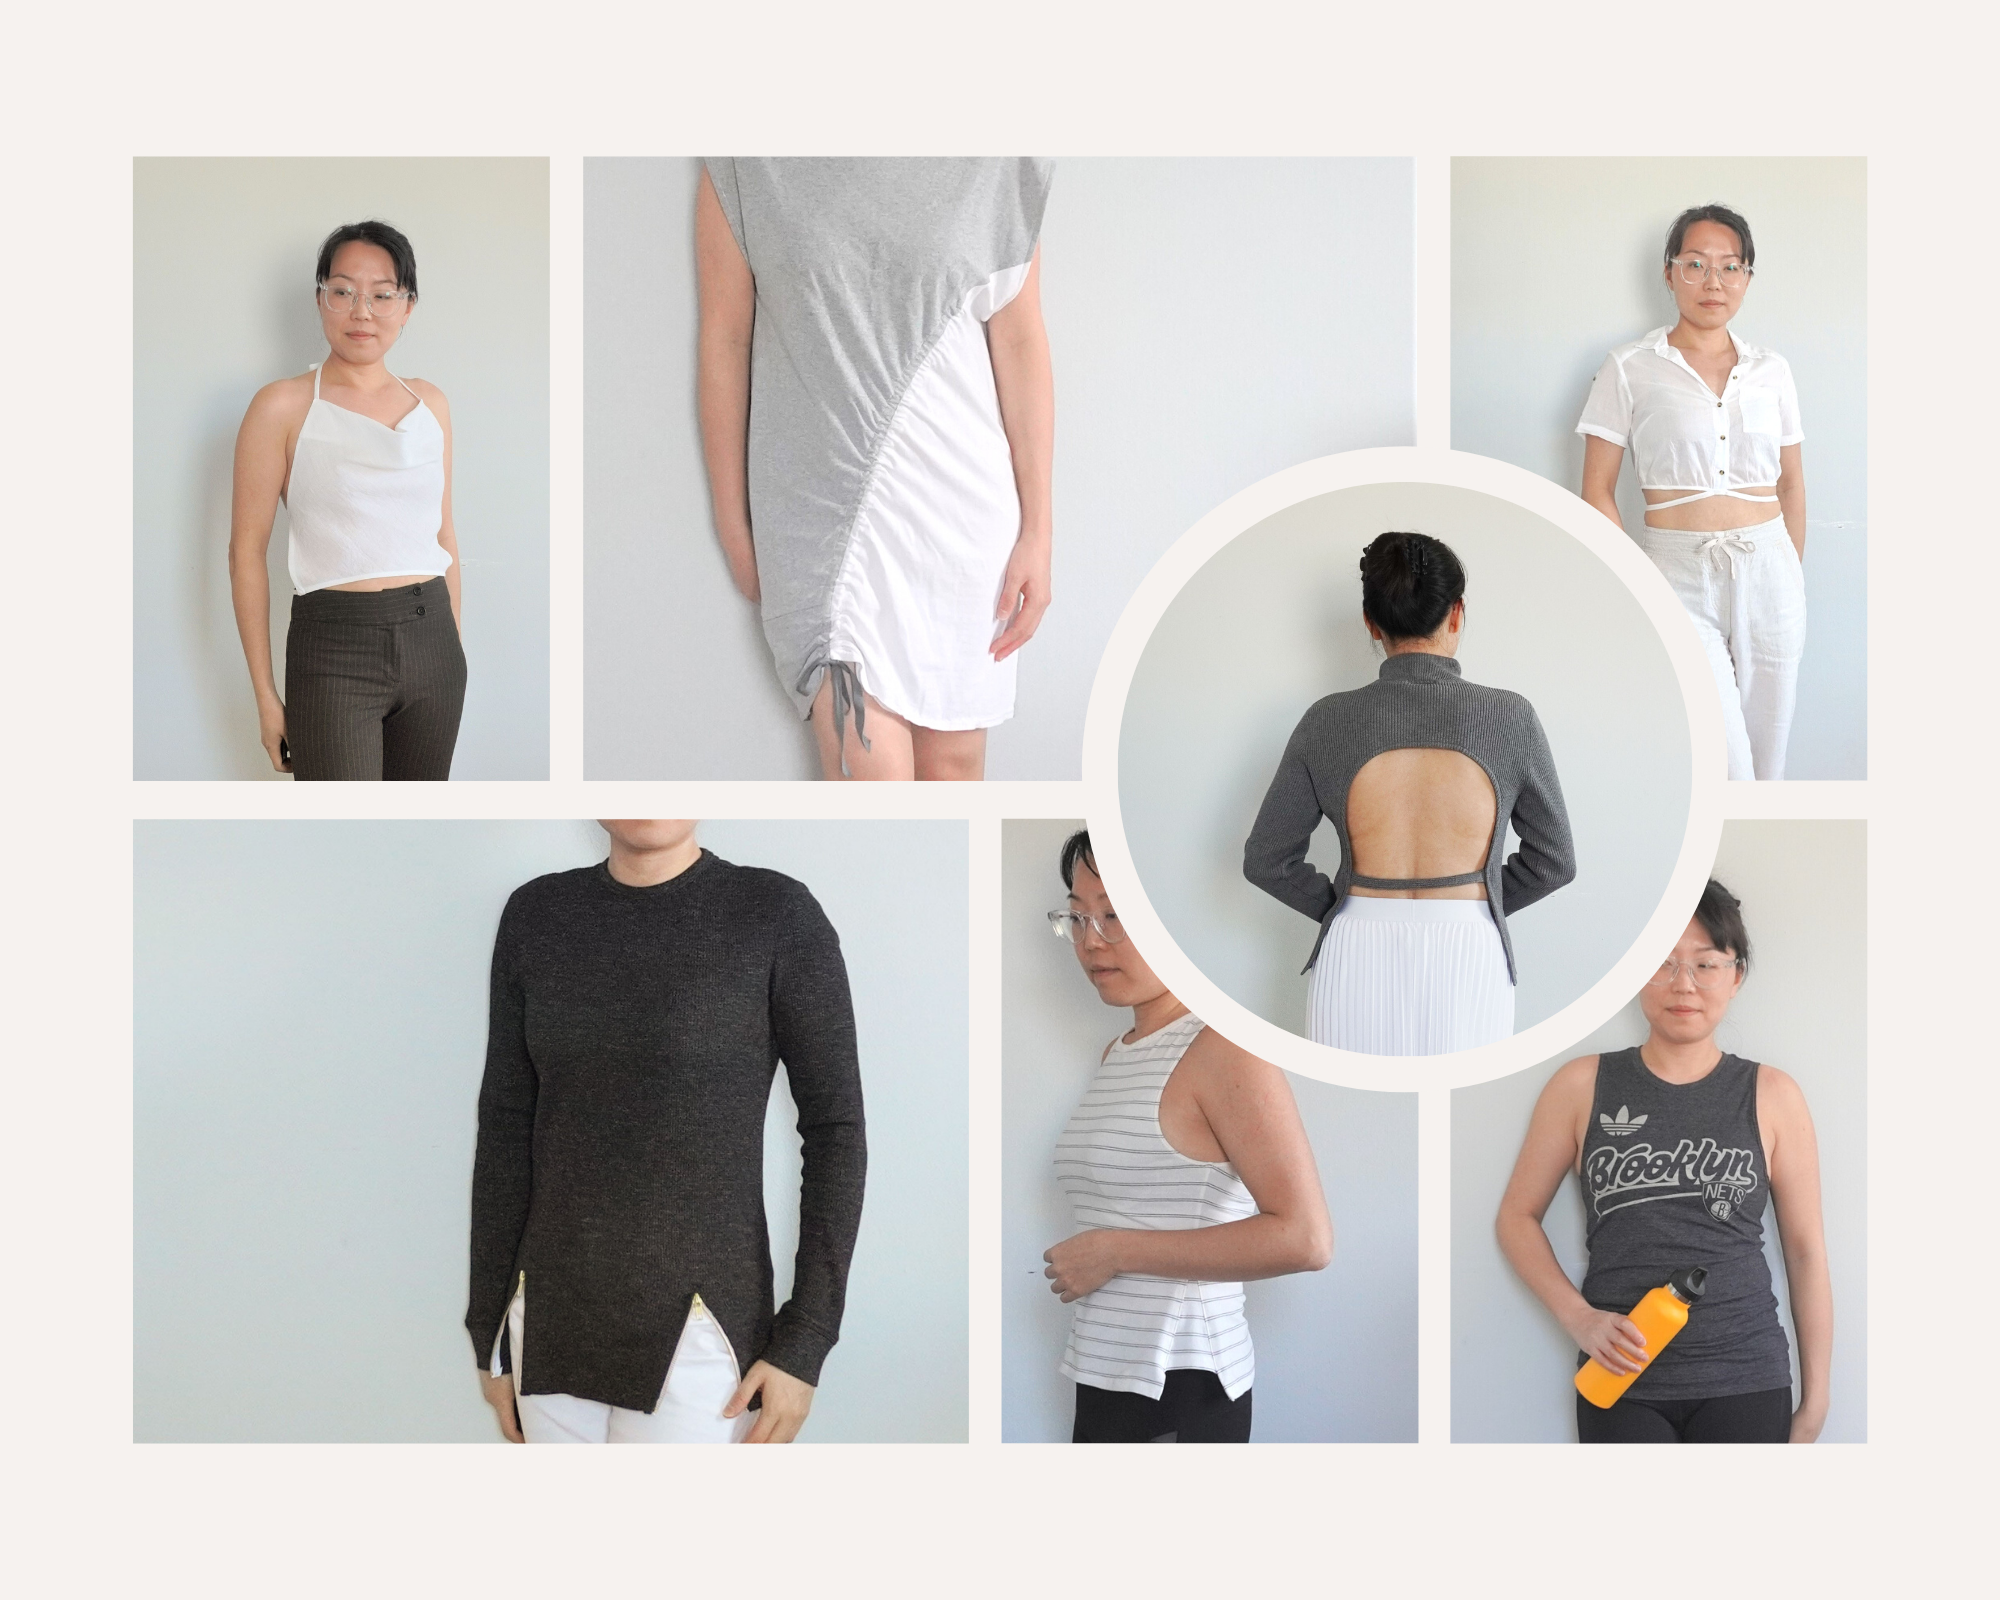
Do you have a beloved shirt that no longer fits? Don’t throw it away; instead, turn that shirt into a new, stylish shirt that fits, with just a few basic sewing skills. Below are seven different ways to refashion a shirt that is too small, ranked from easiest to hardest. You can turn the shirt into a tank top, add godets, add zippers, make it backless, turn it into a napkin top, make it into a crop top with waist ties, or make it into a t-shirt dress. Read on below for details and video tutorials showing you how.
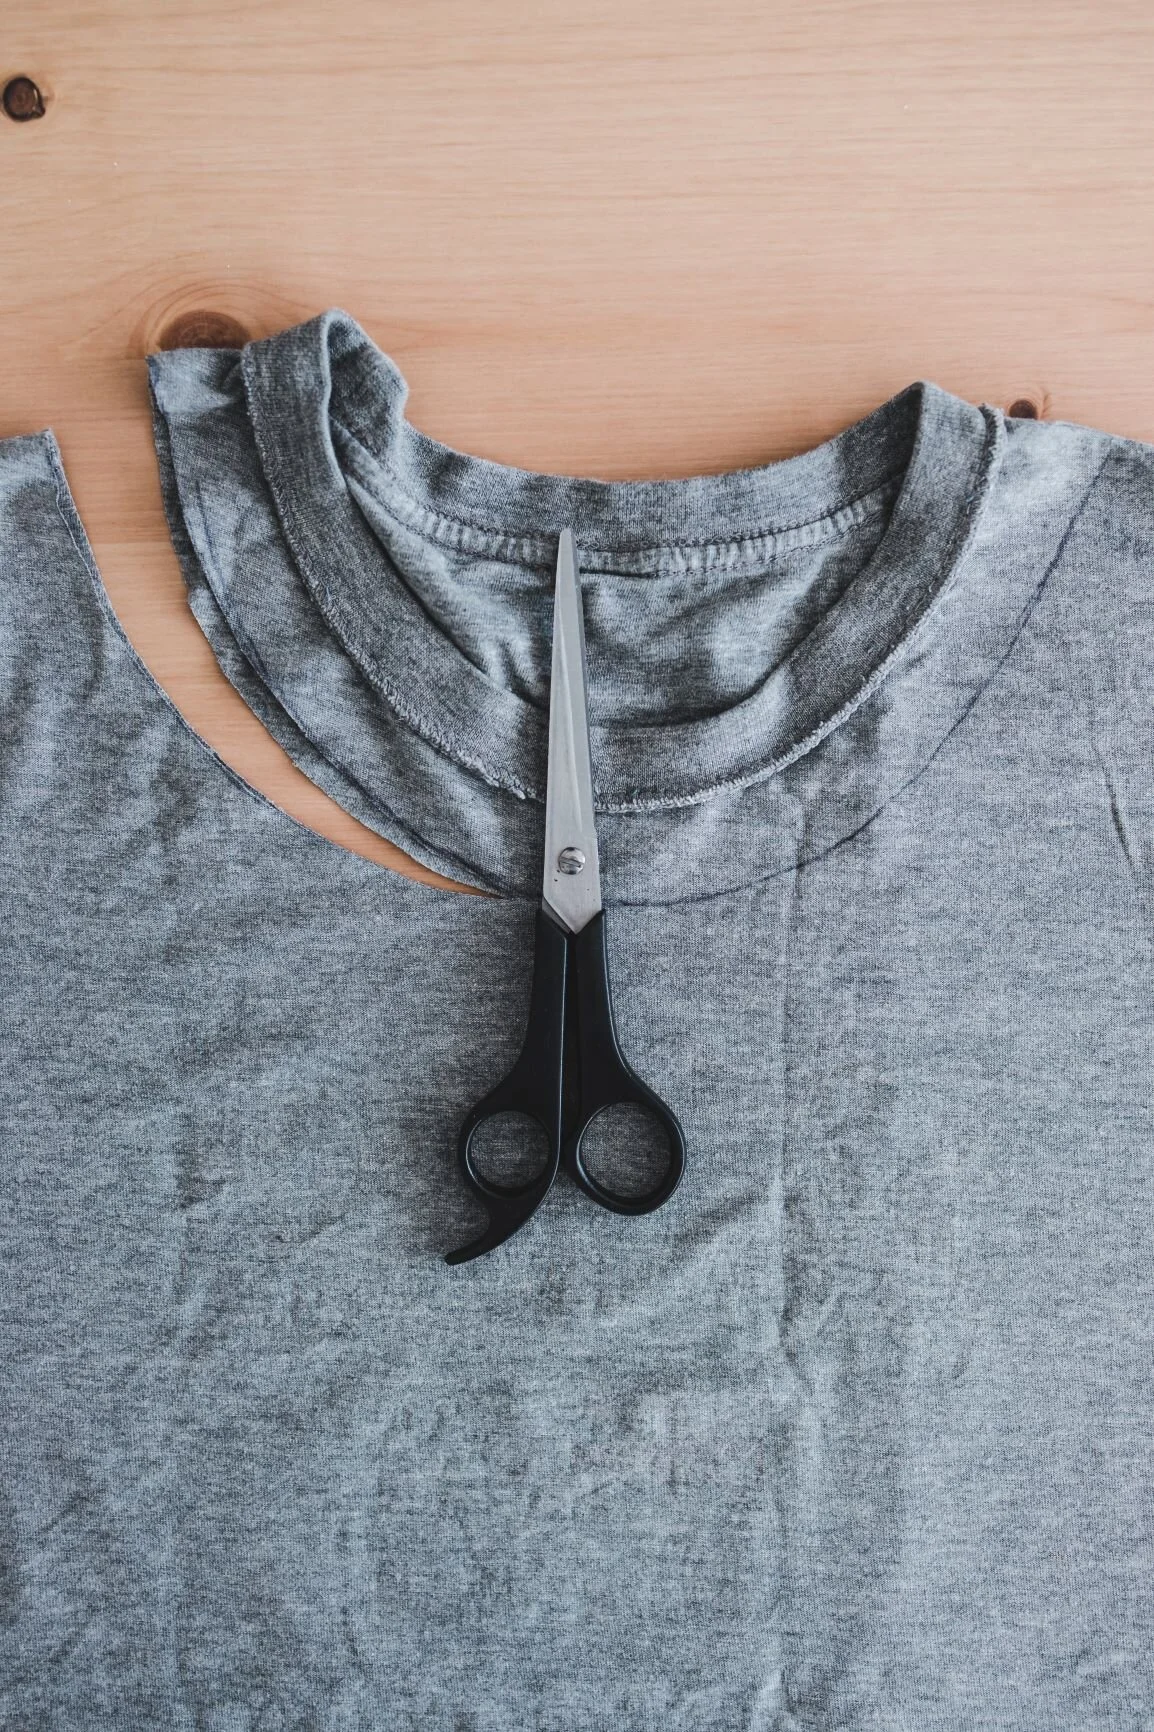
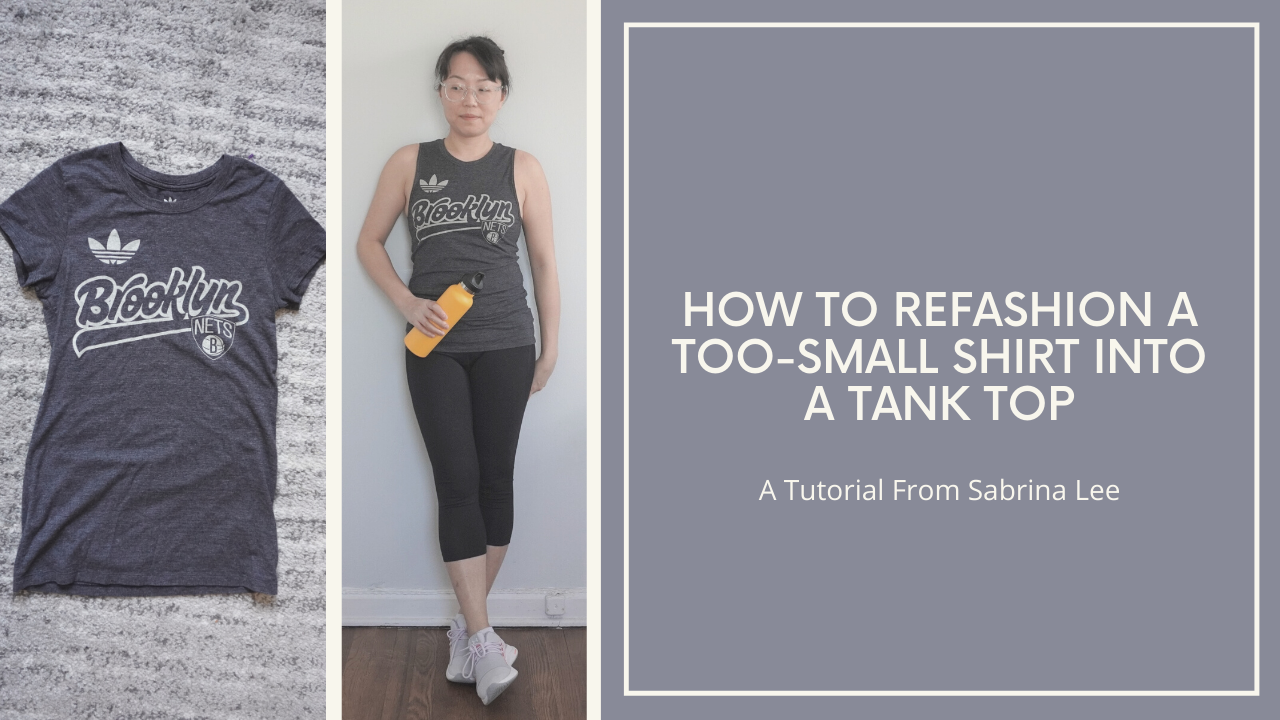
1. Make it a tank top
Best for: tops that are too tight around the shoulders or arms
Materials:
Clear elastic (I use Dritz 3/8 inch lightweight clear elastic)
If you have a shirt that is too tight around the shoulders or arms, one easy way to refashion it is to cut off the sleeves and turn it into a tank top. Simply use a tank top you already love as the template for cutting off the sleeves, and once you have cut off one sleeve, use that sleeve as a template for cutting off the sleeve on the other side. This is an easy way to ensure that you get a tank top that is symmetrical.
Once you have cut off the sleeves, finish the raw edges of the tank top with some clear elastic. Simply pin the clear elastic along the edge of the fabric, taking care not to stretch the fabric, then stitch it down with a zigzag stitch. Turn the elastic over to the wrong side of the tank top and zigzag stitch again through the elastic and the right side of the fabric. This stitching will show on the right side of the shirt, so make sure you are using thread that matches the color of your shirt.
2. Add godets
Best for: shirts that are too tight around the chest or waist
Materials:
Clear elastic (I use Dritz 3/8 inch lightweight clear elastic)
A great simple way to refashion a t-shirt that is too small around the chest and waist area is to add godets. A godet is a small, triangular piece of fabric that you insert at the side seams to add more width to your garment. You’ve probably come across godets in flared jeans – the godet in those types of jeans is usually made of a floral cotton fabric, which gives the jeans a hippie, boho style.
You can take this same idea and use it to add width to your shirt, and you can do it in a sleeker, more minimalist way. Instead of adding a printed cotton fabric, you can add godets made from fabric taken from the sleeves of your shirt. Simply cut off the sleeves, then open up the sleeves by cutting along the underarm seam. Open out the sleeve fabric and press flat, then cut the sleeve fabric into a triangle. This will give you two triangular godets.
Next, cut along the side seam of your t-shirt, then pin the godets into the side seams, matching up the sides of the triangles with the sides of the side seams. If you have a striped fabric, play with the placement and direction of the stripes (for example, do you want the stripes of the godet to match up to the stripes in the shirt? Do you want them offset? Do you want them in the opposite direction to the shirt?). To give a more modern look, make the godet slightly shorter than the main t-shirt, to give your shirt a stepped hem.
Once you are happy with the placement of the godets, stitch the godets into the side seams using a stretch needle and stretch stitch. (Check out my post on sewing machine settings for stretchy fabrics to determine which stitch settings you should use for your type of fabric.) After that, topstitch through the outer fabric and the seam allowance on both sides of the godet seam.
Now that the godets are inserted, the next step is to finish the armholes, which currently have raw edges because we cut off the sleeves. Use a tank top you already know you like as a guide to cut the new armholes. Once you’ve cut one armhole, use the piece of fabric that you cut off as a template to cut the other armhole. This helps ensure that you end up with symmetrical armholes. Finish the raw edges of the armhole with clear elastic — pin the clear elastic at the edge of the armhole, taking care not to stretch the fabric, then stitch it down with a zigzag stitch. Turn the elastic over to the wrong side of the tank top and zigzag stitch again through the elastic and the right side of the fabric. This stitching will show on the right side of the shirt, so make sure you are using thread that matches the color of your shirt.

3. Add Zippers at the Hem
Best For: Longer Shirts That Are Too Tight Around the Hips
Materials:
Two 6-inch zippers (I used these white YKK zippers with gold hardware)
Strips of fusible knit interfacing (optional) (I used this black fusible knit interfacing)
If you have a hip-length shirt that has become a bit too tight around the hip area, refashion it by inserting some zippers at the hem of the shirt. This will give the shirt a bit more ease at the hemline, so it is no longer tight around the hips, and it can also add a touch of edge or visual interest to the look of your shirt, if you use zippers in contrasting colors or zippers with heavy-duty metal teeth.
Start by cutting a 6-inch slit into your shirt, positioning the slit 3-4 inches from the side seam. You want that slit to hit right where your hip bones are. Repeat on the other side.
If your shirt is really thin, iron some strips of fusible knit interfacing to reinforce the area around the slit. This helps ensure the shirt will withstand the stress of the fabric pulling around the slit. You don’t need to do this if your shirt is made out of a thicker fabric.
On the wrong side of the shirt, fold ¼ inch in on both sides of the slit, tapering in at the top of the slit. Press and repeat with other slit.
Position a 6-inch zipper in the slit and pin, folding the edges of the zipper tape under at the hem. Sew the zipper into the shirt using a pick stitch, making sure you keep your stitches small so they don’t show on the right side of the shirt. (If you don’t know how to do a pick stitch, check out the video tutorial embedded below - I demonstrate how to sew a pick stitch.) Repeat with the other zipper.

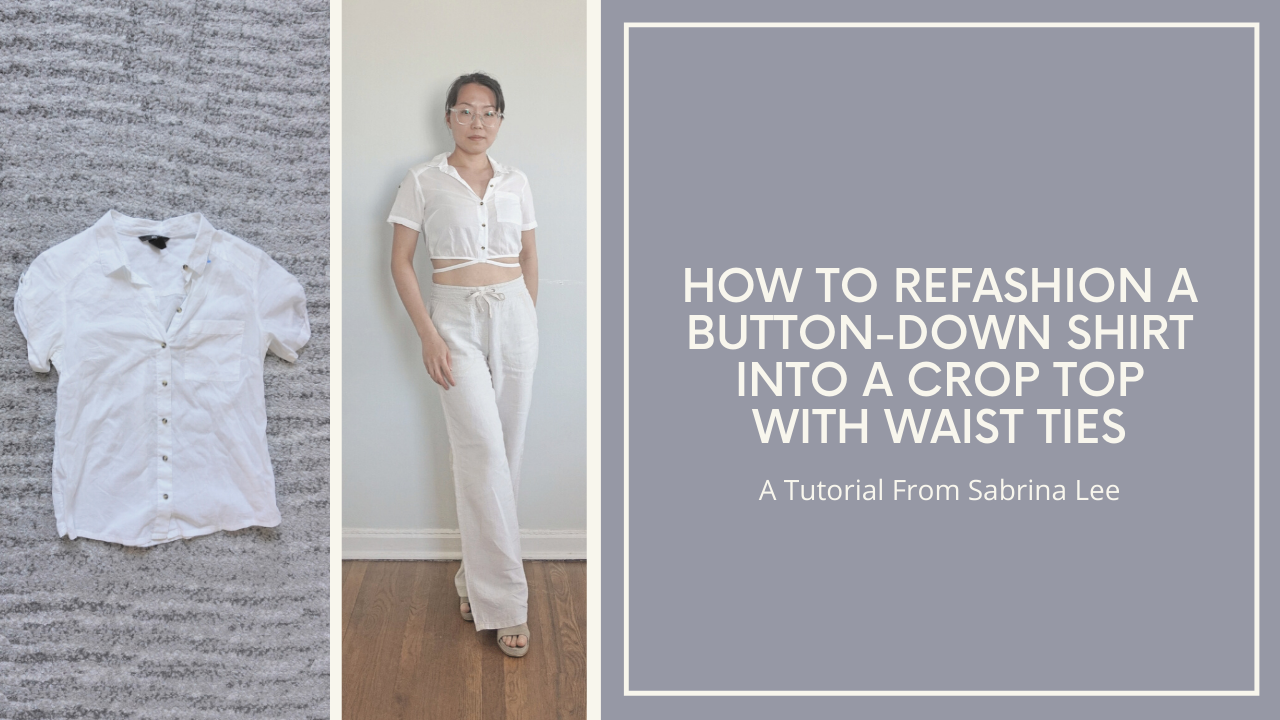
4. Make it a Crop Top with Waist Ties
Best For: Button-Down Shirts
Materials:
None!
You can transform a boring button-down shirt into a crop top with sexy waist ties, just in time for summer.
Start by cutting the shirt so that it hits a few inches above the belly button. Cut one side of the front of the shirt first, then use the cut line as a guide to cut the back. Fold over the cut side and use that as a template to cut the other side of the shirt. This helps ensure that your shirt is symmetrical.
From the cut off shirt fabric, cut two strips that are two inches wide. These strips will become the bottom band of your new cropped shirt and the waist tie, respectively.
Using the longest stitch length on your sewing machine, sew a line of stitching about 1/4 inch from the cut edge of your shirt. Try on the shirt and use those threads to gather the hem of the shirt so it fits close to the body. Adjust the gathers so they are evenly distributed around the hem of the shirt.
Once you are done gathering the hem, take one of the two-inch wide strips, fold it in half and press. Pin the folded strip to the gathered edge and stitch with 1/4 inch seam allowance. Press the seam allowance down and trim down to 1/8 inch. Fold the strip in half and pin so that the strip just barely covers the seam. Flip the shirt over and stitch in the ditch to secure. You should now have a nice neat band on the bottom of your cropped shirt.
The last step is to make the waist tie. Take your remaining two-inch wide strip, fold it in half and stitch down the long edge. Turn the tube inside-out using this handy loop turner. Give the waist tie a nice press, then handstitch to the center front of the shirt.
5. Make It Backless
Best For: Long-Sleeved Turtleneck Knit Shirts
Materials:
Clear elastic (I use Dritz 3/8 inch lightweight clear elastic)
If you have a long-sleeved knit top that needs to be refreshed, transform it into a sexy, on-trend backless top for spring. Personally, I think this refashion works best when you have a knit top with a turtleneck or mock neck, because the full coverage in the neckline area contrasts nicely with the exposed skin in the back.
Start by measuring 5 inches down from the neckline of the back of your top. Mark that point using some tailor’s chalk or a pin. Next, measure 2 ½ inches in from the side seam, and mark that point. Repeat on the other side. Cut an upside-down “U” shape from the back of the top, connecting the points that you just marked. Cut out half of the U shape first, then flip the cut piece over and use that as a template to cut the other side. This helps ensure that the shape you cut out is symmetrical.
Finish the edge of the back cutout using clear elastic. Zigzag stitch the clear elastic to the edge, then flip the elastic to the inside and topstitch down. (If you want to see how to do this step-by-step, check out my video tutorial here.)
Next, from the U-shaped piece you cut out of the back, cut a 2-inch wide strip. Fold the strip in half, then stitch with 1/4 seam allowance using a lightning stitch. Turn the tube inside out and press. (Quick tip: press the strap so that the seam allowance is in the middle of the strap rather than at one of the long edges. This will result in a flatter finished strap.) Attach the finished strap to your top. Position the strap about 7 1/2 inches from the hem of the shirt, so it falls in the middle of the back, just beneath your shoulder blades. Pin the strap in place, making sure that the strap has some tension so it pulls taunt when worn. (You don’t want the strap to be loose and droop down the back.) Hand stitch the strap to the top, then trim off the excess length in the strap.

6. Make It Into a Napkin Top
Best For: Linen or Silk Shirts
Materials:
Free downloadable napkin top pattern (available here)
4 yards of satin cording for straps (optional)
If you have a linen or silk shirt that no longer fits, you can give your shirt a new lease on life by converting it into a sexy, skin-baring cowl-neck top. This refashion works best on shirts that are made out of cotton gauze, linen, silk crepe or silk charmeuse/satin.
Cutting and construction. Start by cutting the sleeves and collar off your shirt. Next, cut down the shoulder seams, and if your shirt has a back yoke, cut that off too. The goal is to get to a flat piece of fabric. Do not cut down the side seams of the shirt – we want to keep those intact so we have the largest possible piece of fabric to work with. After you’re done cutting your shirt, give the entire shirt a good press, making sure to iron out any pleats that might have been in the original shirt.
Once your shirt is pressed flat, take the pattern piece and position it so that the marked grainline is on the grainline of the shirt. To make sure that the pattern piece is properly aligned, measure the same distance up on both side seams and aligned that with the marked grainline on the pattern piece. The pattern piece will look like it is on the diagonal, and that is intentional because this will mean that the fabric is cut on the bias (i.e., on the diagonal grain). It is the bias cut that gives the cowl neck its lovely drape.
Once the pattern is properly placed, pin around the edge of the pattern and cut the piece out. Snip a notch at the place where the facing folds over.
Next, finish the top edge of the facing using your desired edge finishing technique (one possibility is folding the edges of the fabric over twice, then top-stitching it down). Once the top edge of the facing is finished, fold the facing over at the notch, matching right side to right side. Pin. Stitch the side seams with ¼ inch seam allowance. Clip the corners to reduce bulk, then turn the facing right side out and give it a good press. Finish the remaining edges in the top.
Add the straps to the top. You can use ready-made satin cording for the straps in a matching or contrasting color. Alternatively, you can make spaghetti straps out of the remaining fabric in your shirt. To make these straps, cut six 1-inch wide strips from your remaining shirt fabric. Aim for a length of around 22 inches per strip. This will give you enough length so you can tie the straps on the top.
Fold the strip over and stitch down the long edge of the strap using about ¼ inch seam allowance. Also stitch closed one of the short ends of the strap. Trim the seam allowance down to 1/8 inch, then turn the strap inside-out. (I use this nifty loop turner to help me turn these long, narrow tubes, which can be tricky to handle.)
Once the tube is turned right-side out, press the strap flat and handstitch to the corner of the napkin top. Repeat with the remaining straps.

7. Make A T-Shirt Dress
Best For: Two or More T-Shirts
Materials:
2 1/2 yds twill tape (1/4 inch wide)
Clear elastic (I use Dritz 3/8 inch lightweight clear elastic)
If you have two or more t-shirts in complementary colors, you can combine them to make a graphic t-shirt dress. I used a free grey t-shirt that I got once at a Mets game, turned inside-out so I had plain fabric to work with. I paired that with another plain white Hanes t-shirt in my closet.
I used McCall’s 7688, View E. The front pattern piece has a line marked for the ruching detail; I simply extended the line to split the front pattern piece into two separate pieces. I added 5/8 inch seam allowance, then cut one part of the front pattern piece out of my white t-shirt and the other part out of the grey t-shirt. I tried to cut the pieces to take advantage of the existing neckline and hems on the shirts, to save me the trouble of having to hem the fabric later on. Note that this dress is designed with a drop shoulder, but I didn’t want that because I wanted to make a regular sleeveless dress with a normal armhole. I therefore cut the armhole a bit short of what is indicated on the pattern piece.
I cut the pattern back piece as shown on the pattern, with no alterations.
To construct the dress, I first sewed the two parts of the front pattern piece together, then stitched down the seam allowance to make two ‘channels’ for the twill tape which forms the ruching. I then threaded the twill tape into the channels, stitched down one end of the tape, then ruched the fabric and tied a bow at the skirt hem.
Once the front was constructed, I sewed the front to the back piece at the side seam and armhole, then finished the armholes with clear elastic.