After three straight curtain re-fashion projects (see them here, here and here), I decided to step away from the home décor fabrics and try refashioning a very different kind of material: thrifted sweaters.
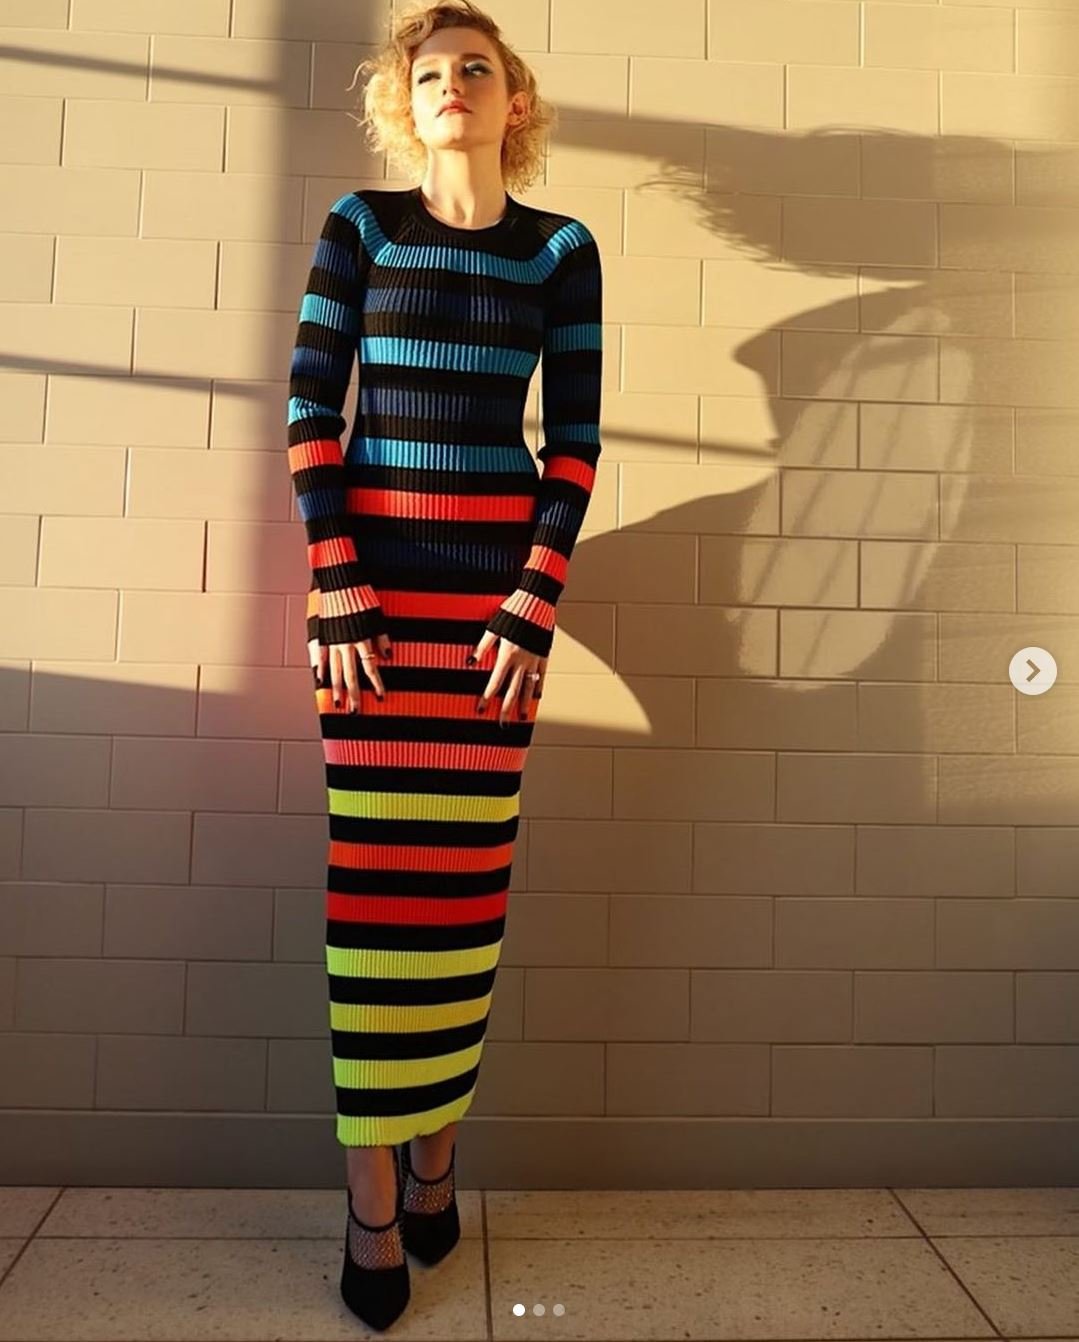
The inspo for this project was this gloriously happy striped knit dress from the designer of the moment, Christopher John Rogers. Here it is on the enigmatic Julia Garner (who, by the way, won my vote for most intriguing accent of the year for her performance in Inventing Anna):
At first, I thought I could recreate this dress by buying some striped fabric or striped sweaters in a few different colorways, then piecing them together to achieve the gradations in color. But try as I might, I just couldn’t find any fabric or sweaters with stripes that were wide enough. It seems that most clothing and fabric manufacturers don’t make anything with stripes that are wider than about half an inch, perhaps because of the much-touted (though bs, in my opinion) view that horizontal stripes can make a person look fat.
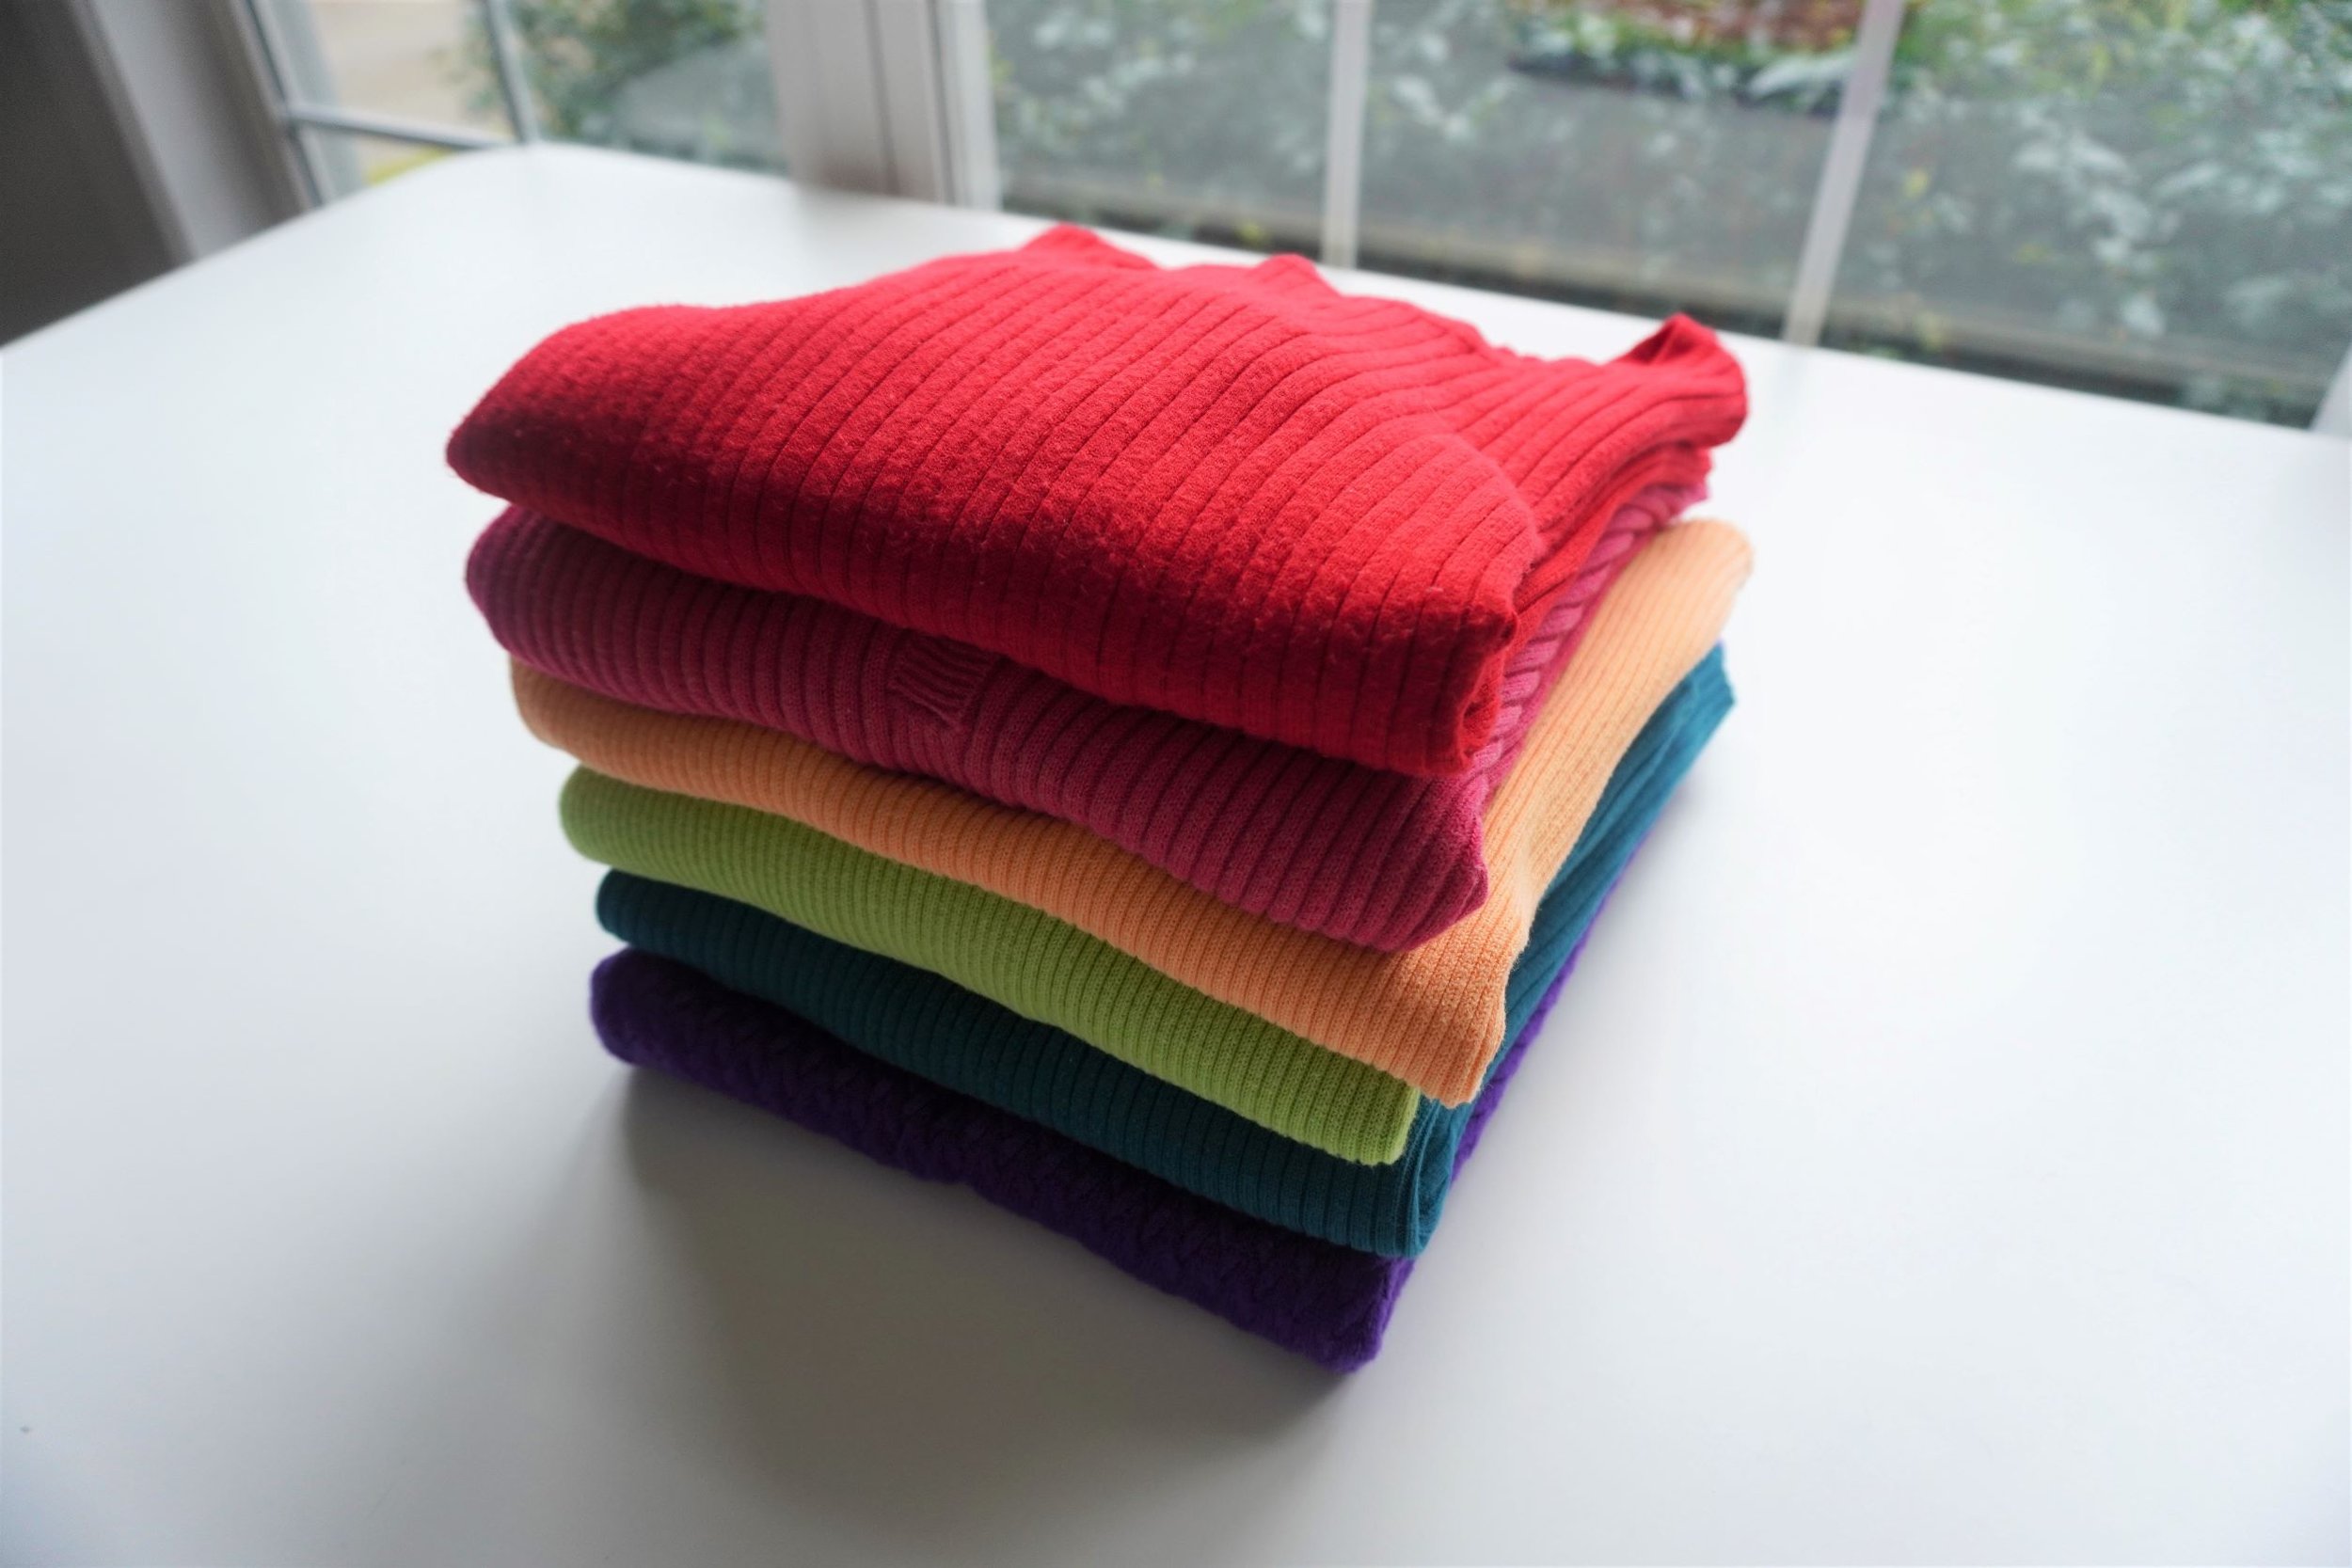
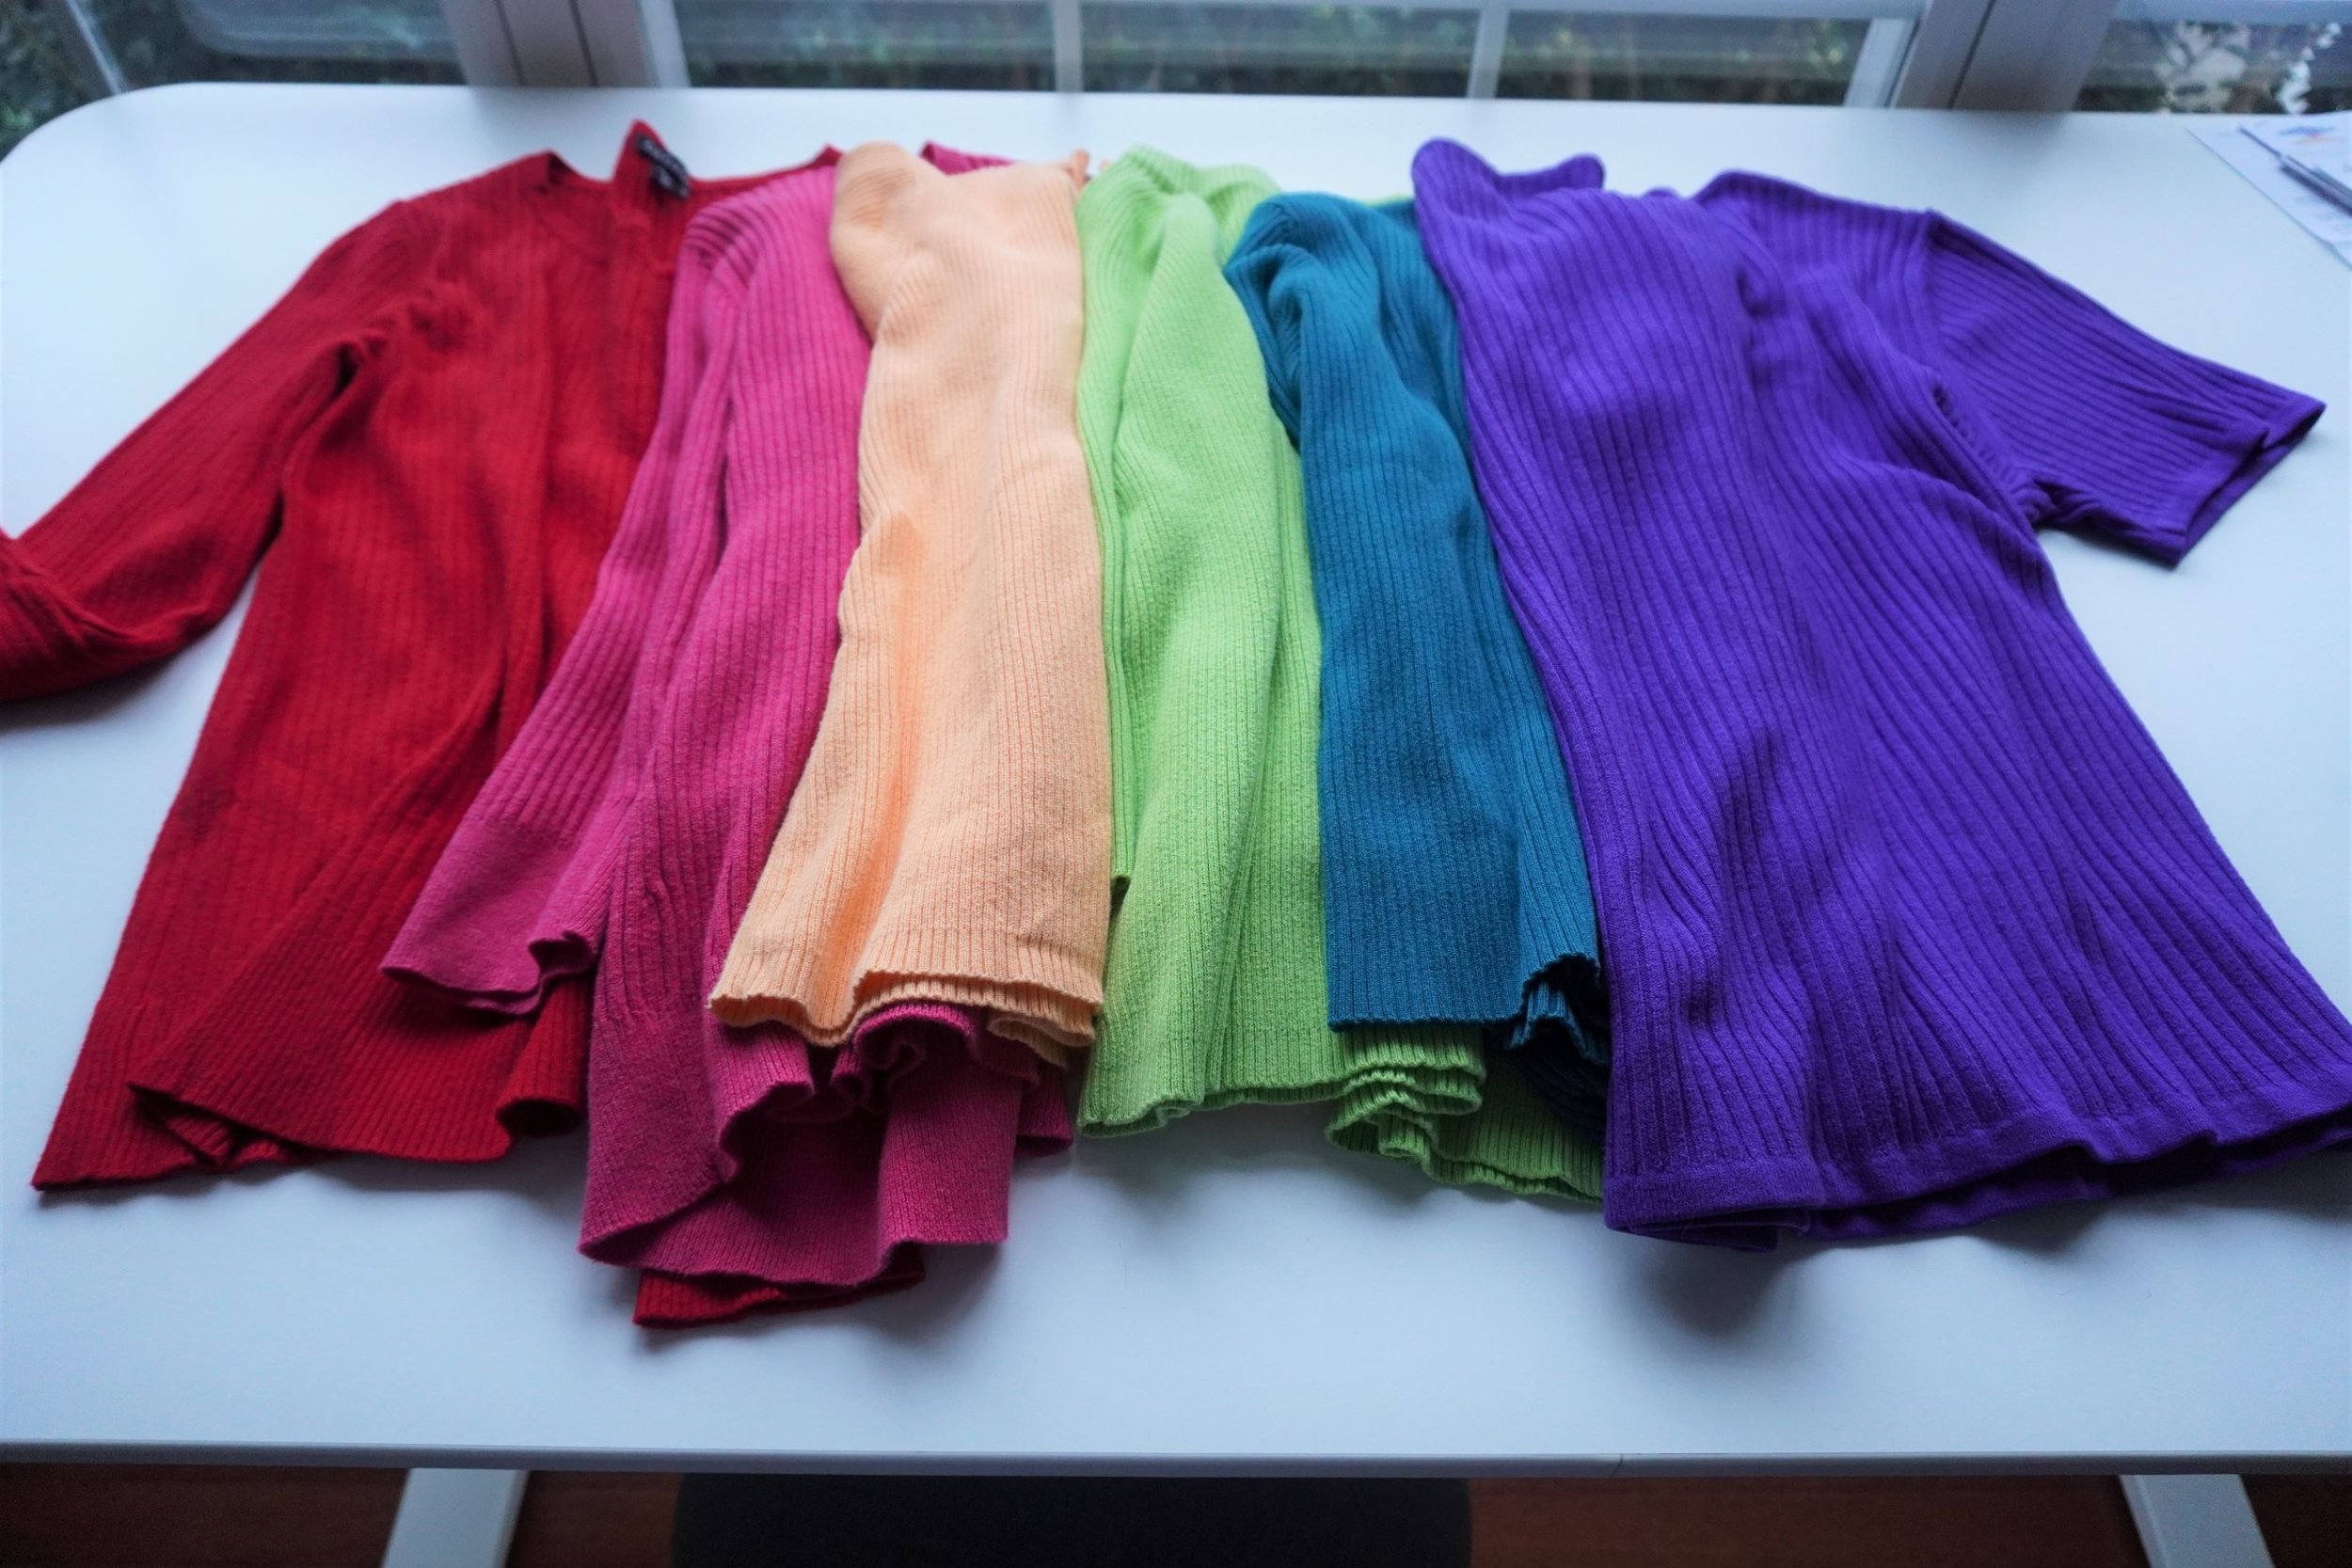
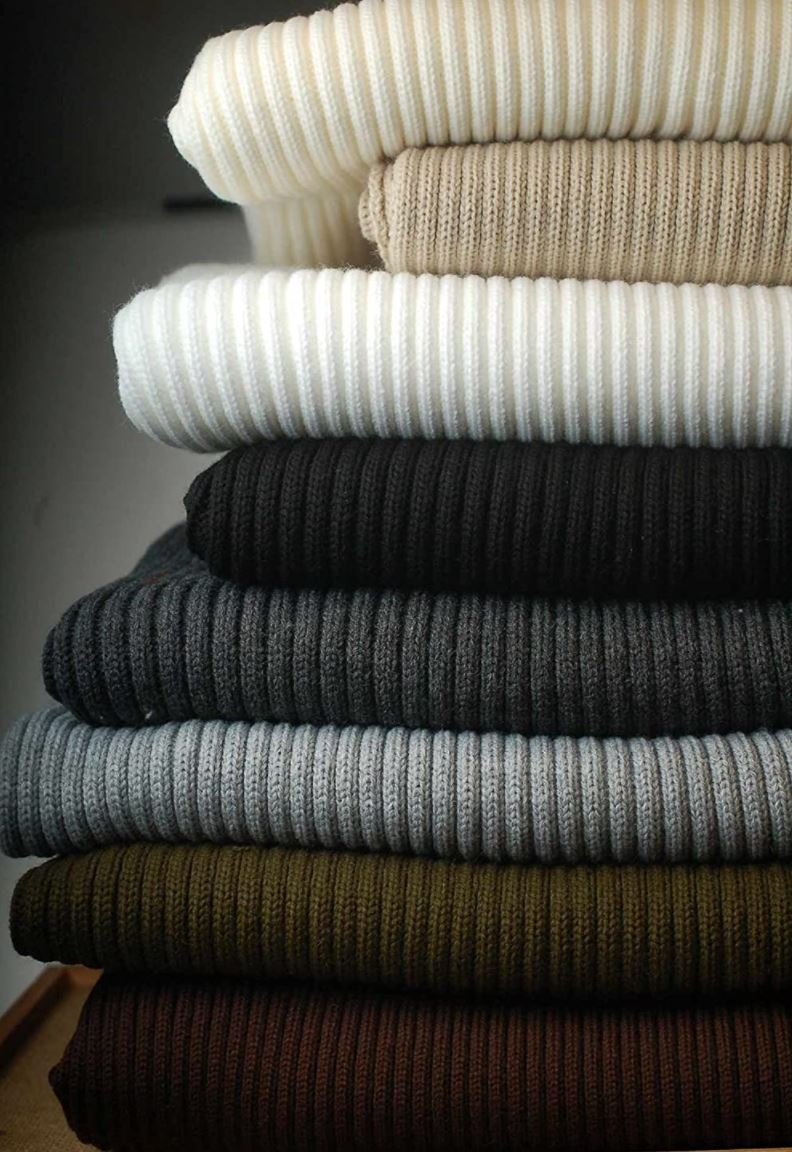
Eventually, I resigned myself to the fact that I would have to make the striped fabric myself, and I started looking for ribbed knit sweaters at local thrift stores. As luck would have it, my local Goodwill had sweaters in several different colors, but all with similar weights, fiber content (all artificial, natch) and ribbing. I quickly snatched them up and took them to the register, where the man at the counter remarked that I was buying a “rainbow”:
The plan was to cut the sweaters into strips, add some strips of black knit fabric, and then sew all the strips together to make my own striped knit fabric. I then went on a long hunt for black ribbed fabric that had similar weight and ribbing width, and eventually I landed on this fabric from a supplier in the UK. I bought 1 meter, just to be safe, but I really only needed ½ meter.
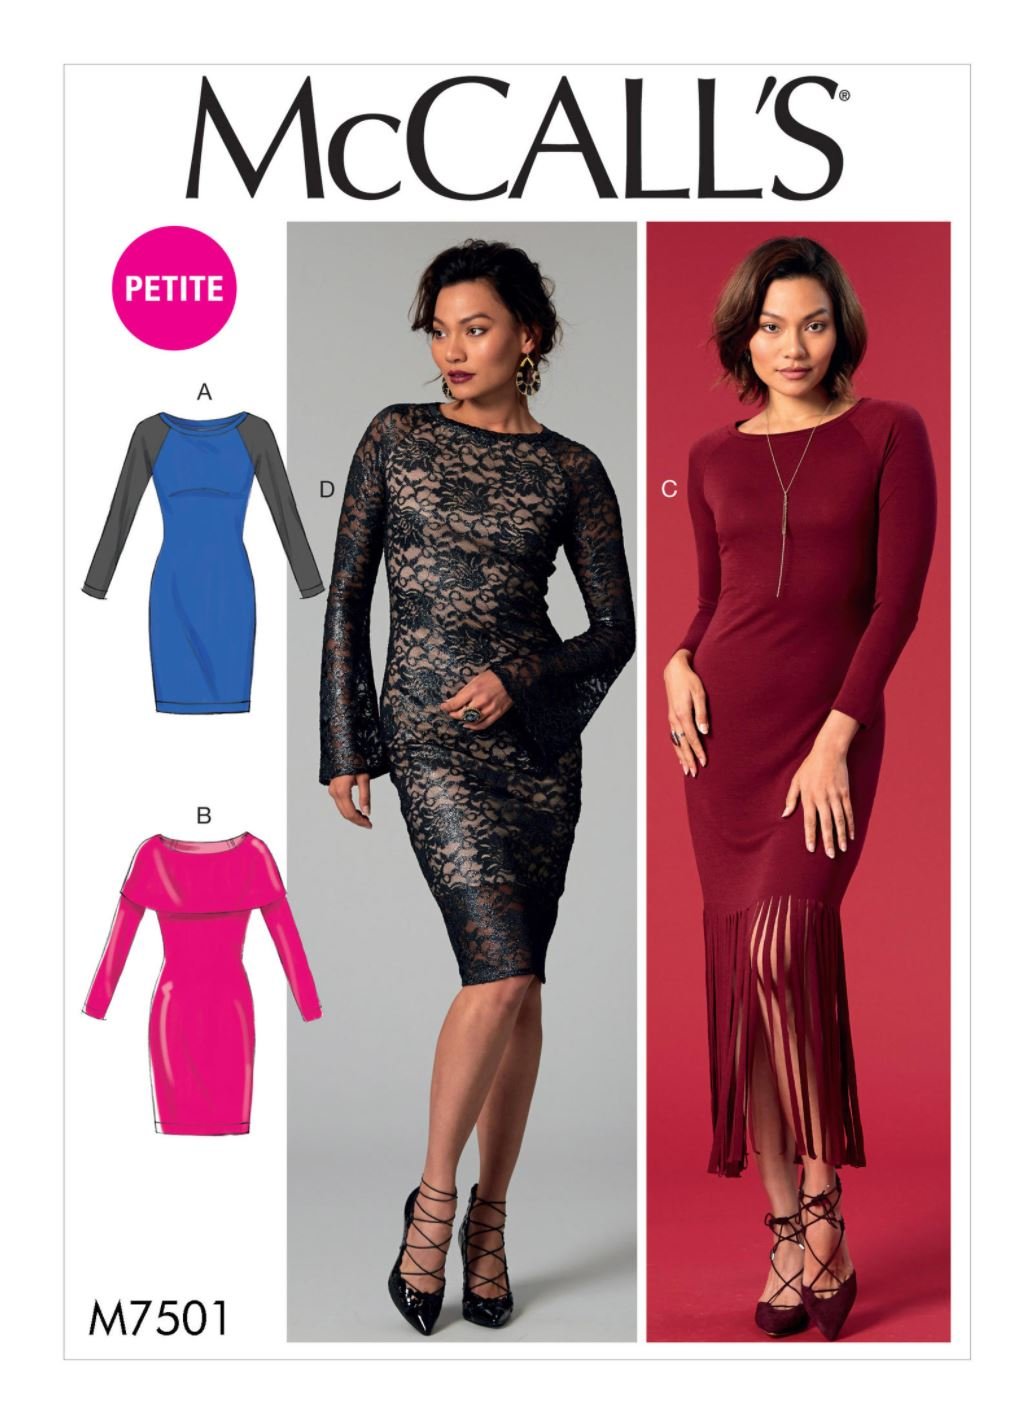
As for the pattern, I wanted a plain, simple, basic body-con knit dress pattern, with as few seams as possible so there was nothing to break up the stripes. I originally considered using McCall’s 7999, which had some good reviews on patternreview.com, but I was on the fence because that pattern has ordinary set-in sleeves, rather than a raglan sleeve, which I prefer because it allows for stripe matching along the sleeve seam. Eventually I found McCall’s 7501, which fit the bill perfectly – it was a fitted, maxi-length knit dress with raglan sleeves and minimal seaming. McCall’s 7501, unfortunately, is out of print, but you can still find several sellers offering it on eBay and Etsy.

The last design choice I had to make was deciding where to place all of the different colors. To test this out, I sketched the knit dress and used Photoshop to fill in the different colors from my sweater. I repeated this process with a few different color combinations, then asked my tiny handful of Instagram followers to vote on their favorite combo:

The first option turned out to be the clear winner, so that’s what I went with.
Making the striped fabric
With sweaters and fabric in hand, I washed and dried all of the sweaters, took a deep breath, then took the plunge and started cutting them up. First, I cut 2½ inch strips from all of the colorful sweaters:

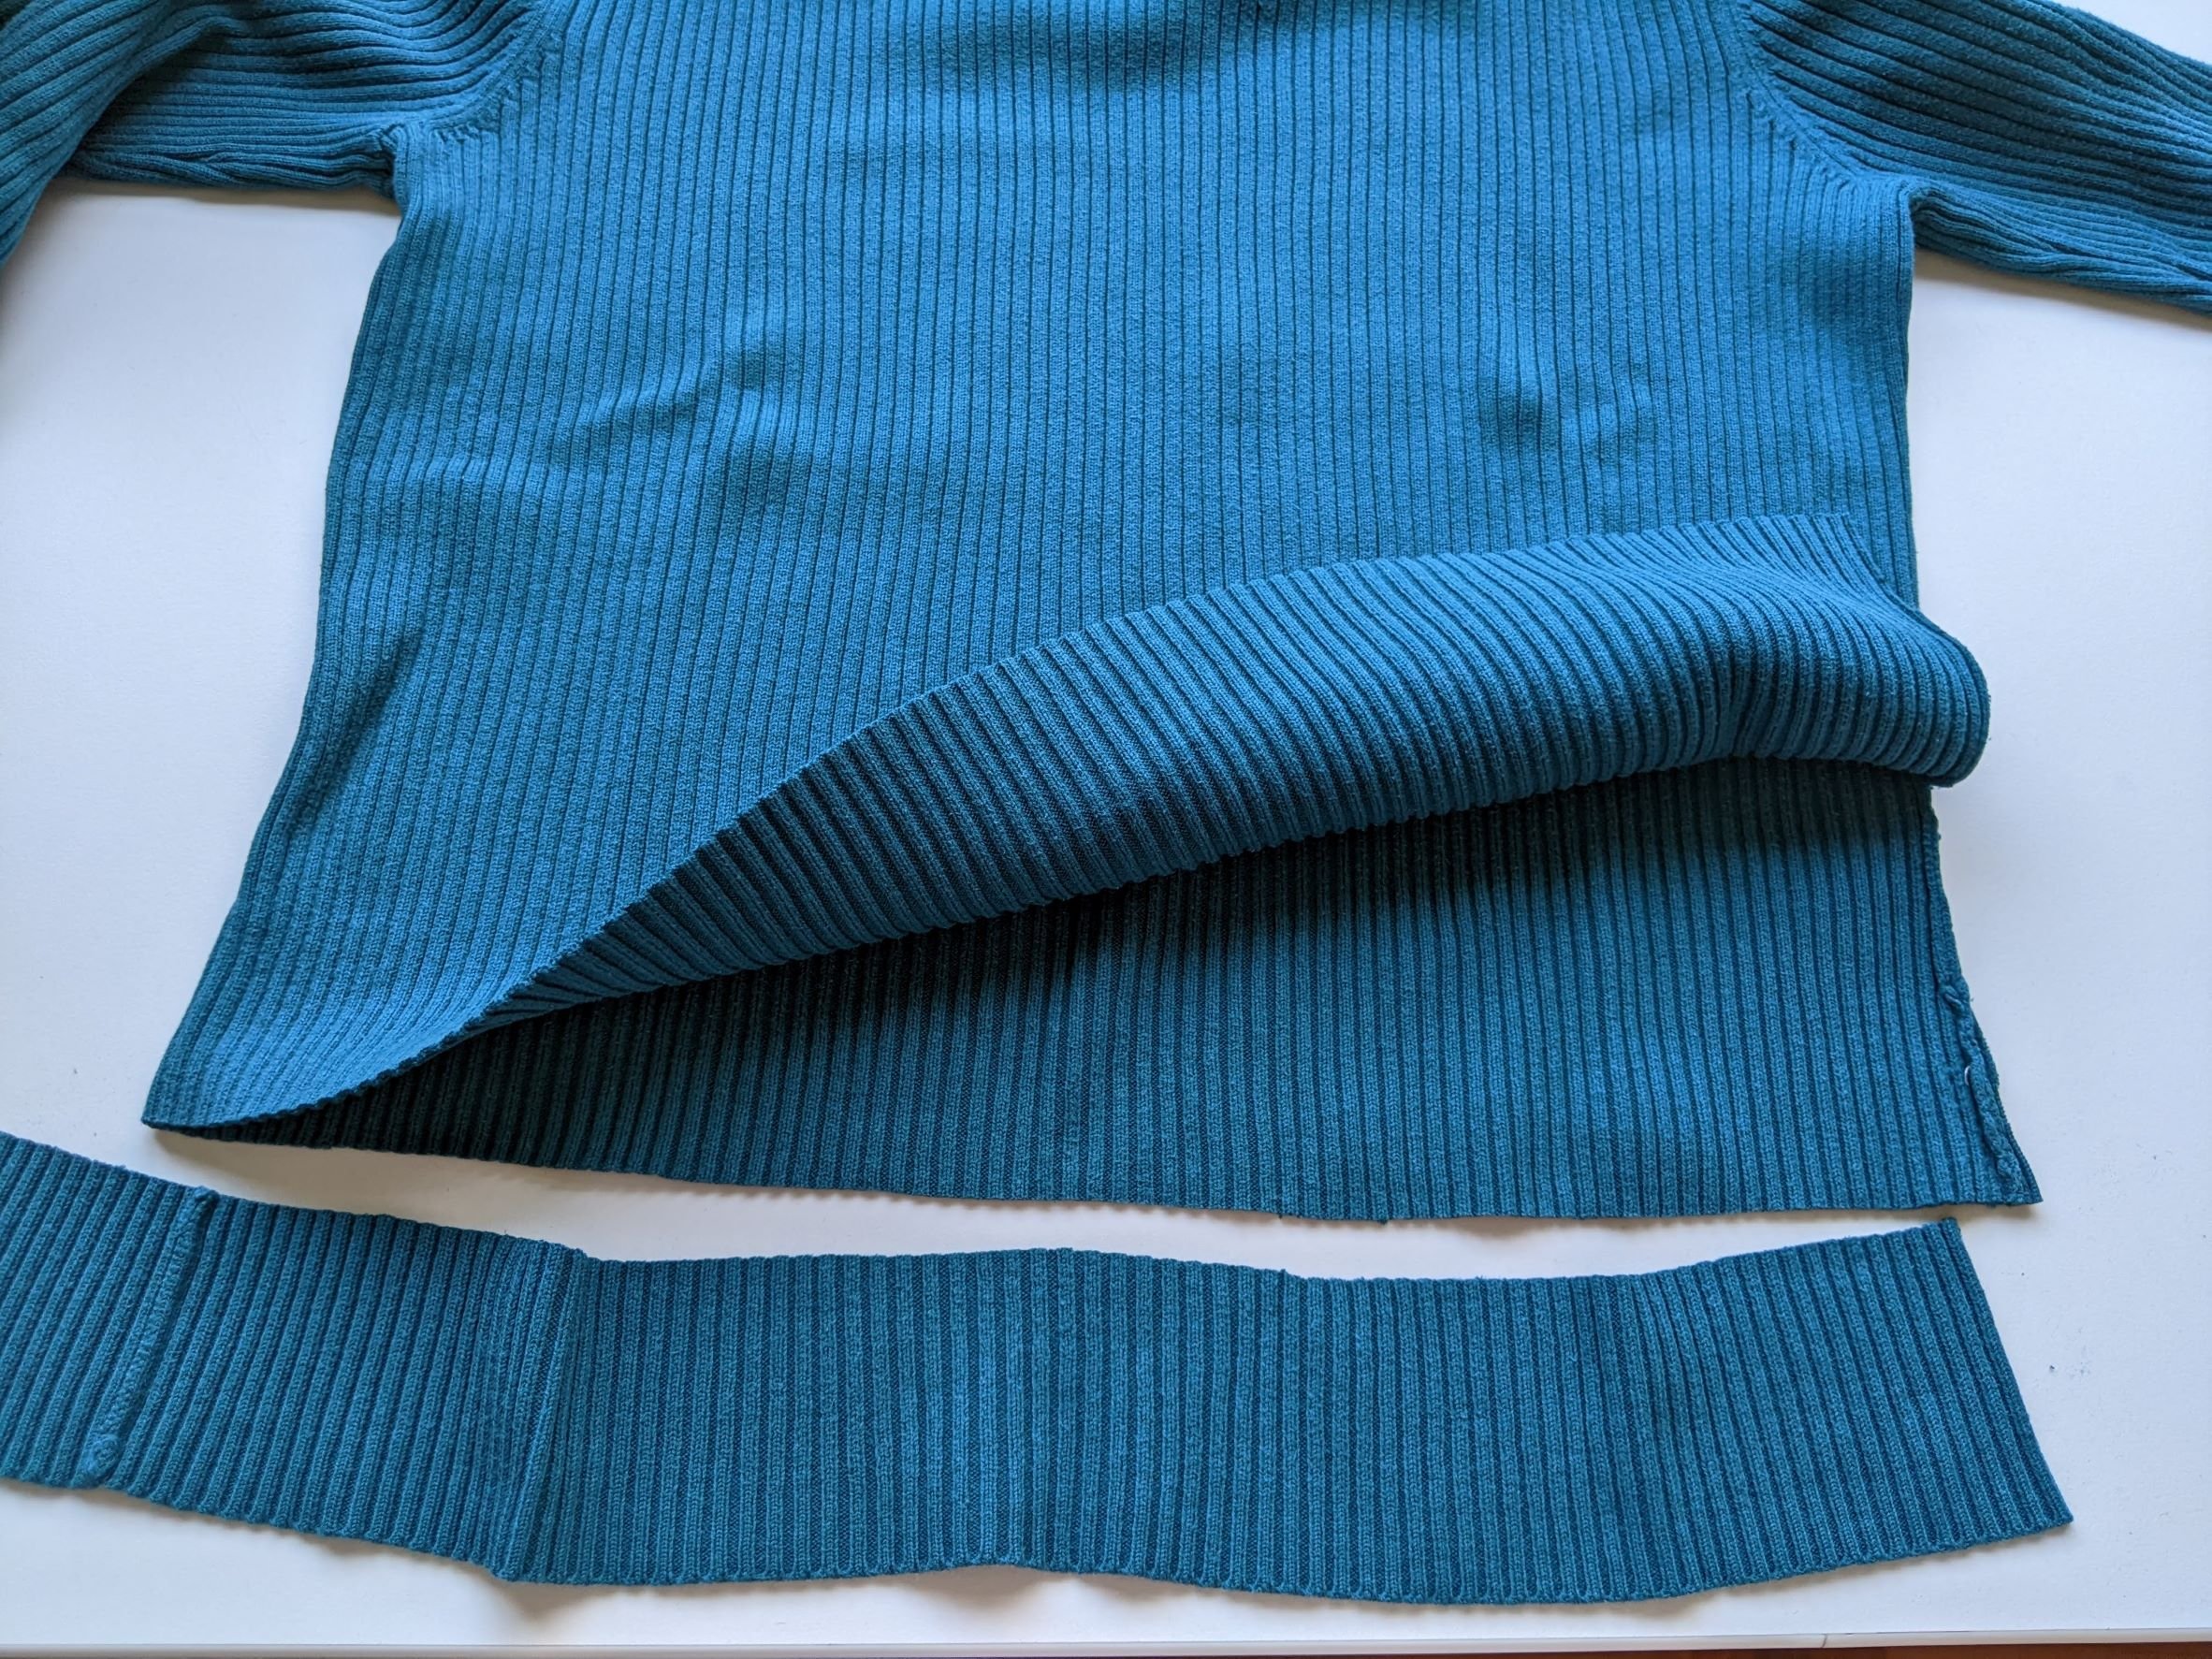
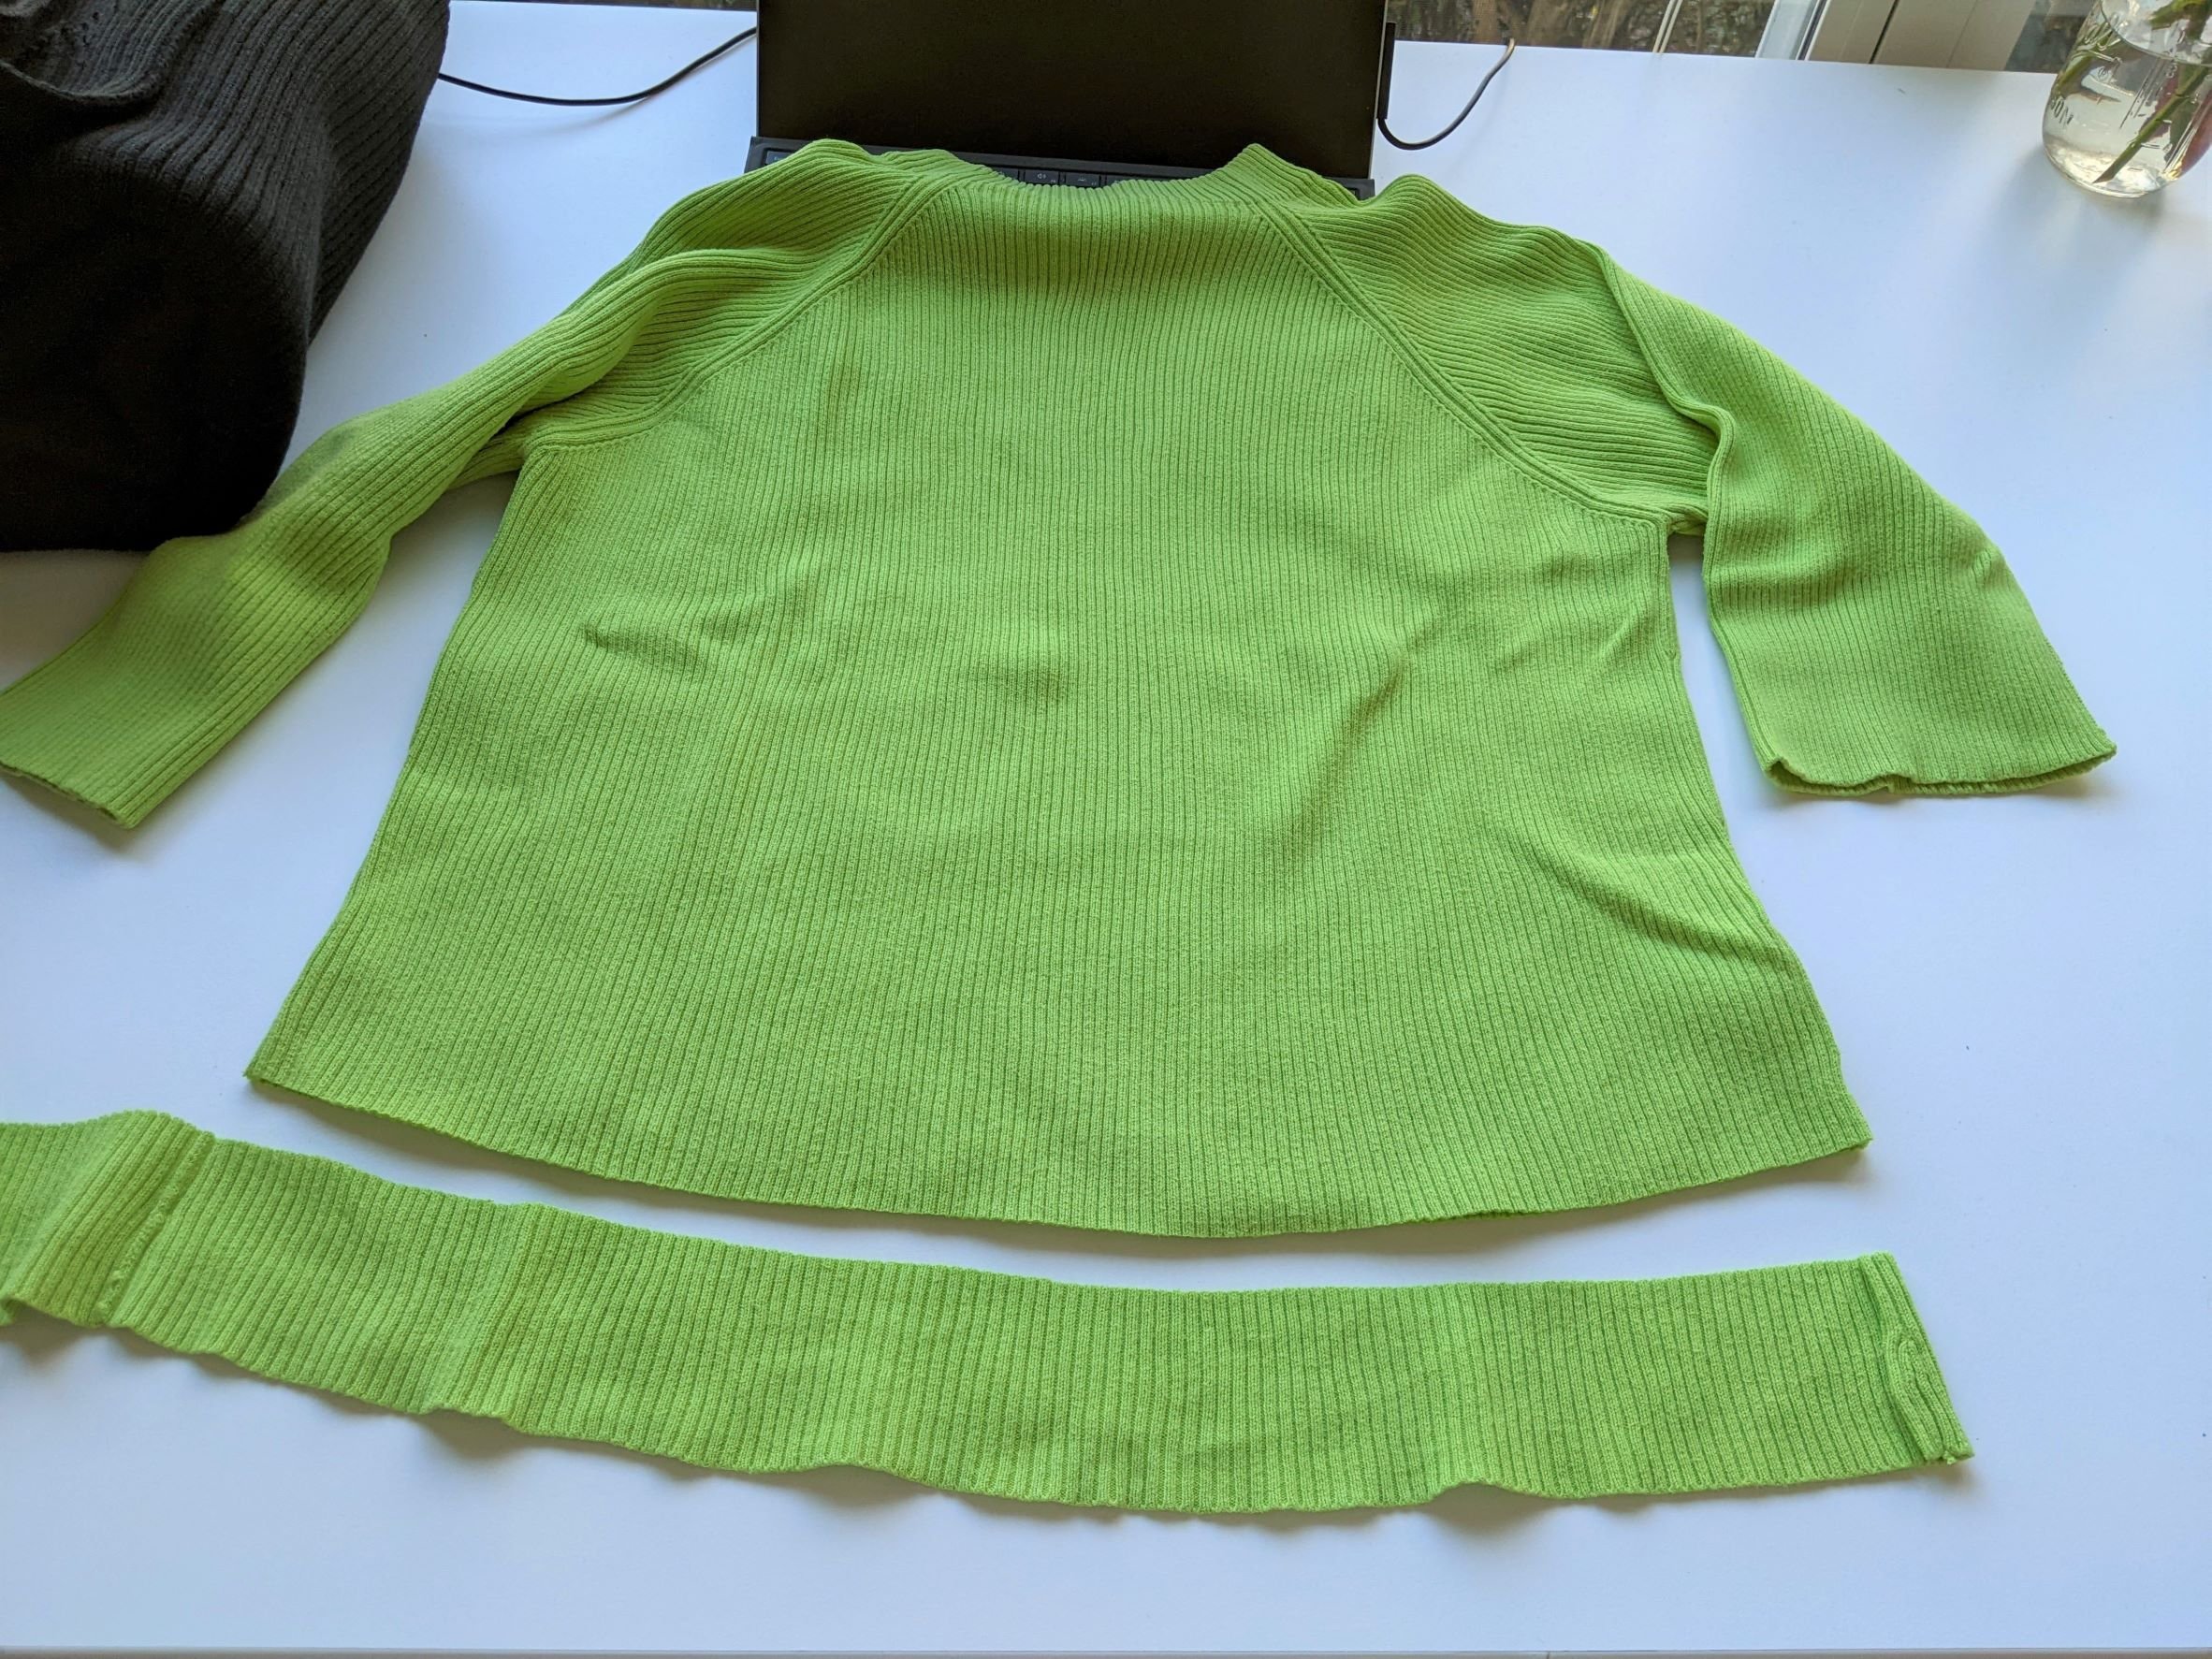
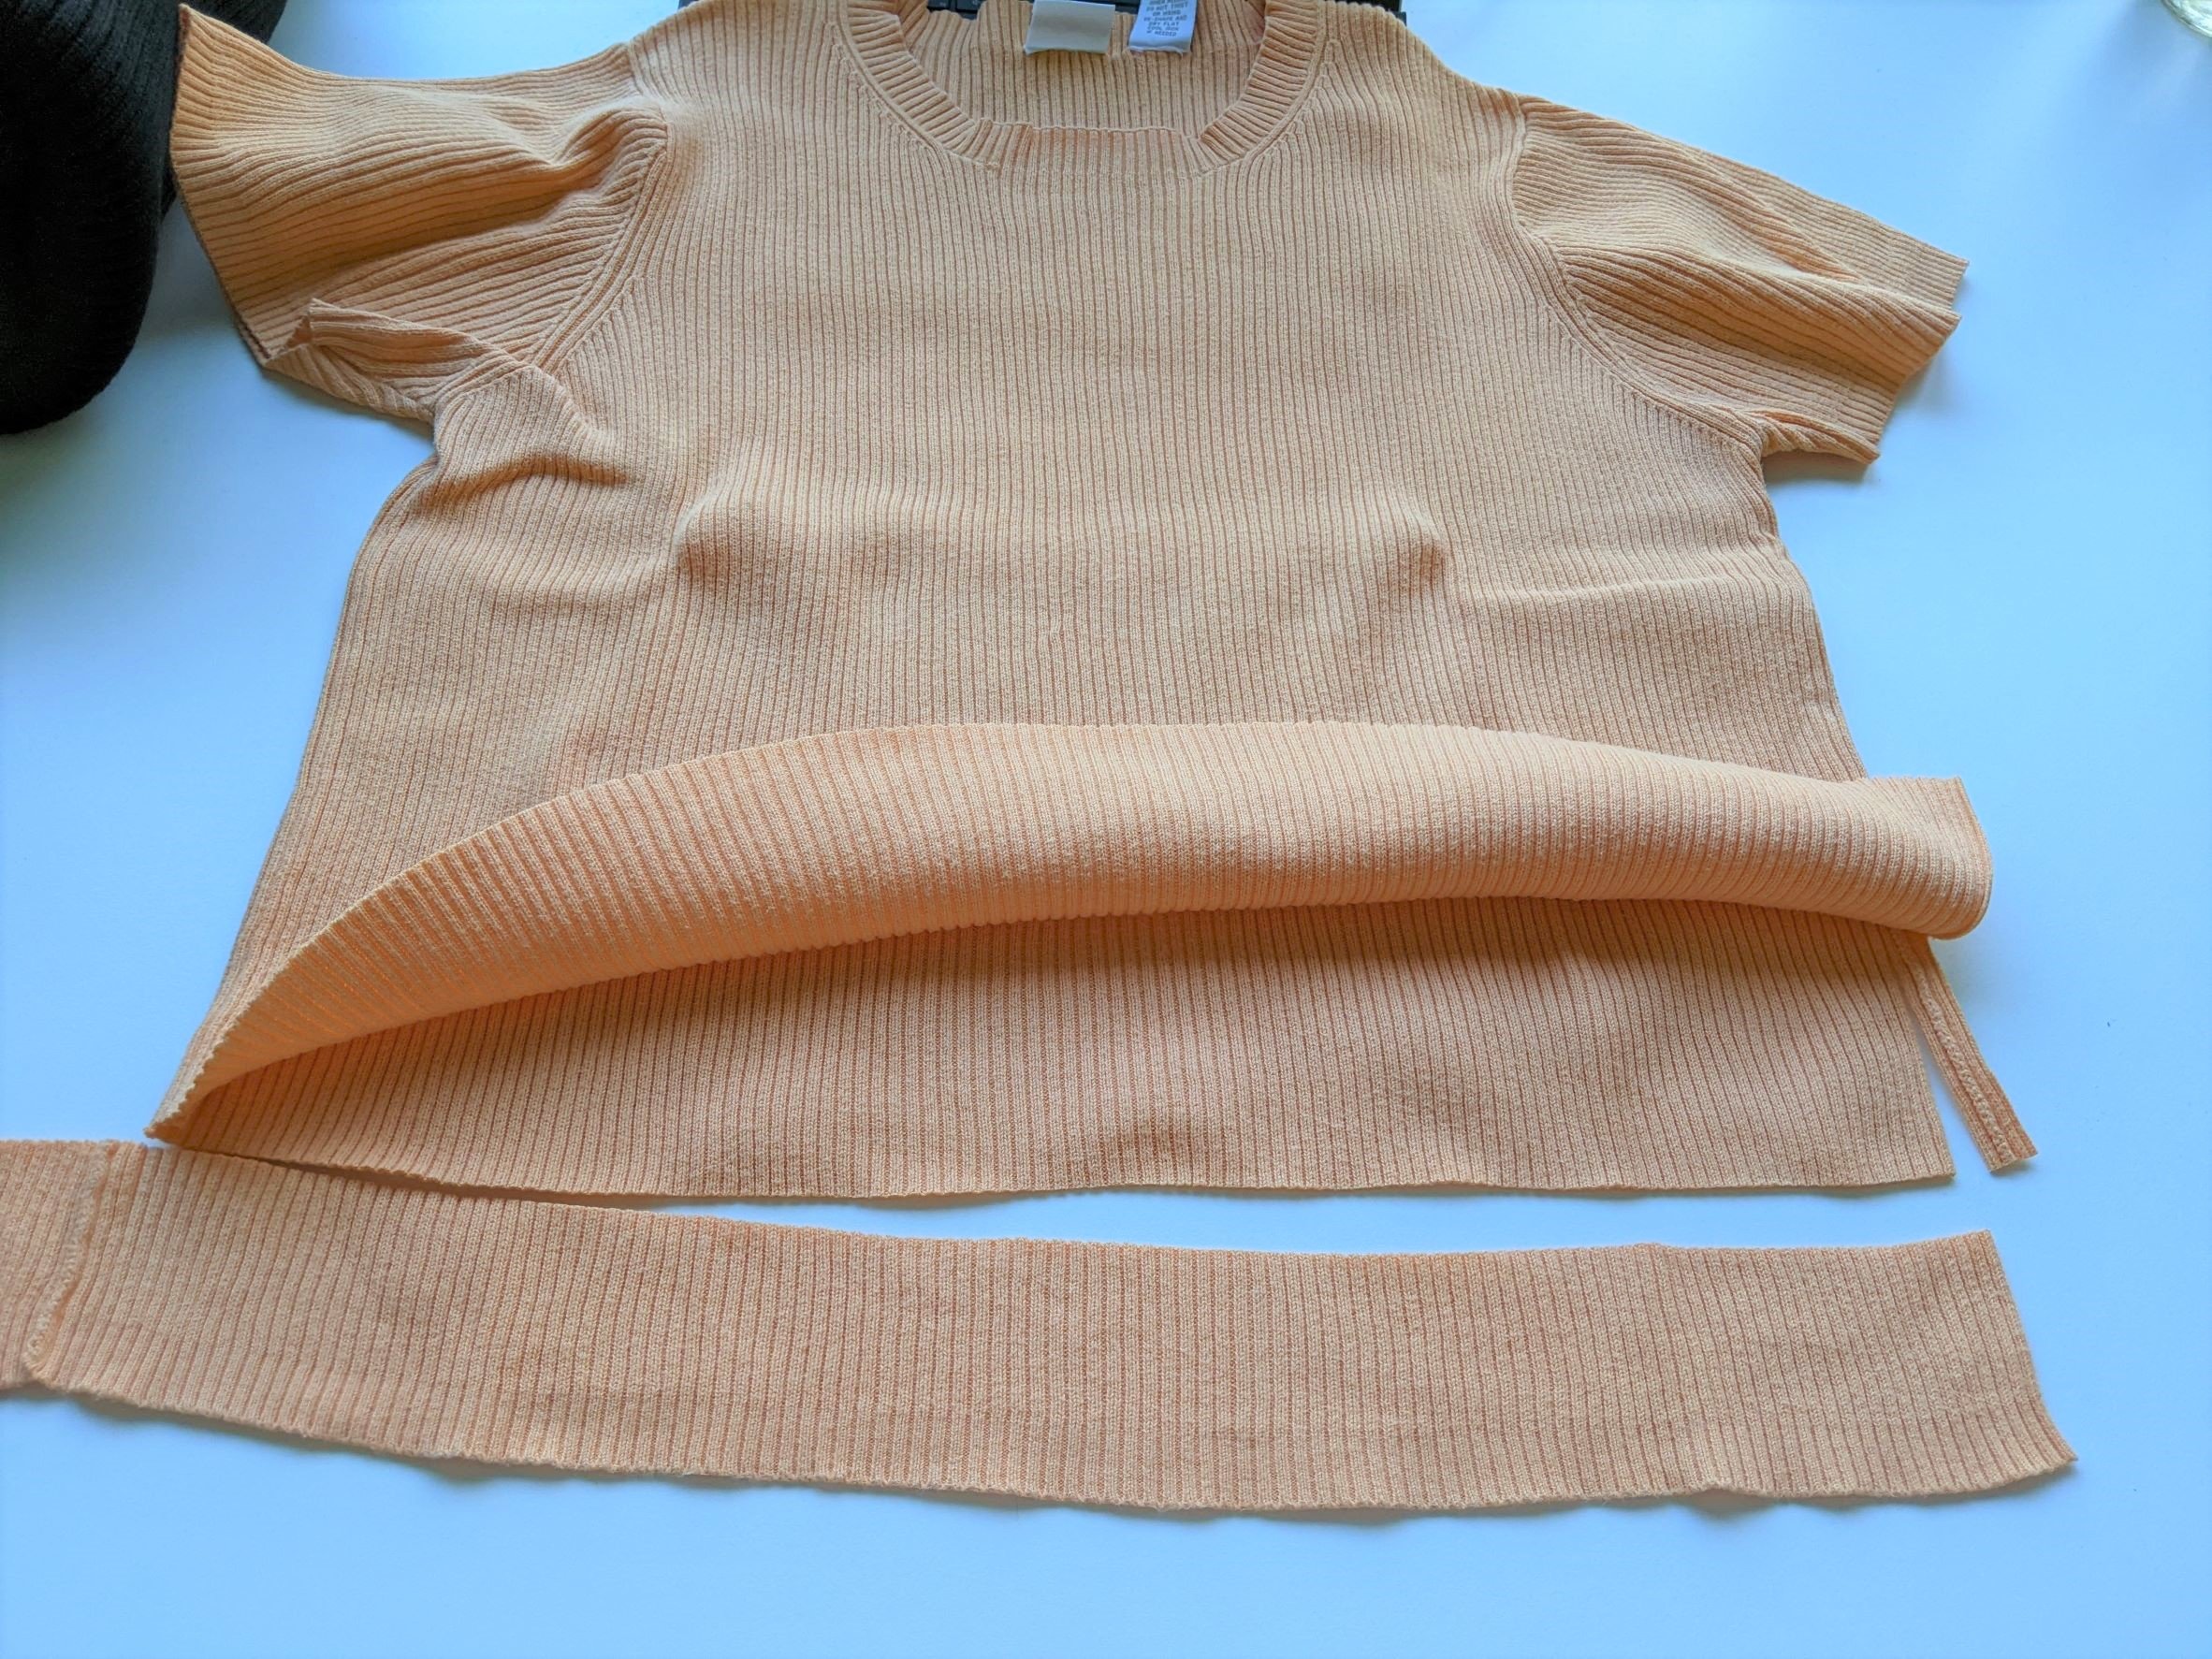
Now some of my sweaters were actually cardigans with buttons down the front, and one of the sweaters had a cabled texture on the front, so I had to cut around those features so that the final strips only had the ribbing. I was a little worried that there wouldn’t be enough to squeeze out all of the stripes that I needed, but it wasn’t a problem in the end – my six sweaters, even with all of the things I had to cut around, yielded more than enough stripes for this striped maxidress.

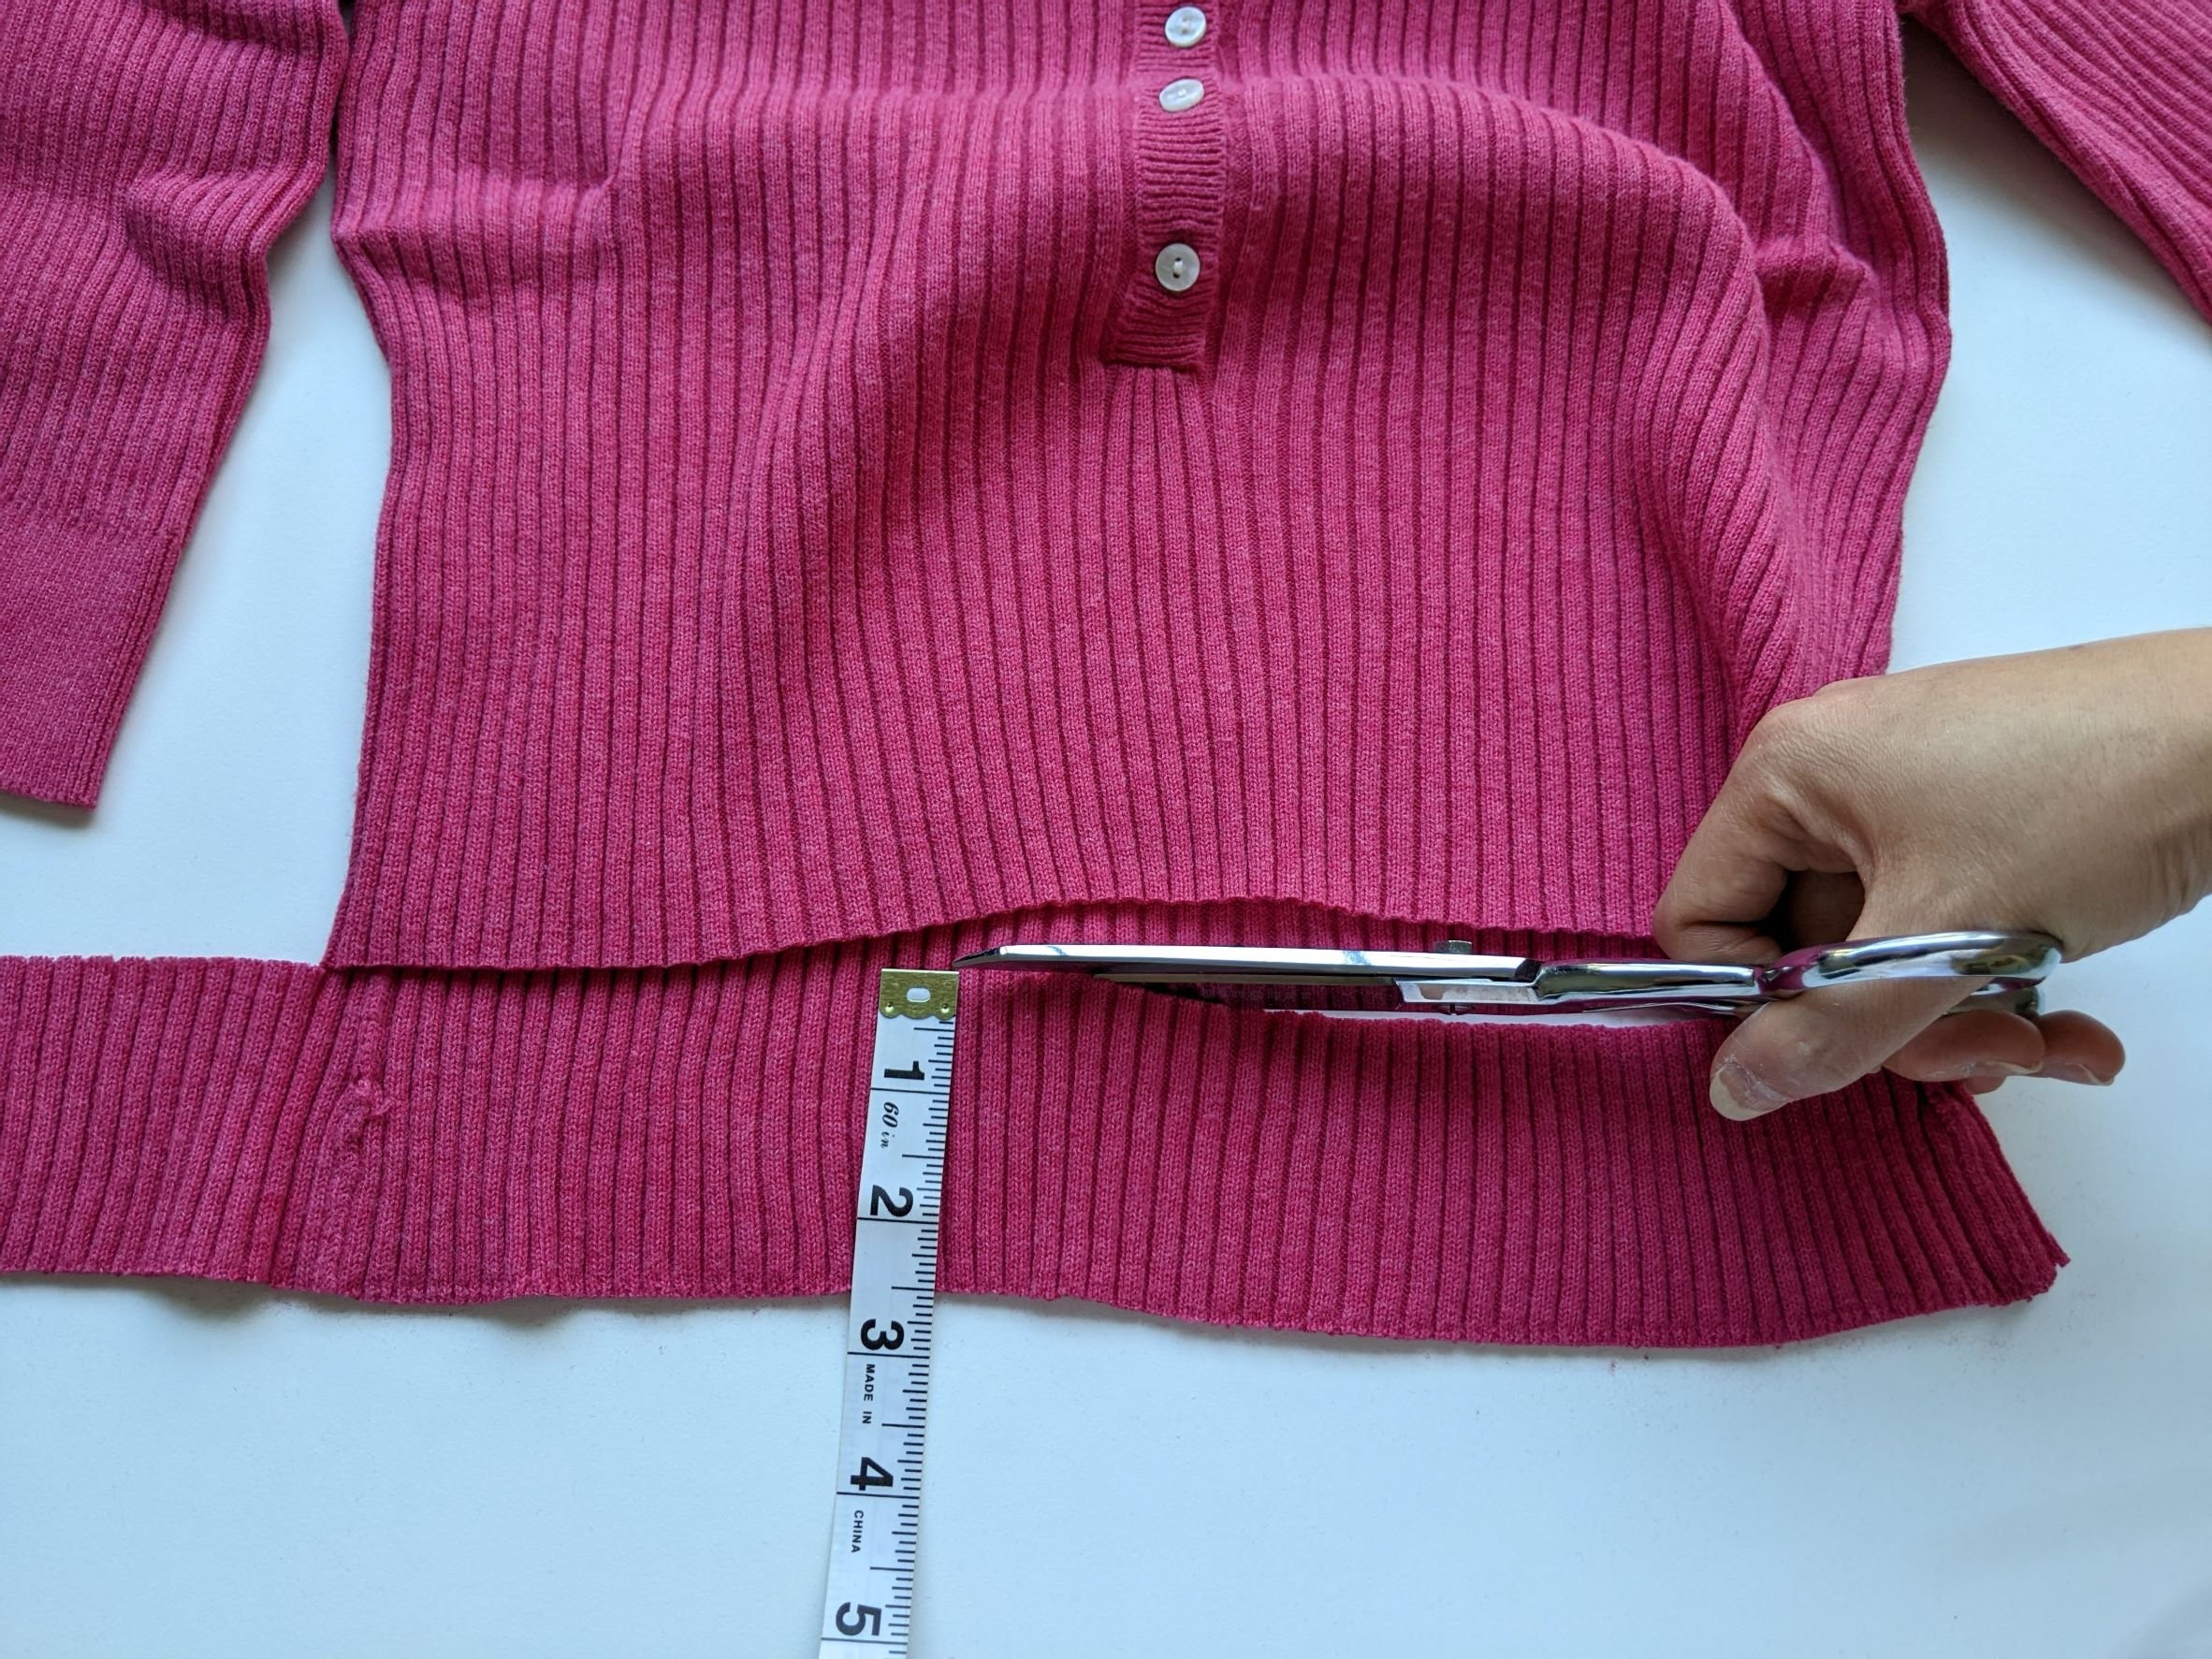
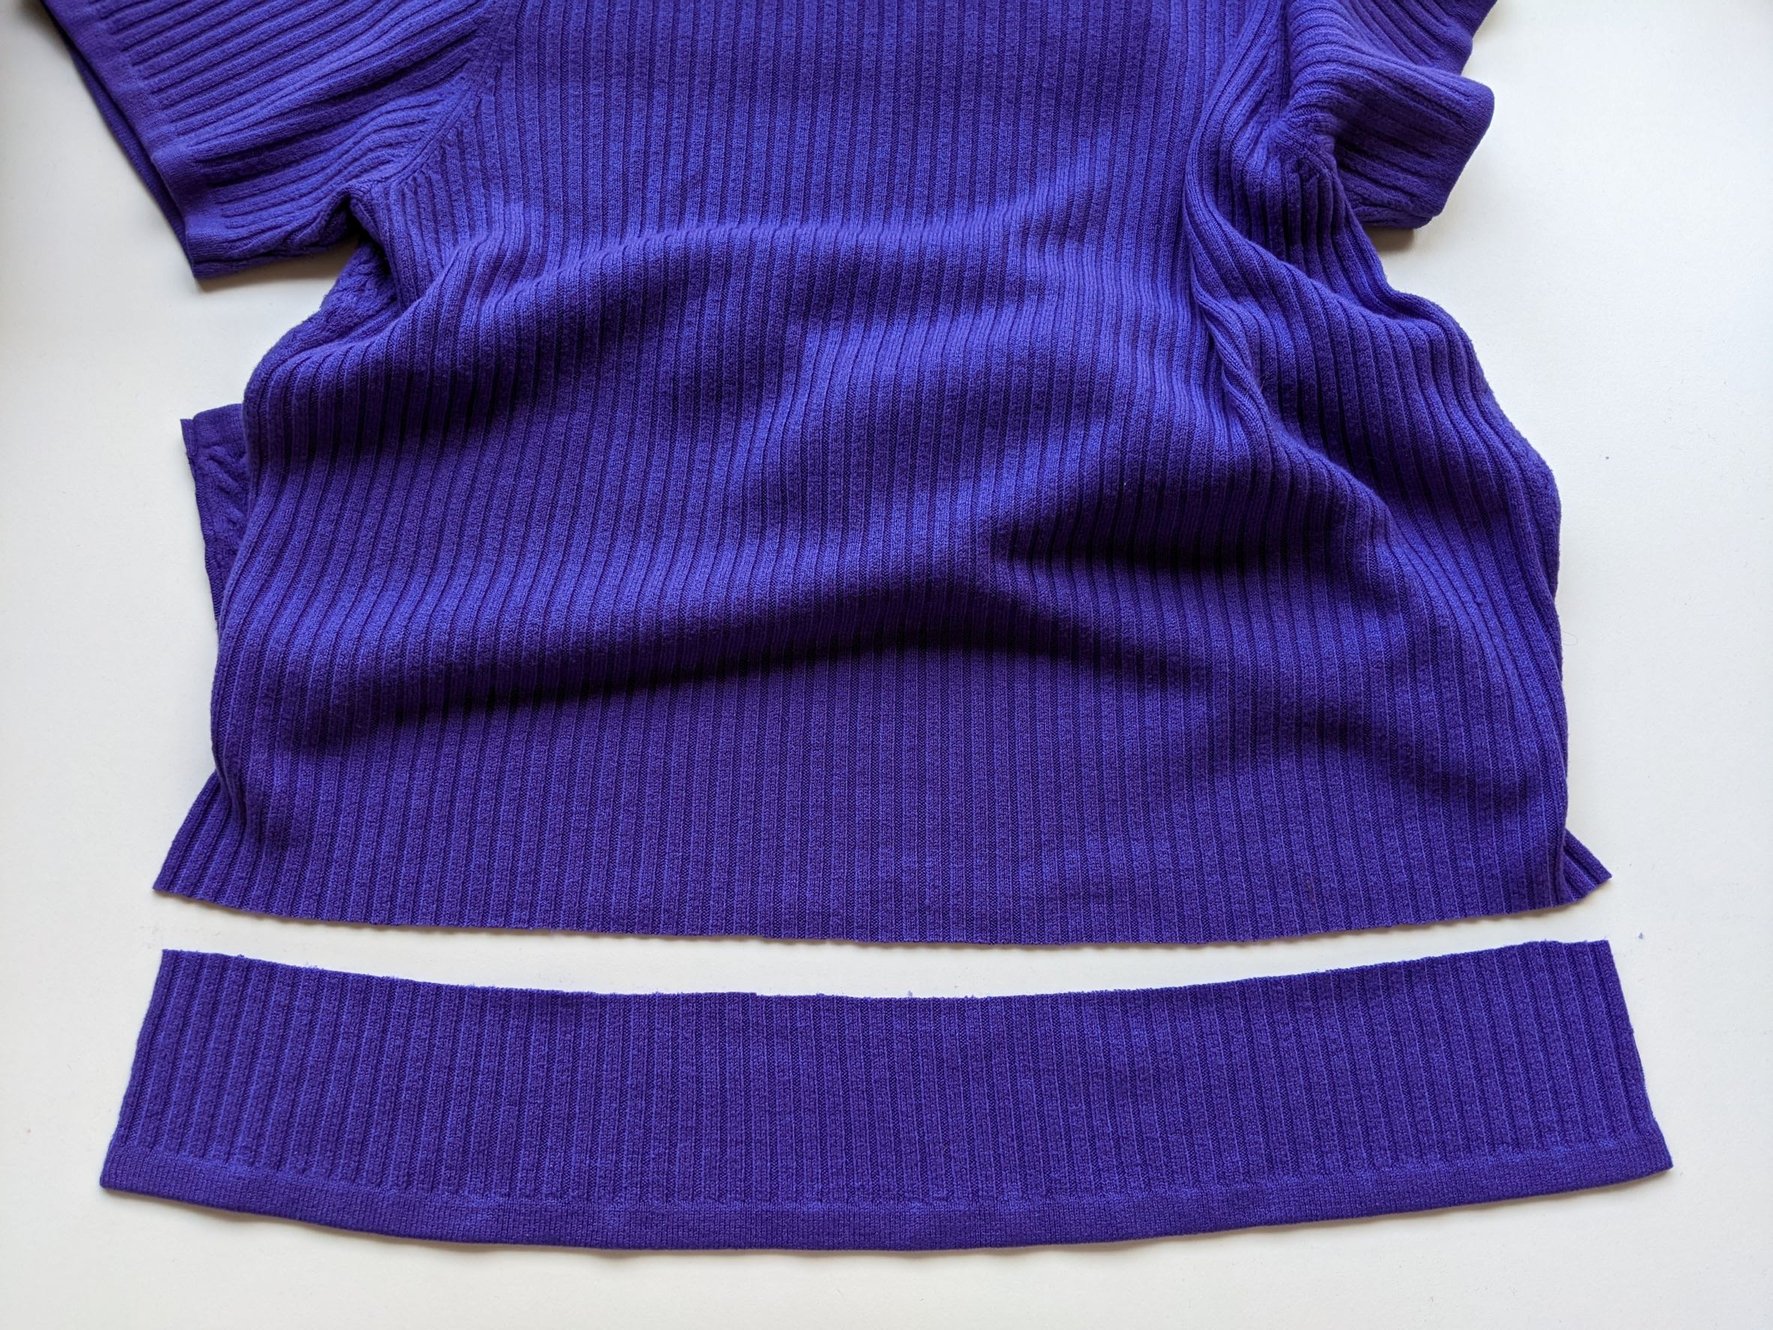
Next, I cut out 2 inch strips from the black knit fabric, because I wanted the black stripes to be slightly thinner than the colorful stripes. When sewn up ¼ inch seam allowance, the colorful stripes would be 2 inches wide, while the black stripes would be 1 ½ inches wide. I also cut out wider panels to use in the neckline areas (I didn’t write this down, so I might be misremembering, but I think I cut a 5-inch panel for the front of the dress and a 7-inch panel for the back of the dress.)
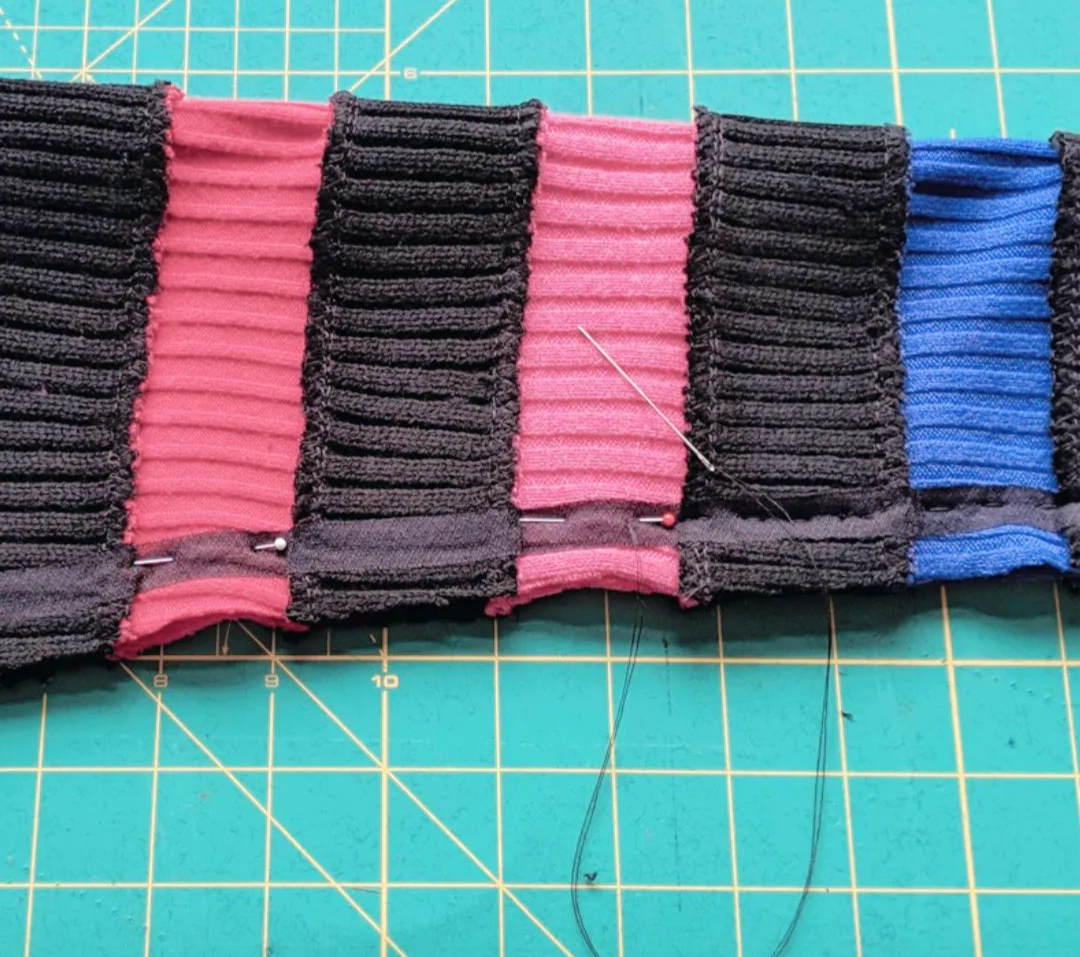
And now for the most knuckle-biting part of the process: sewing the strips together. My biggest concern with this project was the possibility of all of the strips becoming stretched out and distorted when I sewed them together. I knew from experience that sewing bulky sweater knits could be really tricky, even on a serger, and this project could be even trickier than most because of all of the seams along the stripes.
To try to get the stretching under control, I experimented with lots of different settings on my serger. I started with a four-thread overlock with standard settings, but that resulted in a seam that was quite bulky and very stretched out. I then fiddled with the stitch length, presser foot tension and differential feed setting, and eventually found a set of settings that did not stretch the fabric out very much. Here are my settings for my Brother 1034D serger, in case anyone is interested:
Four-thread overlock
Differential feed: 2.0
Presser foot tension: highest setting
Stitch length: 4
With those settings worked out, I moved on to sewing the real strips together. At first I tried sewing each strip to the next, in order, but I found that things got really unwieldy once I got past strip five or six. So instead of sewing strips sequentially, I sewed pairs of strips together first (i.e. one black and one colorful strip), then I sewed those paired strips into groups of four, and finally I sewed those groups of four together until I finally had everything assembled. This worked out much better than trying to sew all of the strips sequentially, because the fabric feeds much more smoothly into the machine when you are sewing smaller pieces of fabric together.
Once the strips were all sewn together, I steamed the CRAP out of the seams, to help the fabric recover and eliminate any waviness in the seam. This, I have found, is the magical (and often overlooked) step when working with knits.
Cutting out and constructing the dress
After I finished making my striped fabric, the next step was to cut out the front, back and sleeves of my dress.
Luckily, McCall’s 7501 is a very simple pattern designed for use with stretchy fabric, so I did not need to make most of my usual fitting adjustments to the pattern. (For example, I usually make a hollow bust adjustment, but that wasn’t necessary with this pattern.) I simply cut View C in a size 10 and made a straight back adjustment to reduce the center back length by ½ inch.

To minimize shifting and stretching the fabric while cutting, I used a rotary cutter and cutting mat. I also did NOT cut the piece out on the fold, as that would not be precise enough. Instead, I laid down the pattern, cut out one side and marked on the pattern where the stripes were. Then, I flipped the pattern over, taking care to preserve the center front or center back line, then lined up the fabric with the markings on the pattern. This way, I was able to ensure that the front and back pieces were perfectly mirrored.

I also took care to match up the stripes along the side seams. I did this by marking on the front pattern piece where the stripes fell, then transferring those markings to the back pattern piece. I then aligned the back pattern piece with the stripes in the fabric. I followed the same process to match up the stripes in the sleeves with the front and back dress pieces.
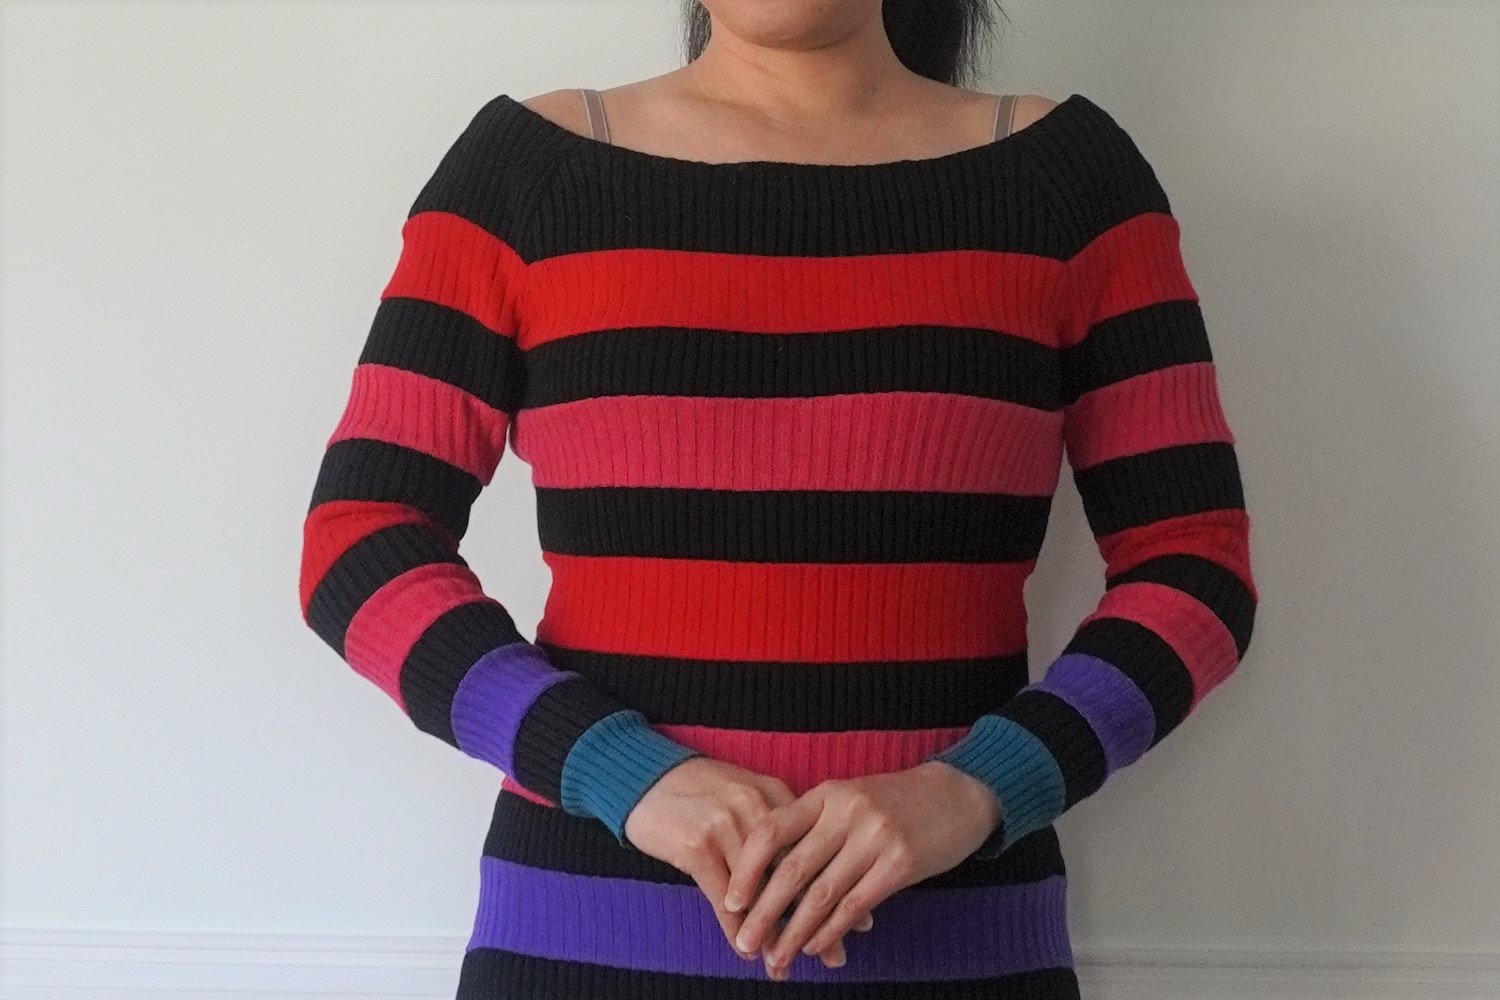
Once the pieces were all cut out, it was time to sew the pieces together. I was still really worried about the fabric stretching while sewing, so I took several steps to try to control the fabric a bit better. First, I applied some ½ inch lightweight fusible knit stay tape near the cut edges, to prevent the stripes from stretching out at the edges while I sewed. (By the way, this stay tape is awesome stuff, as it is super lightweight and adds hardly any bulk.) Second, I painstakingly hand-basted all of the seams, to ensure that the stripes could match once sewn. I was worried that if I just used pins, the stretchy fabric would shift during the sewing process and the result would be slightly offset stripes (which make my eyes twitch). I’m happy to say that these little tricks worked, and the stripes match up pretty well along the side seams and along the raglan sleeve seam.

Once the seams were sewn, I pressed the seam allowances out, then used my serger to finish each edge of the seam allowance. I initially wanted to serge the seam allowances together, as I thought that resulted in a much neater finish, but that ended up being way too bulky.
With all of the seams sewn, I tried on the dress but thought that the fit was a bit too loose around my stomach area, so I decided to add a waist stay cut out of power mesh, to cinch in my waist and help create an hourglass shape. I could have easily cut the waist stay simply by using the front and back dress pieces from McCall’s 7501 and cutting out just the midriff section. However, in the past, I had made a knit dress using McCall’s 5752, which had a lovely shaped waist stay that was curved in the front to leave room for stomach paunches, and more coverage in the back. I thought this waist stay was really well-designed, so I decided to use the front and back stay pieces from McCall’s 5752 to make the waist stay for this dress.


In addition to cinching in the waist, the waist stay ended up being a good idea because it provides an anchor or foundation for holding up the skirt of the dress. Without it, the dress is super heavy, and the weight of all that sweater knit pulls the dress down from the shoulders.
Next, I tackled the neckline, which turned out to be the most difficult part of the sewing process. The pattern tells you to cut a band for the neckline, fold it in half, then sew the band to the neckline, stretching the fabric as you sew. I made the mistake of cutting the band out of a lightweight stretchy ribbed fabric from my stash, which turned out to be far too stretchy, and my resulting neckline was so stretched out that the dress basically turned into an off-the-shoulder dress.
Massive sewing fail!
Frustrated, I decided to unpick everything and re-stitch the neckline using some clear elastic instead. This was a much better choice because the clear elastic was stronger and it effectively prevented the neckline from stretching out, without adding too much bulk.
The Finished Dress
Finally, after many hours of piecing, basting, and choking on sweater knit fluff, my rainbow striped dress was finally done! I love the bold colors and graphic quality of this dress, and I’m so pleased that I was able to fashion this out of a pile of thrifted sweaters. The dress itself is quite comfortable to wear, although the dress is pretty body-conscious, so I feel the need to suck in my stomach all day while I’m wearing it. I won’t be lounging around the house in this dress, but it’s a good choice for a date night out during the colder months. =)
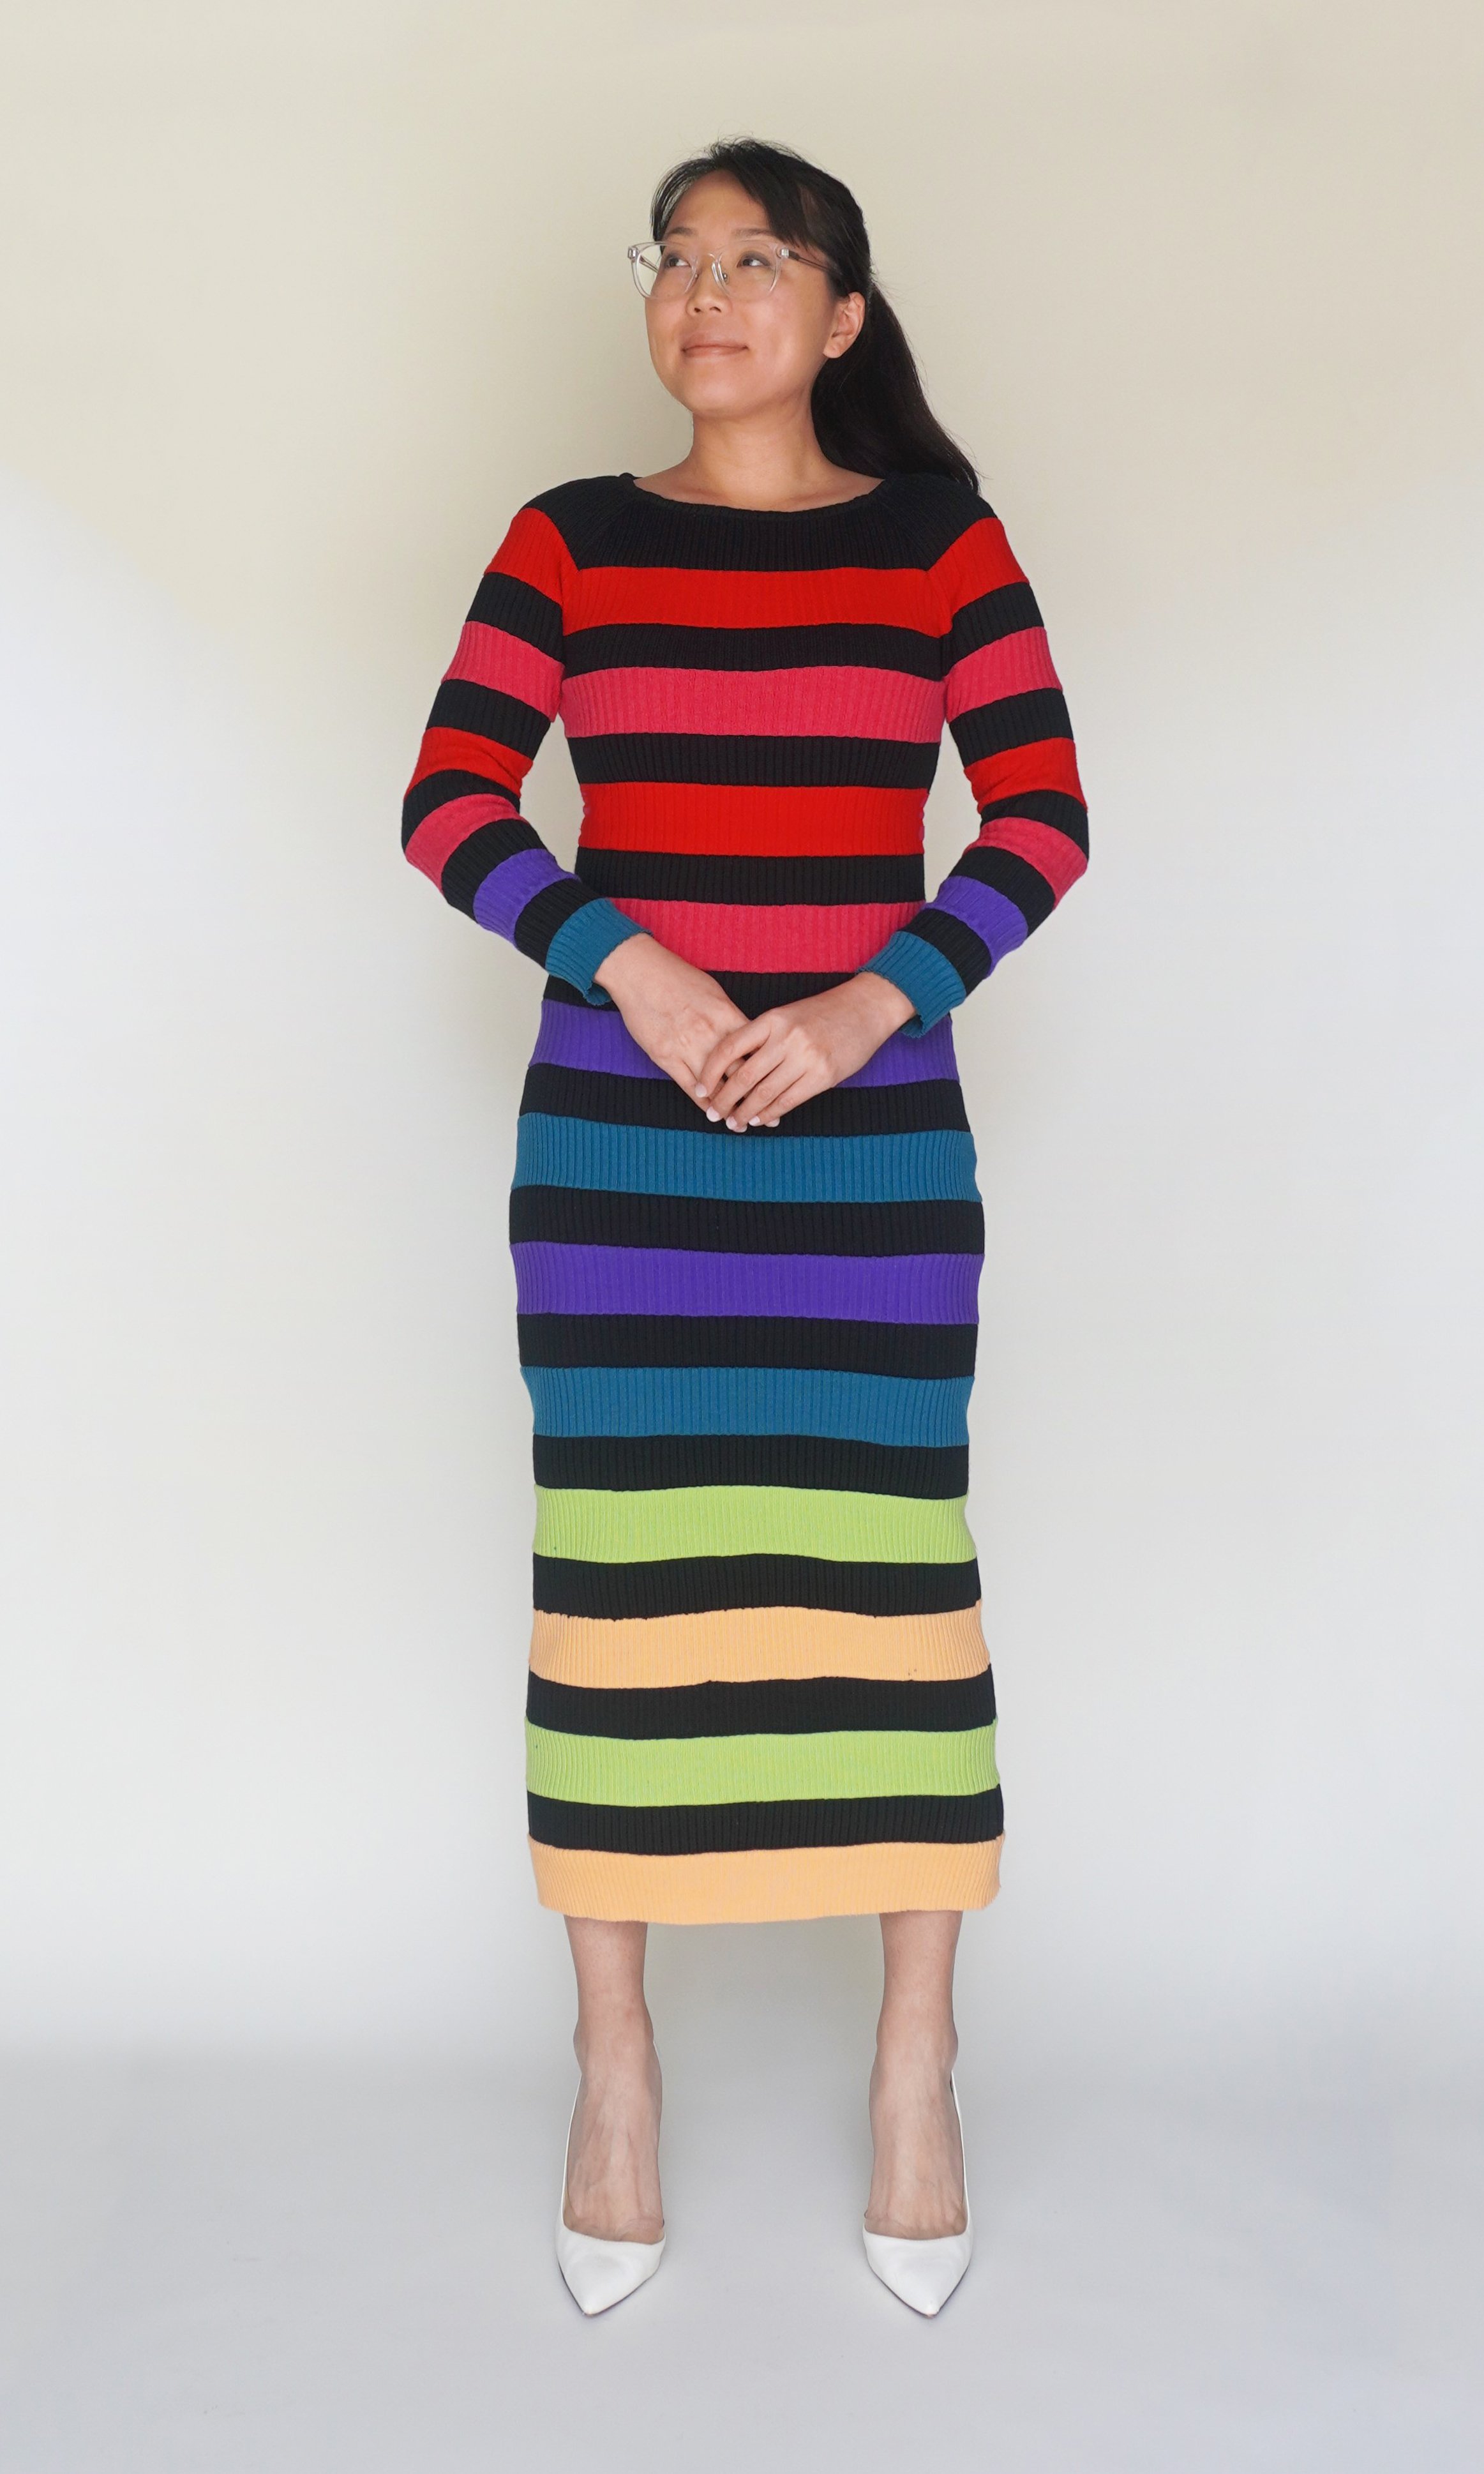

One thing I don’t love is the fact that the colorful stripes ‘sag’ a bit, such that the side seam doesn’t lay completely smooth. I think this happened because my black fabric was much thicker than my sweaters. In retrospect, I would have been better off buying a black ribbed knit dress at the thrift store, and then cutting that into strips. Not only would that have been easier and cheaper, but it also would have saved me having to sew my neckline, as I could have used the original neckline from the thrifted dress.
Another thing I should have done is used the hems that I cut off the sweaters and used them for the hem of the dress and sleeves. That would have saved me the trouble of finishing the hems on my dress (and made for a neater finish). Oh well, lessons learned if I ever end up making another version of this dress!
I hope this inspires you to transform old sweaters into striped knit dresses. If you do end up making your own version, please let me know in the comments – I’d love to see your make! (In fact, I have an extra copy of McCall’s 7501 in sizes 14-22 that I bought accidentally before I realized it was the wrong size for me. Leave a comment below if you’re interested in buying it for $9, plus shipping.)
Update: I won second place in PatternReview.com’s 2022 Upcycle Contest with this dress! I’m so psyched, particularly given how amazing the other entries all were!