
Whenever I head to my local thrift store, I always make a beeline for the home décor section so I can check out the wide assortment of used curtains for sale. I treat the curtain section essentially like a fabric store because they come in such a wide variety of fabrics, from sheer gauze fabrics to colorful cotton prints. Lately, my curtain thrift store finds have been transformed into a tailored jacket, a corset dress, and now I’m turning a sheer white curtain into a floaty shirtdress.
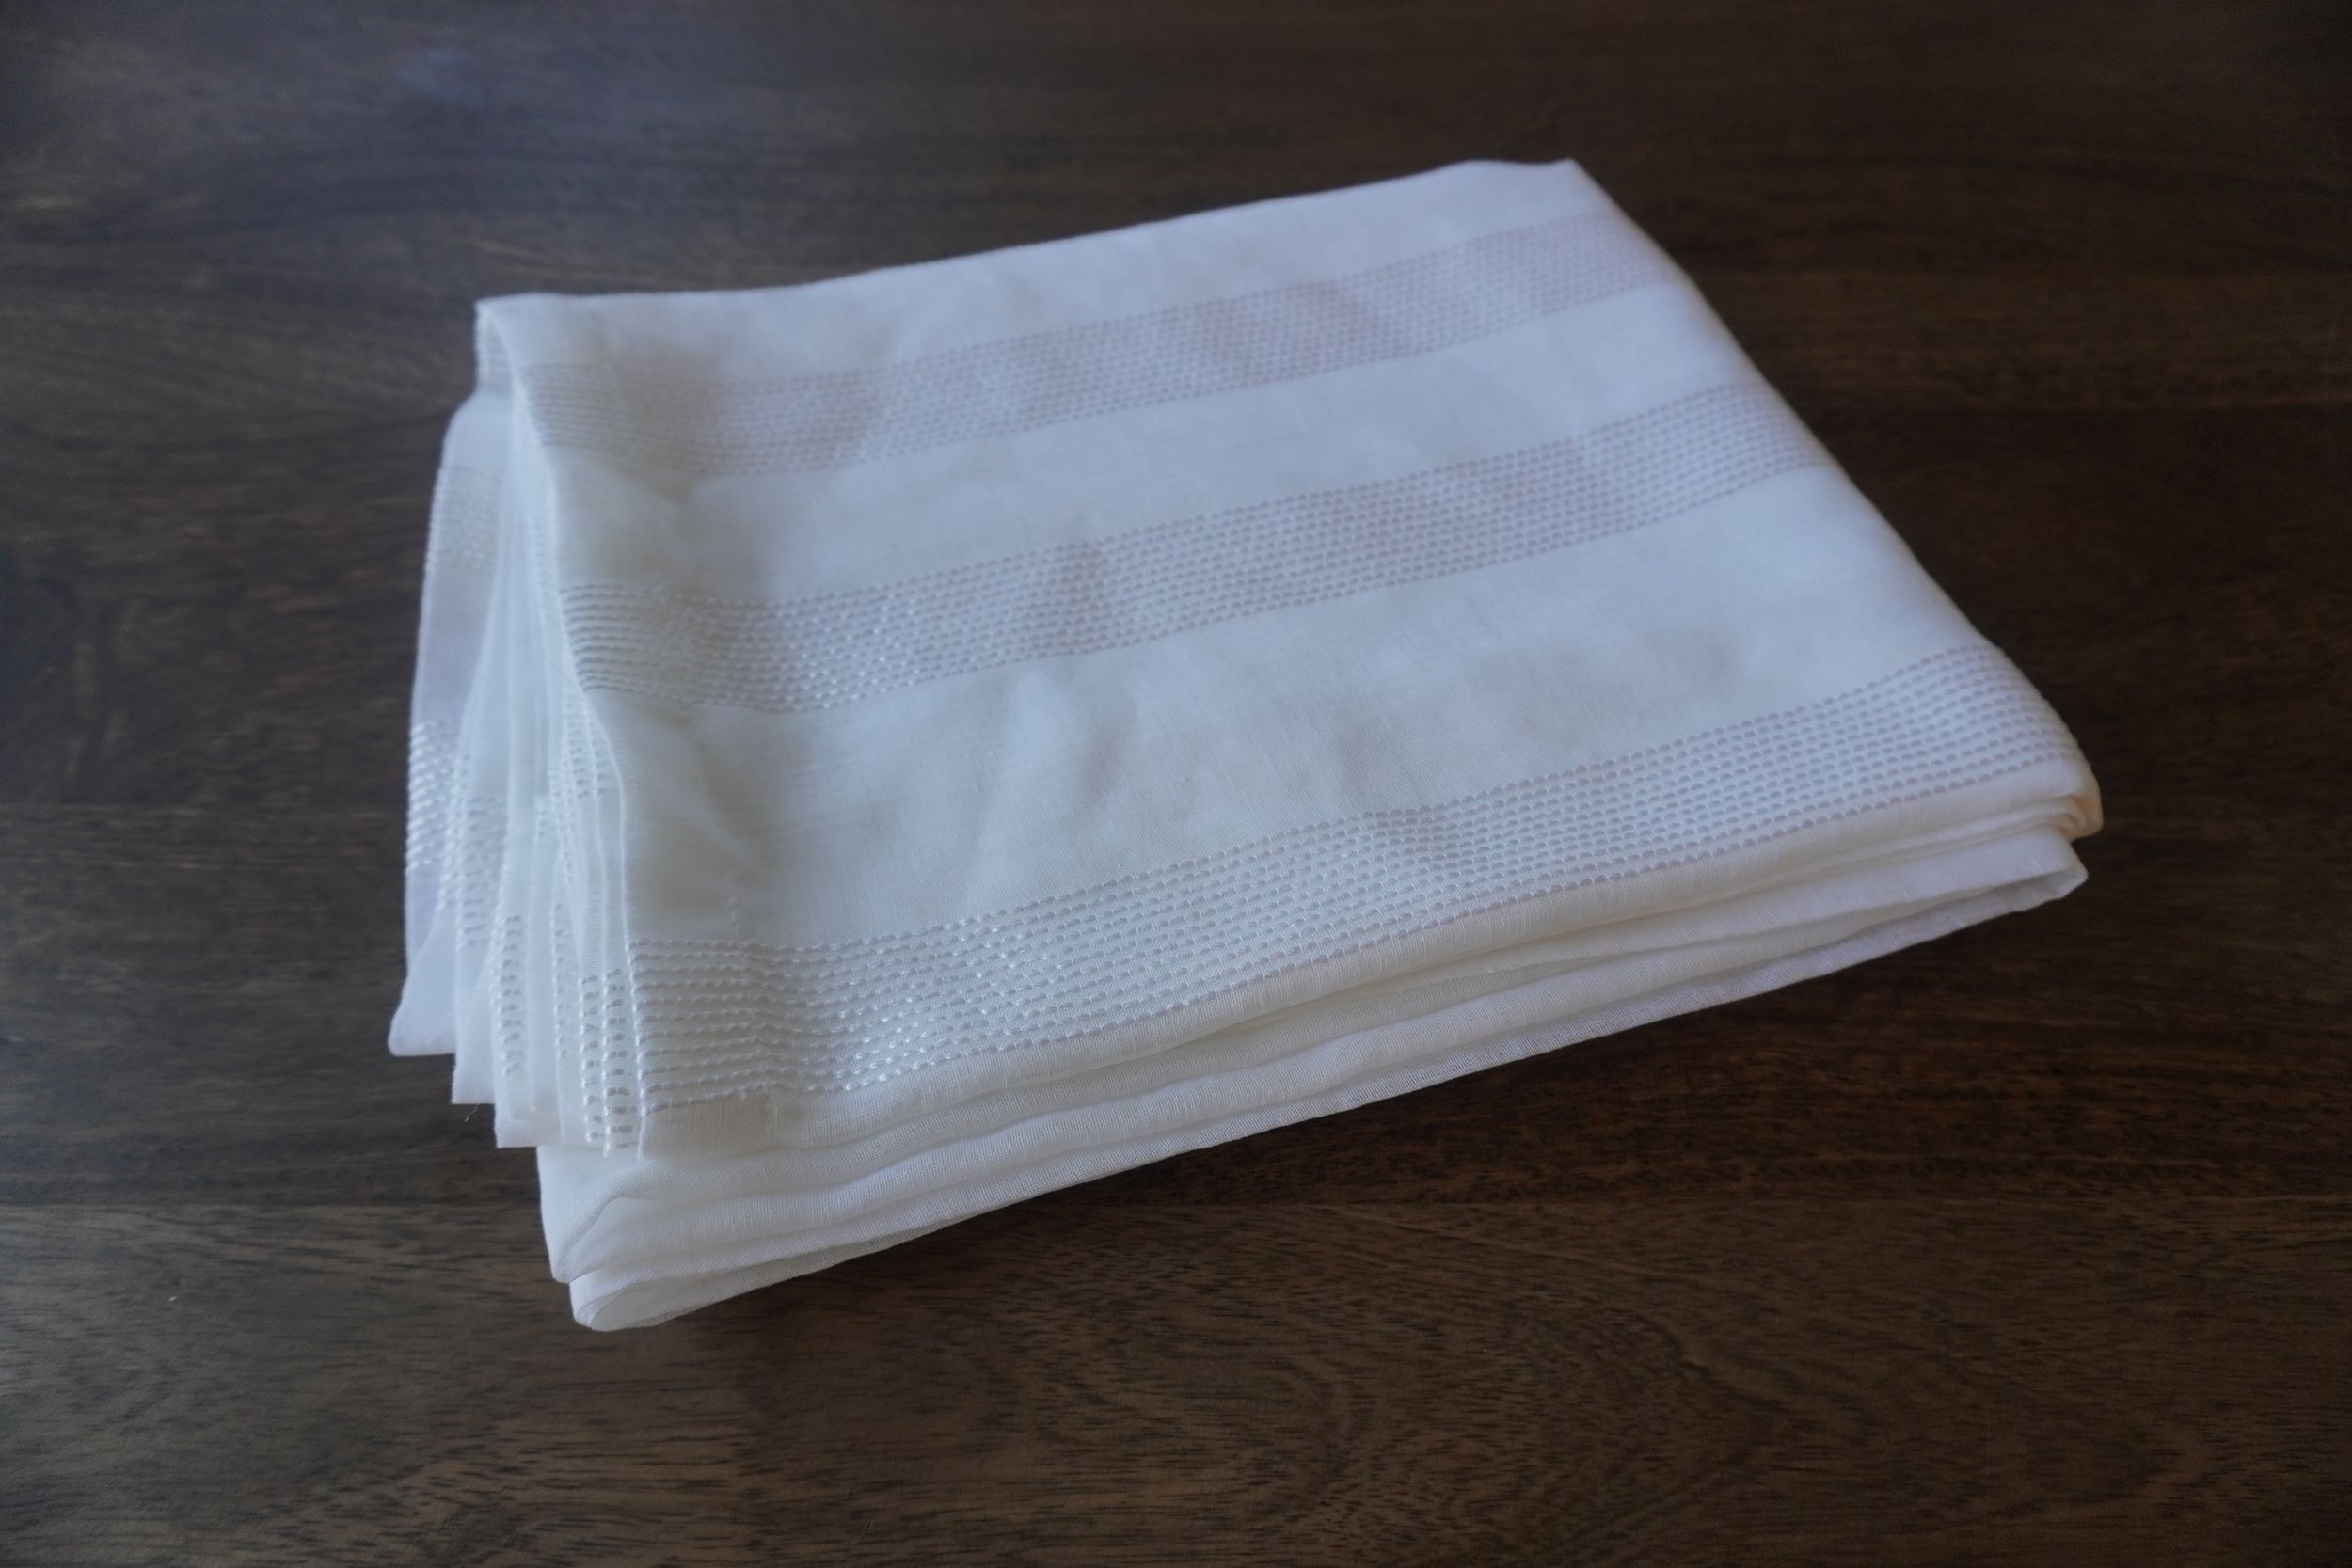
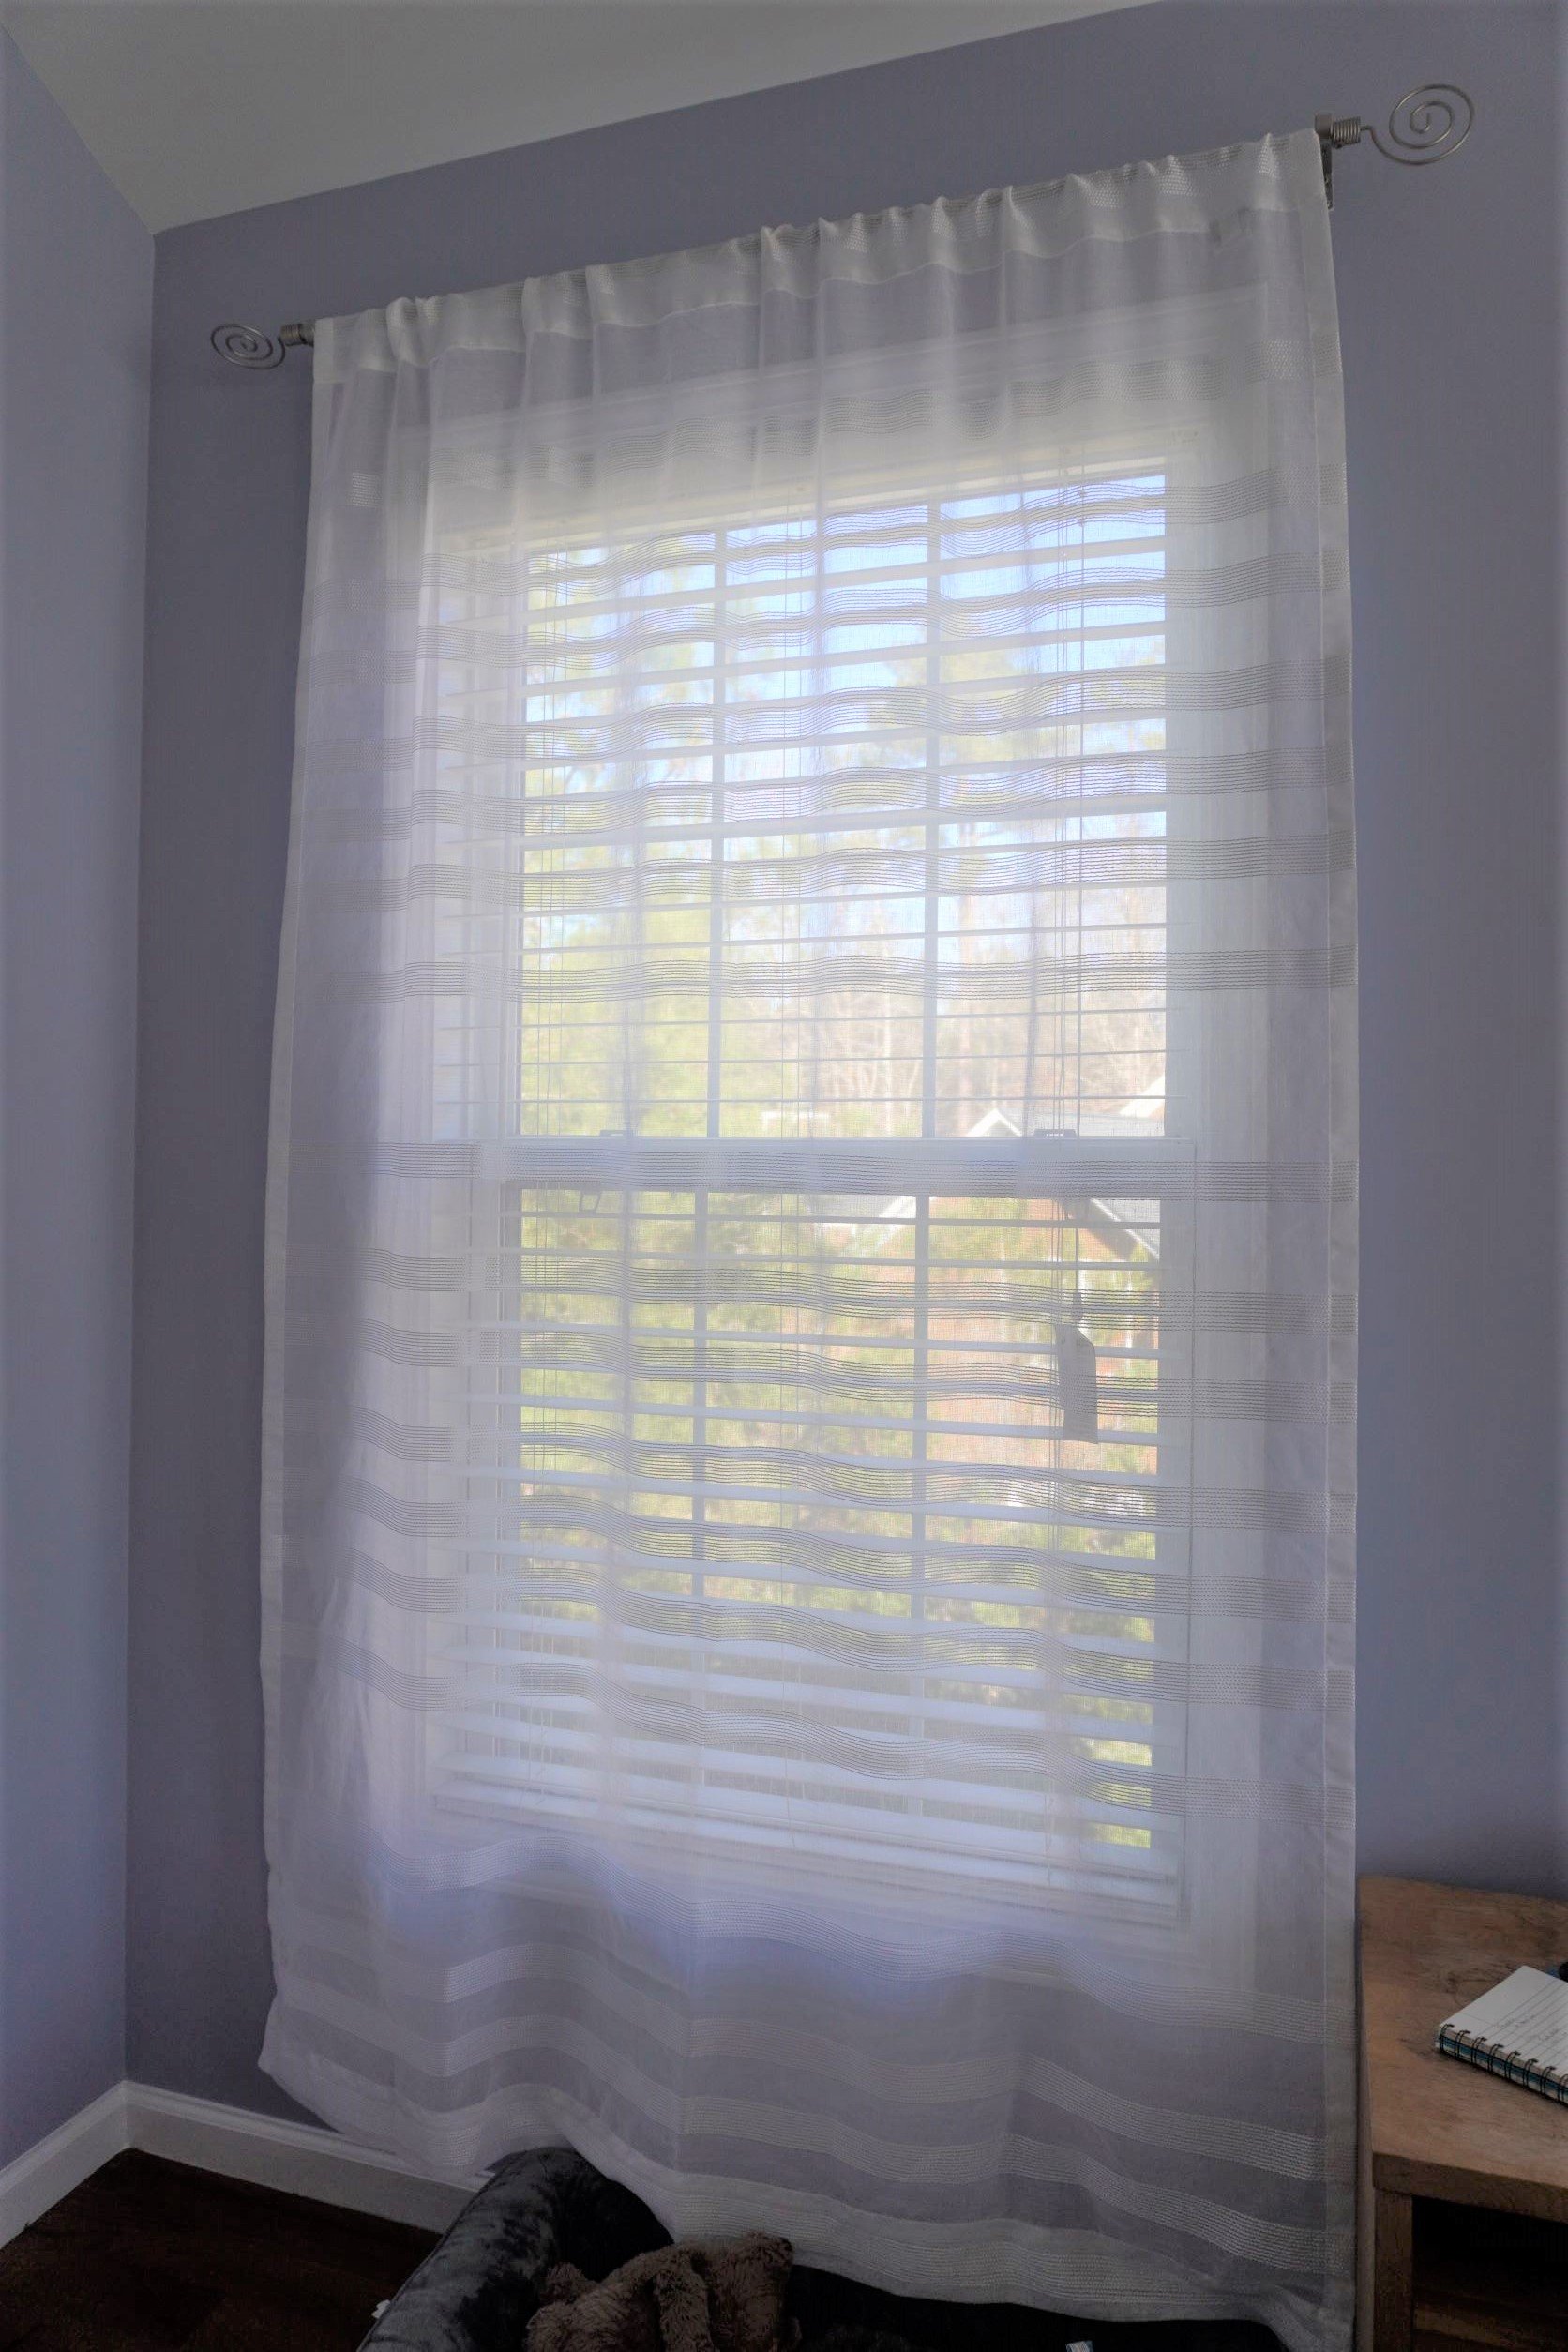
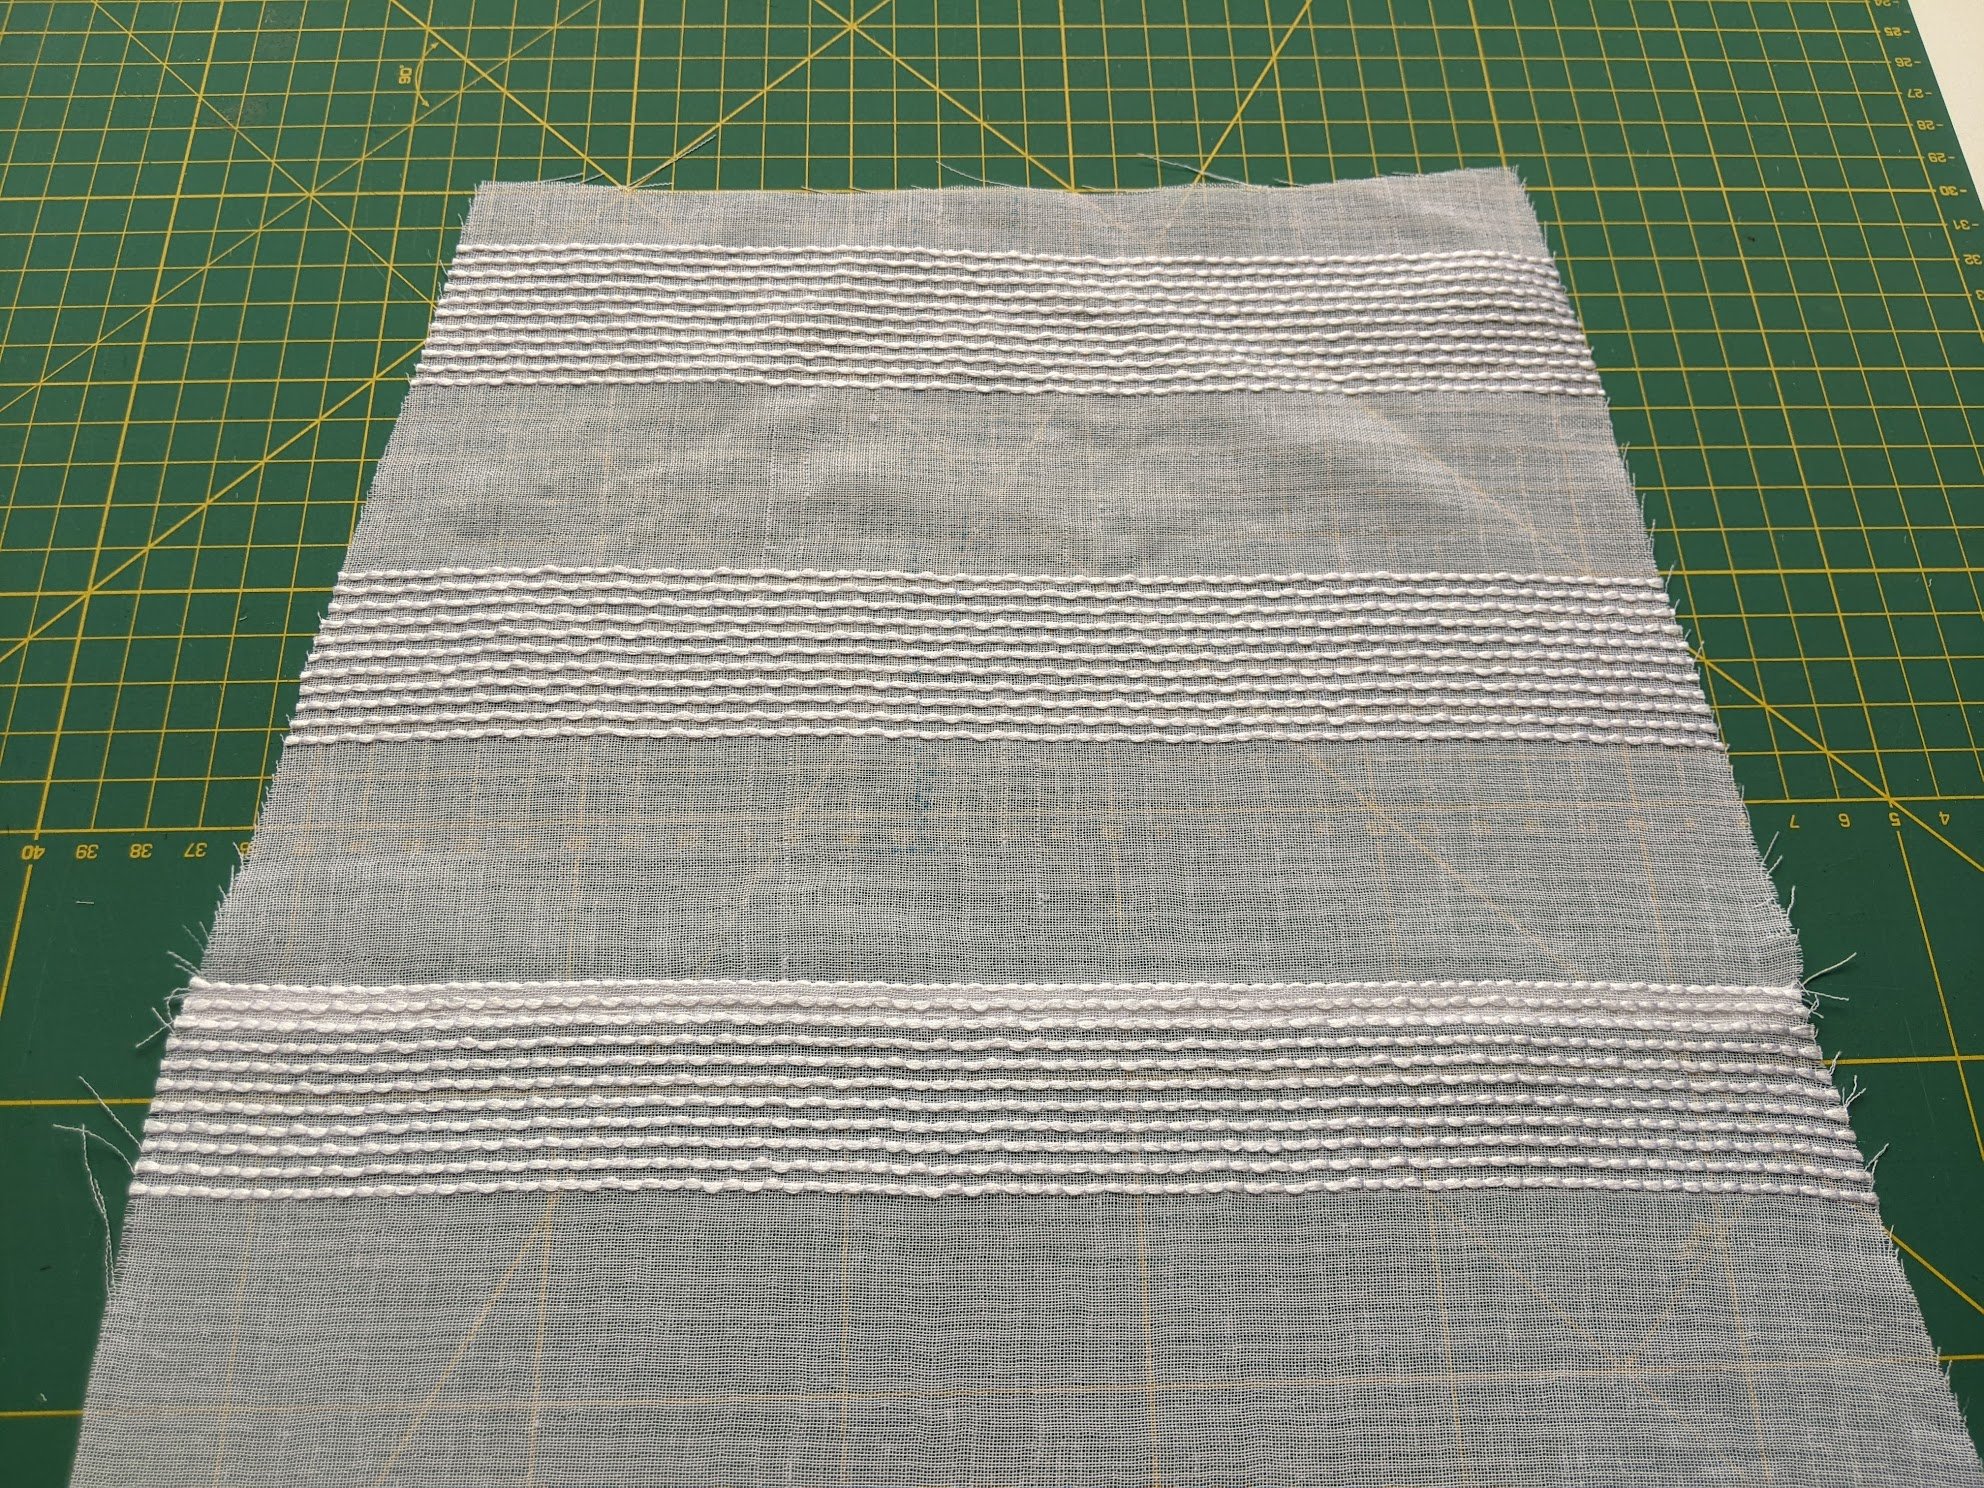
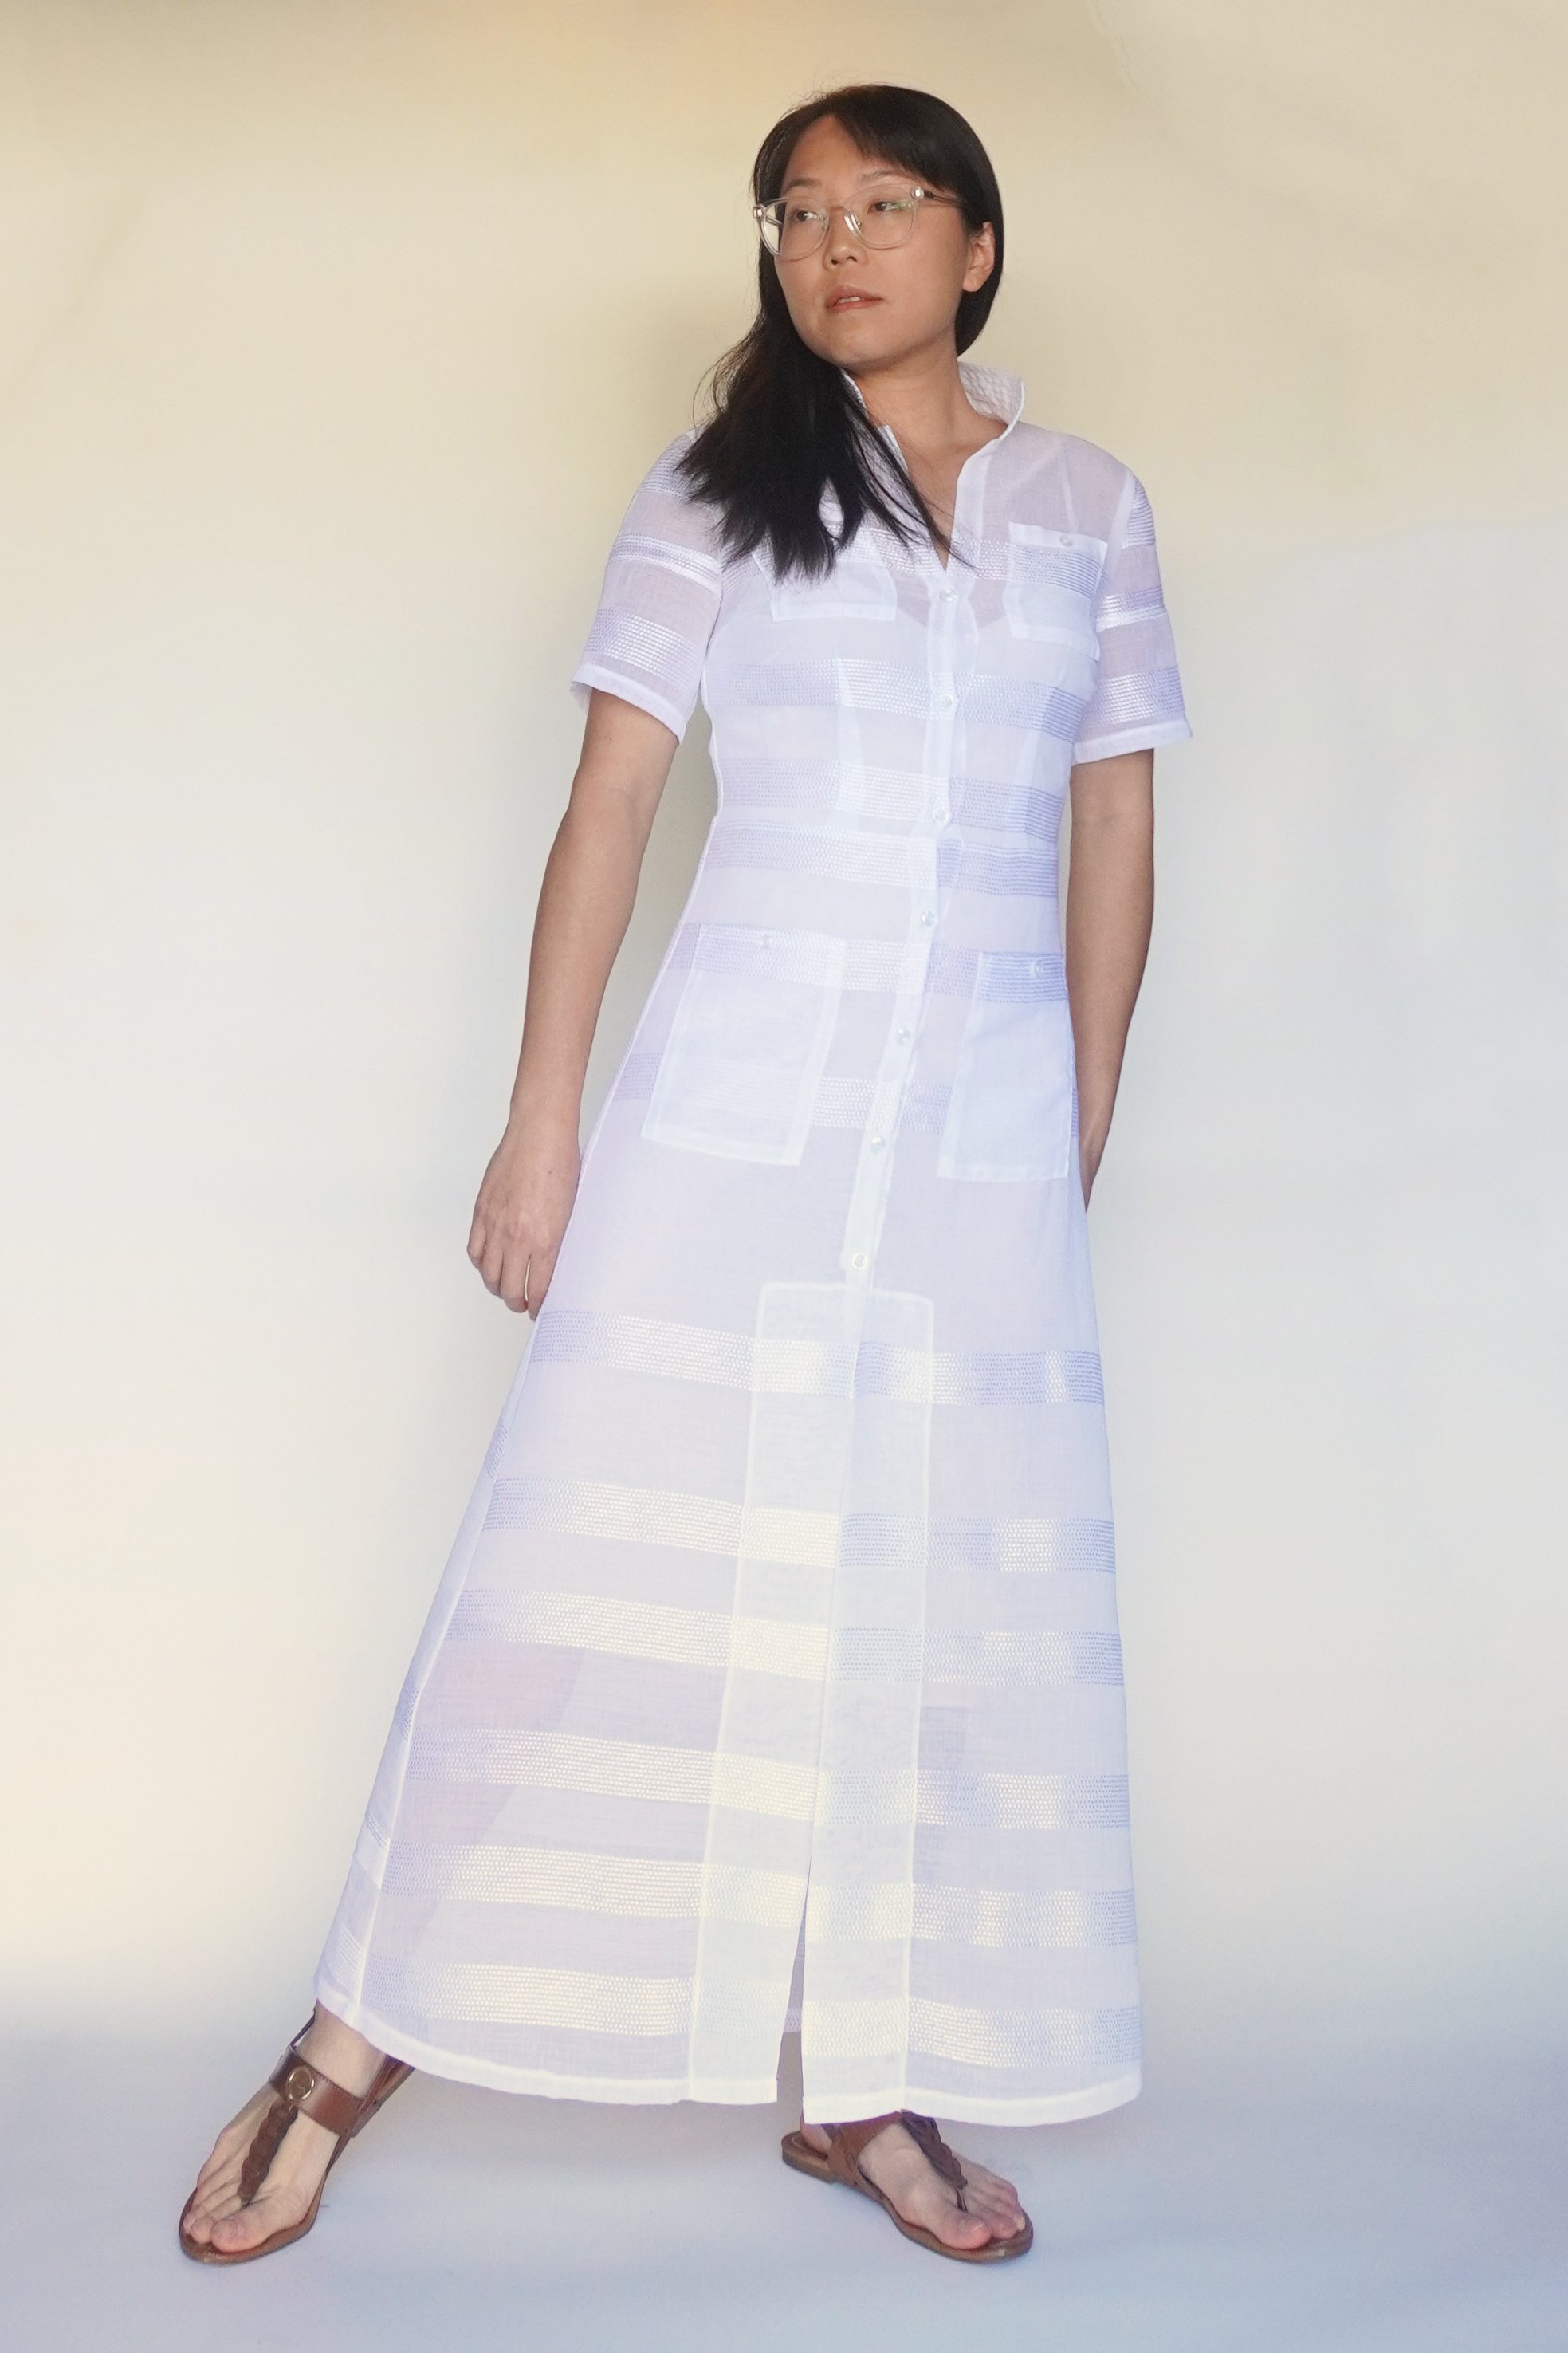
This curtain, like all curtains at my local thrift store, was only $3, and it is made out of a 100% polyester fabric that looks like some kind of voile or gauze fabric with white stripes across the width of the curtain. The fabric has a crisper hand than most sheer fabrics, so I thought that it might look good made into something that was mostly flowing but with some structured elements. That’s why I eventually settled on making a sheer shirtdress using Vogue 1781. I needed a coverup to wear over my swimsuit at the pool or beach, and I hoped that the 100% polyester fabric might be a good match for this project as it might stand up to the chlorine and salt water better than a natural fiber.

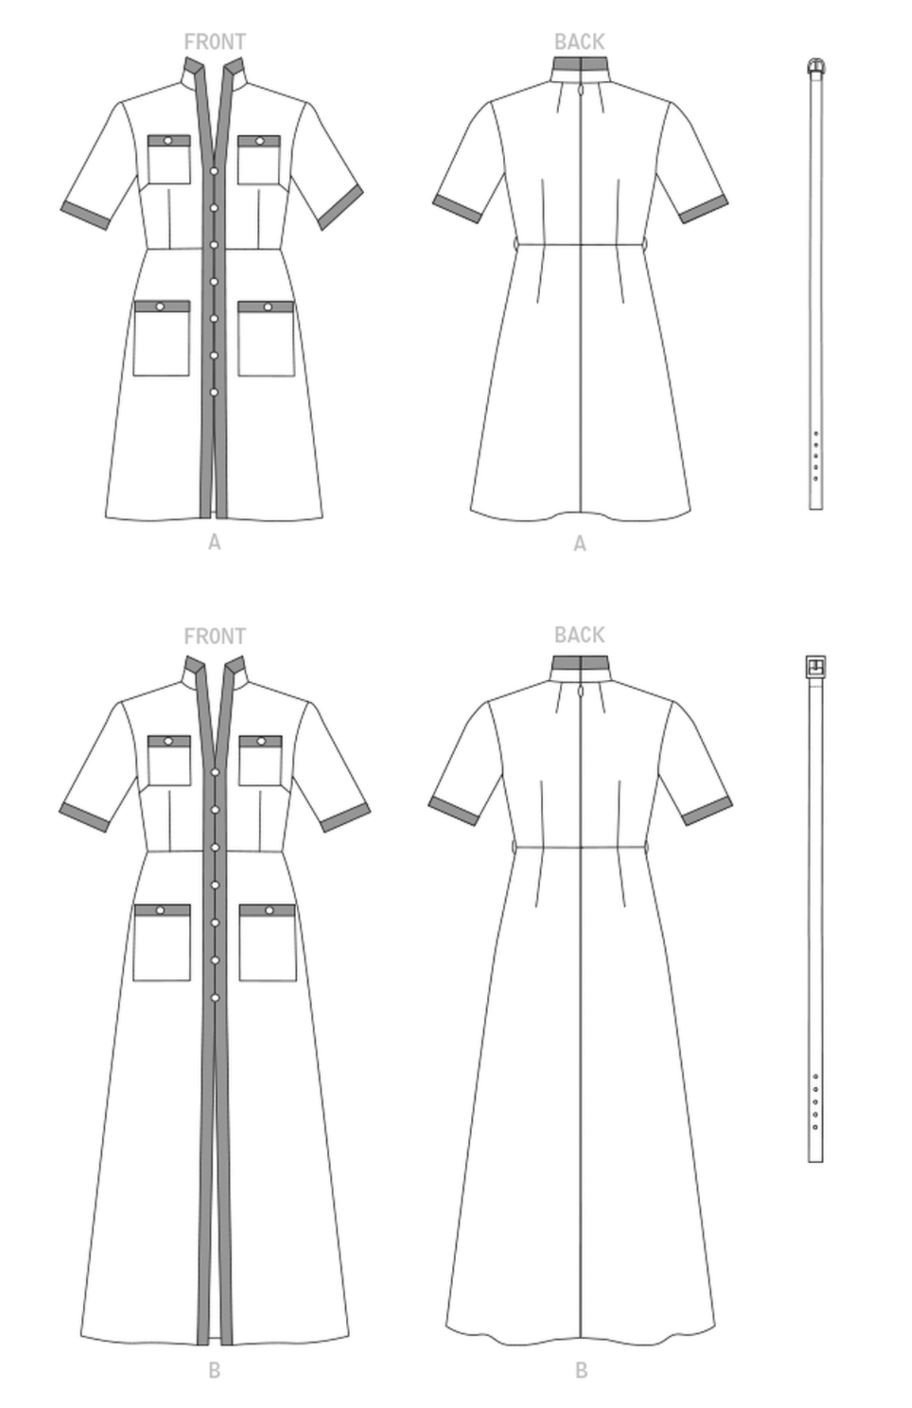
When I first bought Vogue 1781, I thought it was a pattern for a classic button-down shirtdress with a button stand cut out of a fabric in a contrasting color. That turned out to be completely wrong -- the dress is actually zipped up the back, and the front is sewn together permanently with contrast trim sewn down the front of the dress. The buttons down the front are just for decoration, and there is an odd panel underneath the front slit that I think is there for modesty purposes. The line drawing on the back of the pattern envelope doesn’t really make this clear, though I probably could have figured it out had I read the description carefully (which, of course, I didn’t…).
Pattern Alterations and Cutting
For this project, I didn’t bother making a muslin and I just stuck to my usual set of fitting adjustments for Vogue patterns:
I cut a size 10 at the bust and hips, tapering to a 12 at the waist
I made a hollow bust adjustment and reduced the length at the neckline by ½ inch
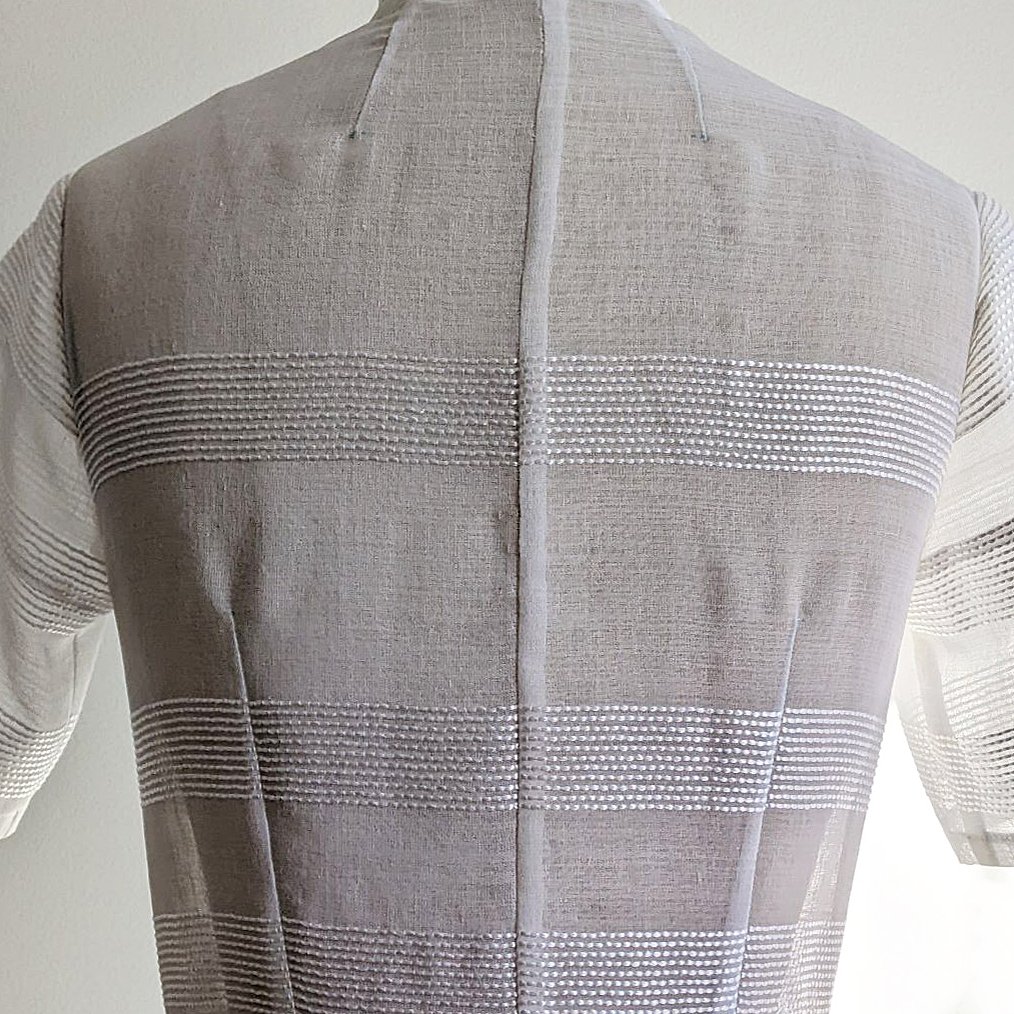
I made a straight back adjustment and reduced the length at the center back by ½ inch
I cut a size 8 sleeve
I shortened the skirt length by 4 ½ inches (for reference, I’m 5 ft 2 inches)
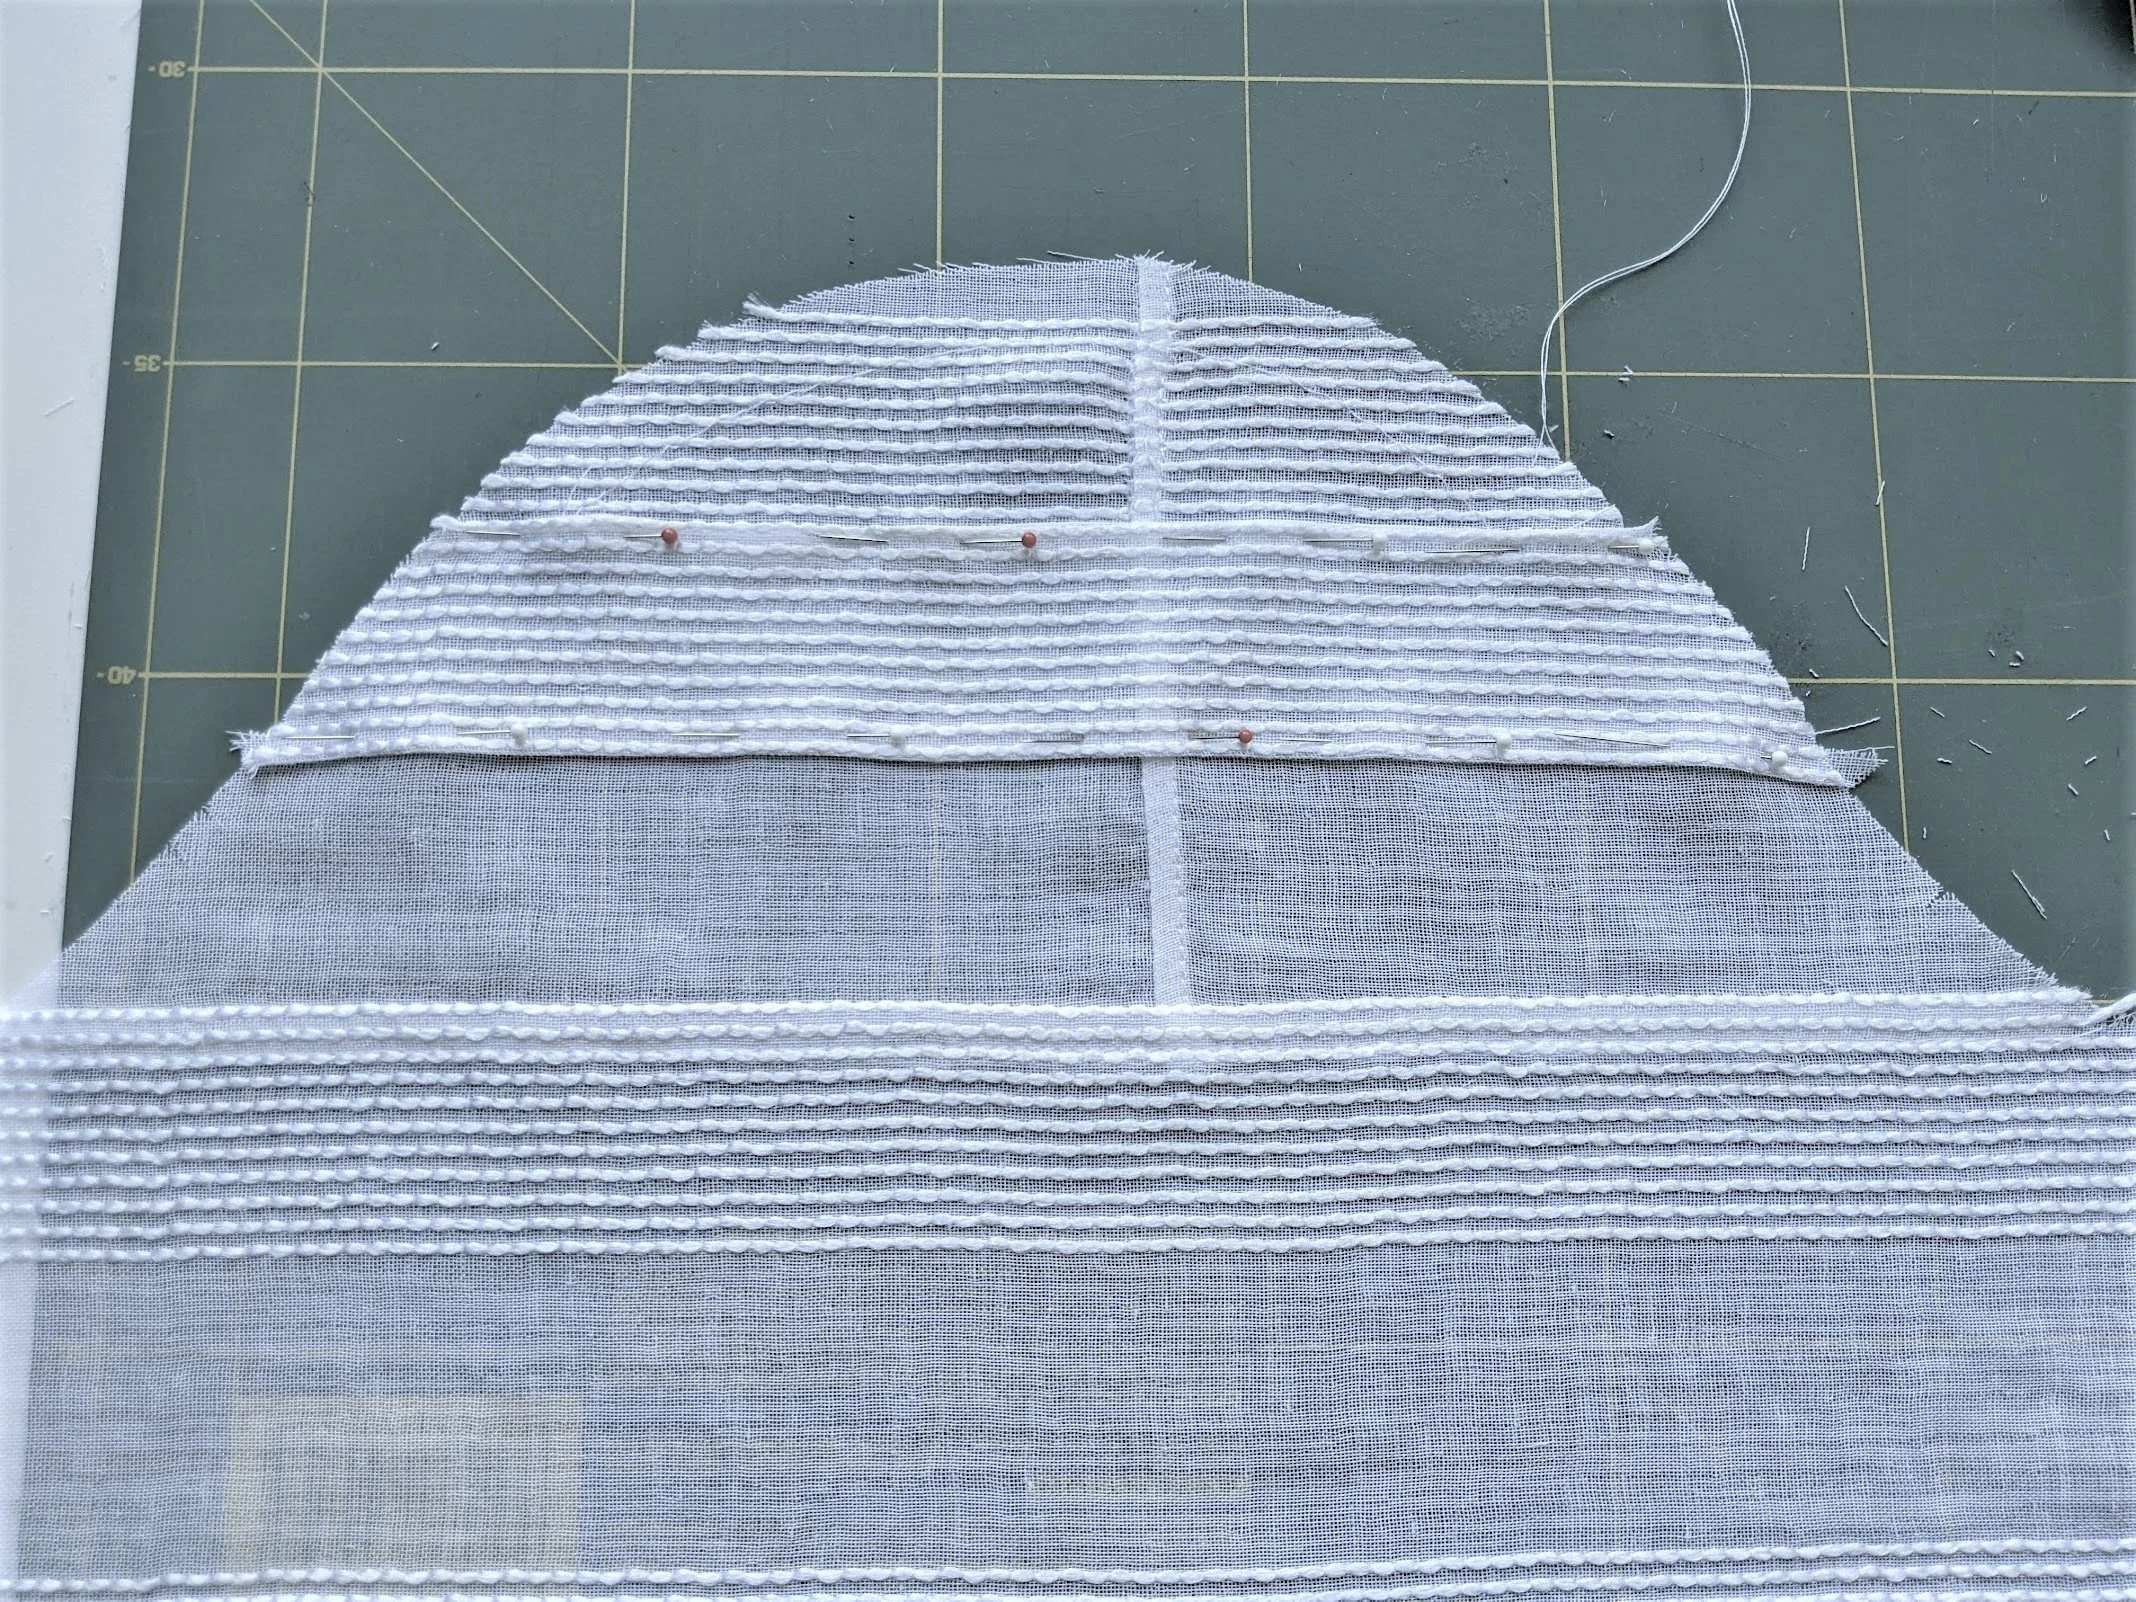
Cutting the pieces out was a real challenge because my curtain panel was only 54 inches wide by 84 inches long (which is quite a narrow panel). The stripes on the curtain are also irregularly spaced, so I didn’t have many options in terms of the cutting layout, if I wanted the stripes to be matched and mirrored. In the end, I had to piece together quite a few of the pieces to get the stripes to match properly along the center seams – for example, one of the back skirt pieces is pieced together from three bits of fabric, which was the only way that I was able to get the stripes to match up on both sides of the skirt back.
Getting maximum yield from minimal cuts of fabric is a recurring challenge when refashioning, and I’ve spent many hours tearing out my hair while trying to figure out how to solve these intricate cutting puzzles. Here’s my advice for anyone who is struggling to figure out how to squeeze all of their pieces out of a small bolt of fabric:
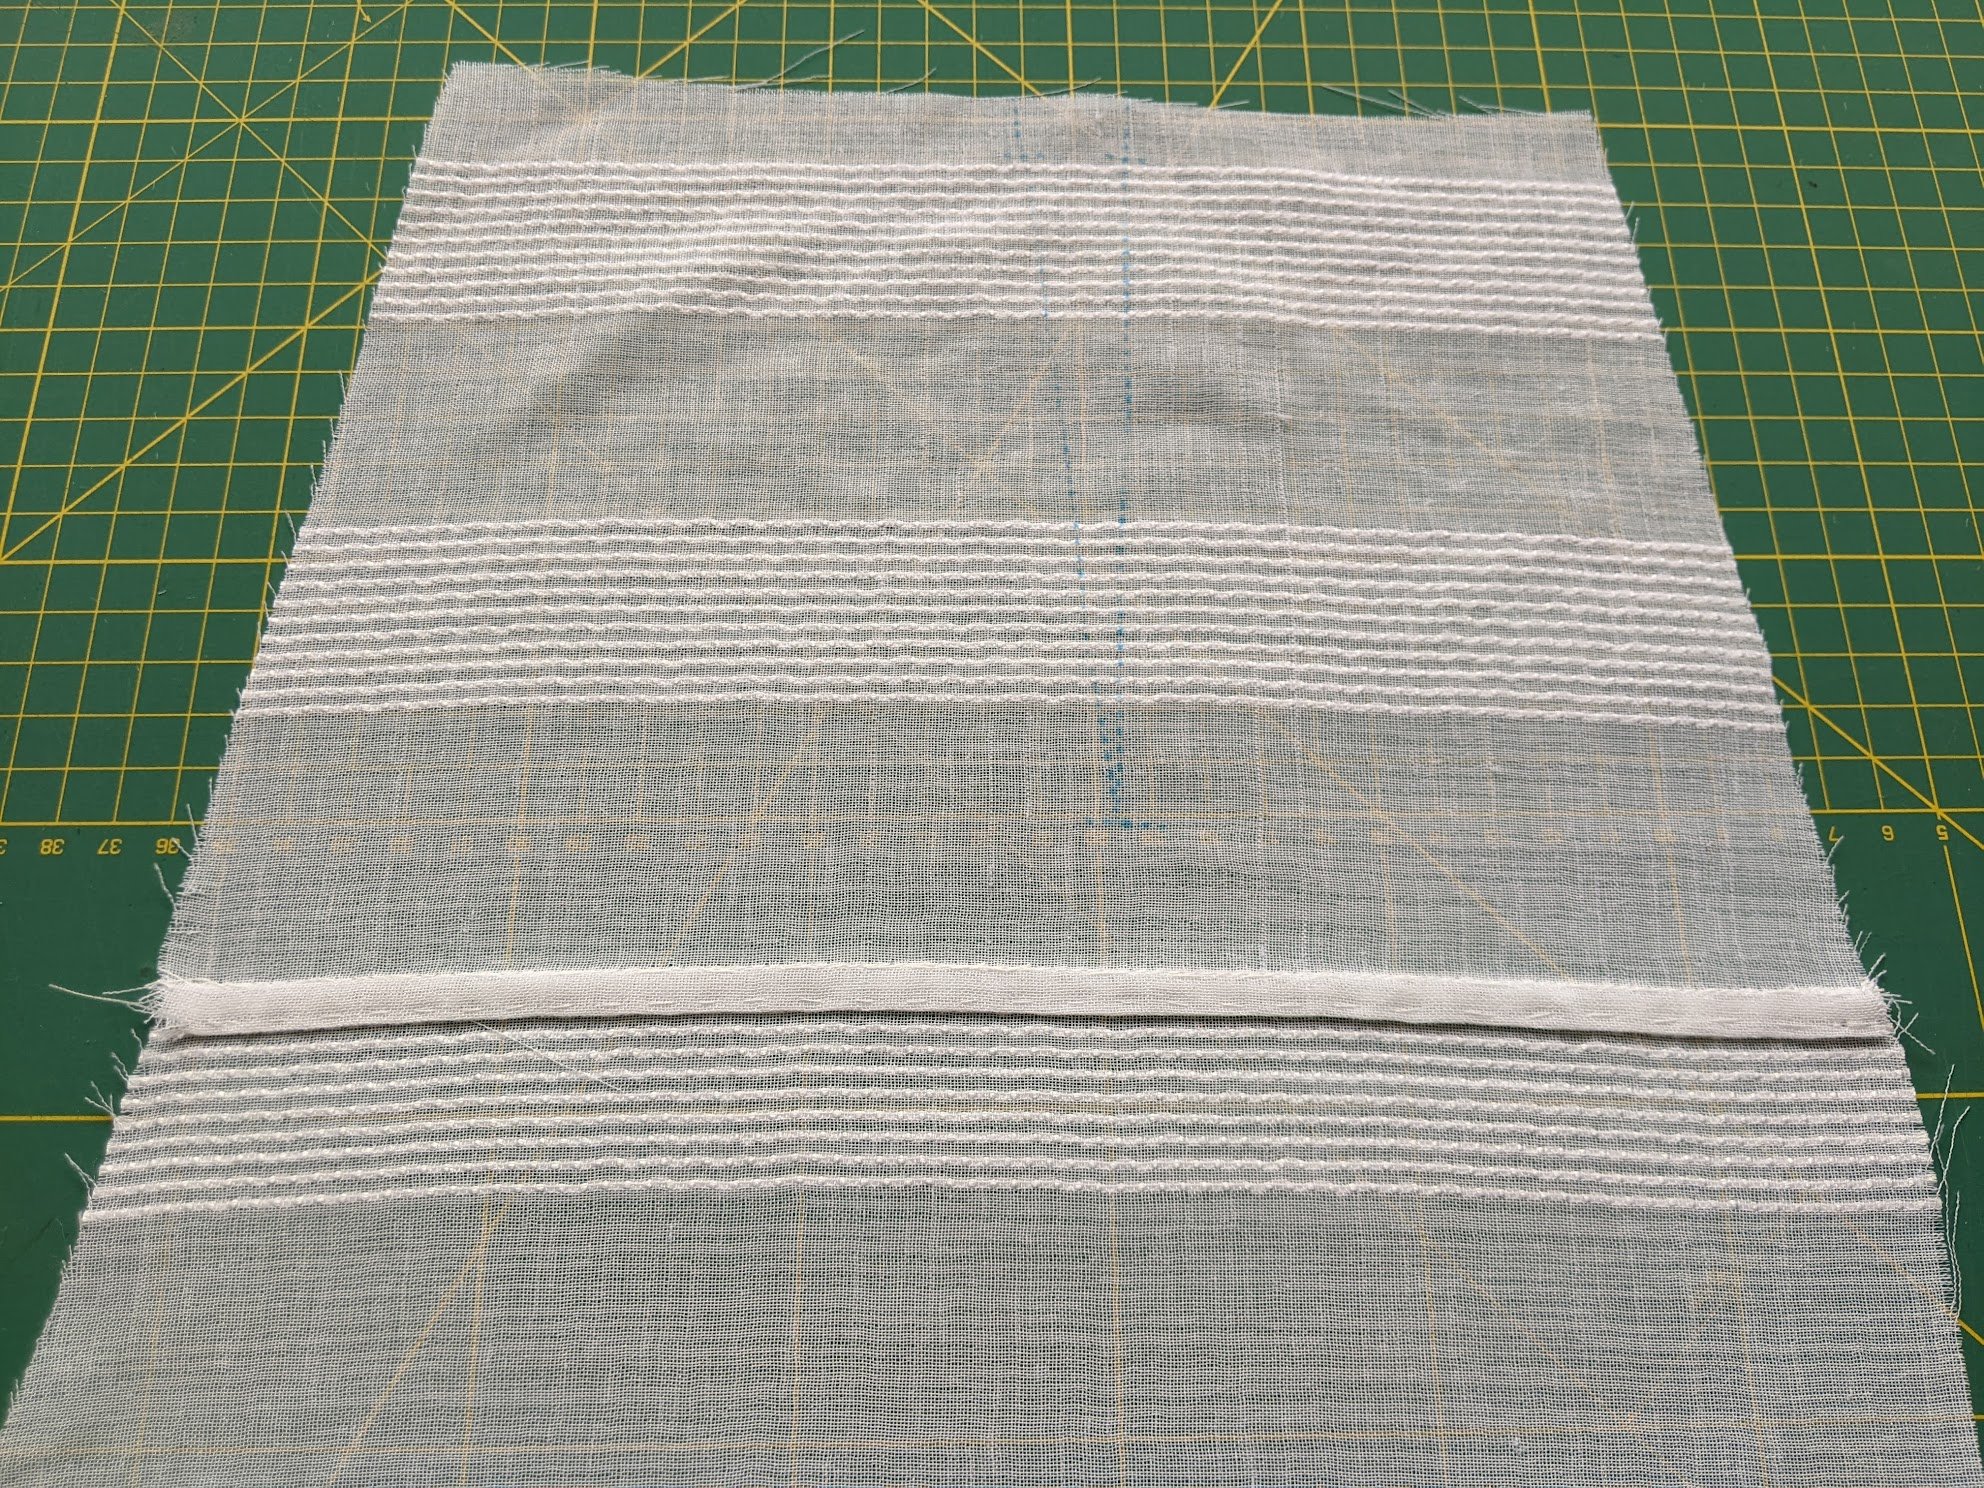
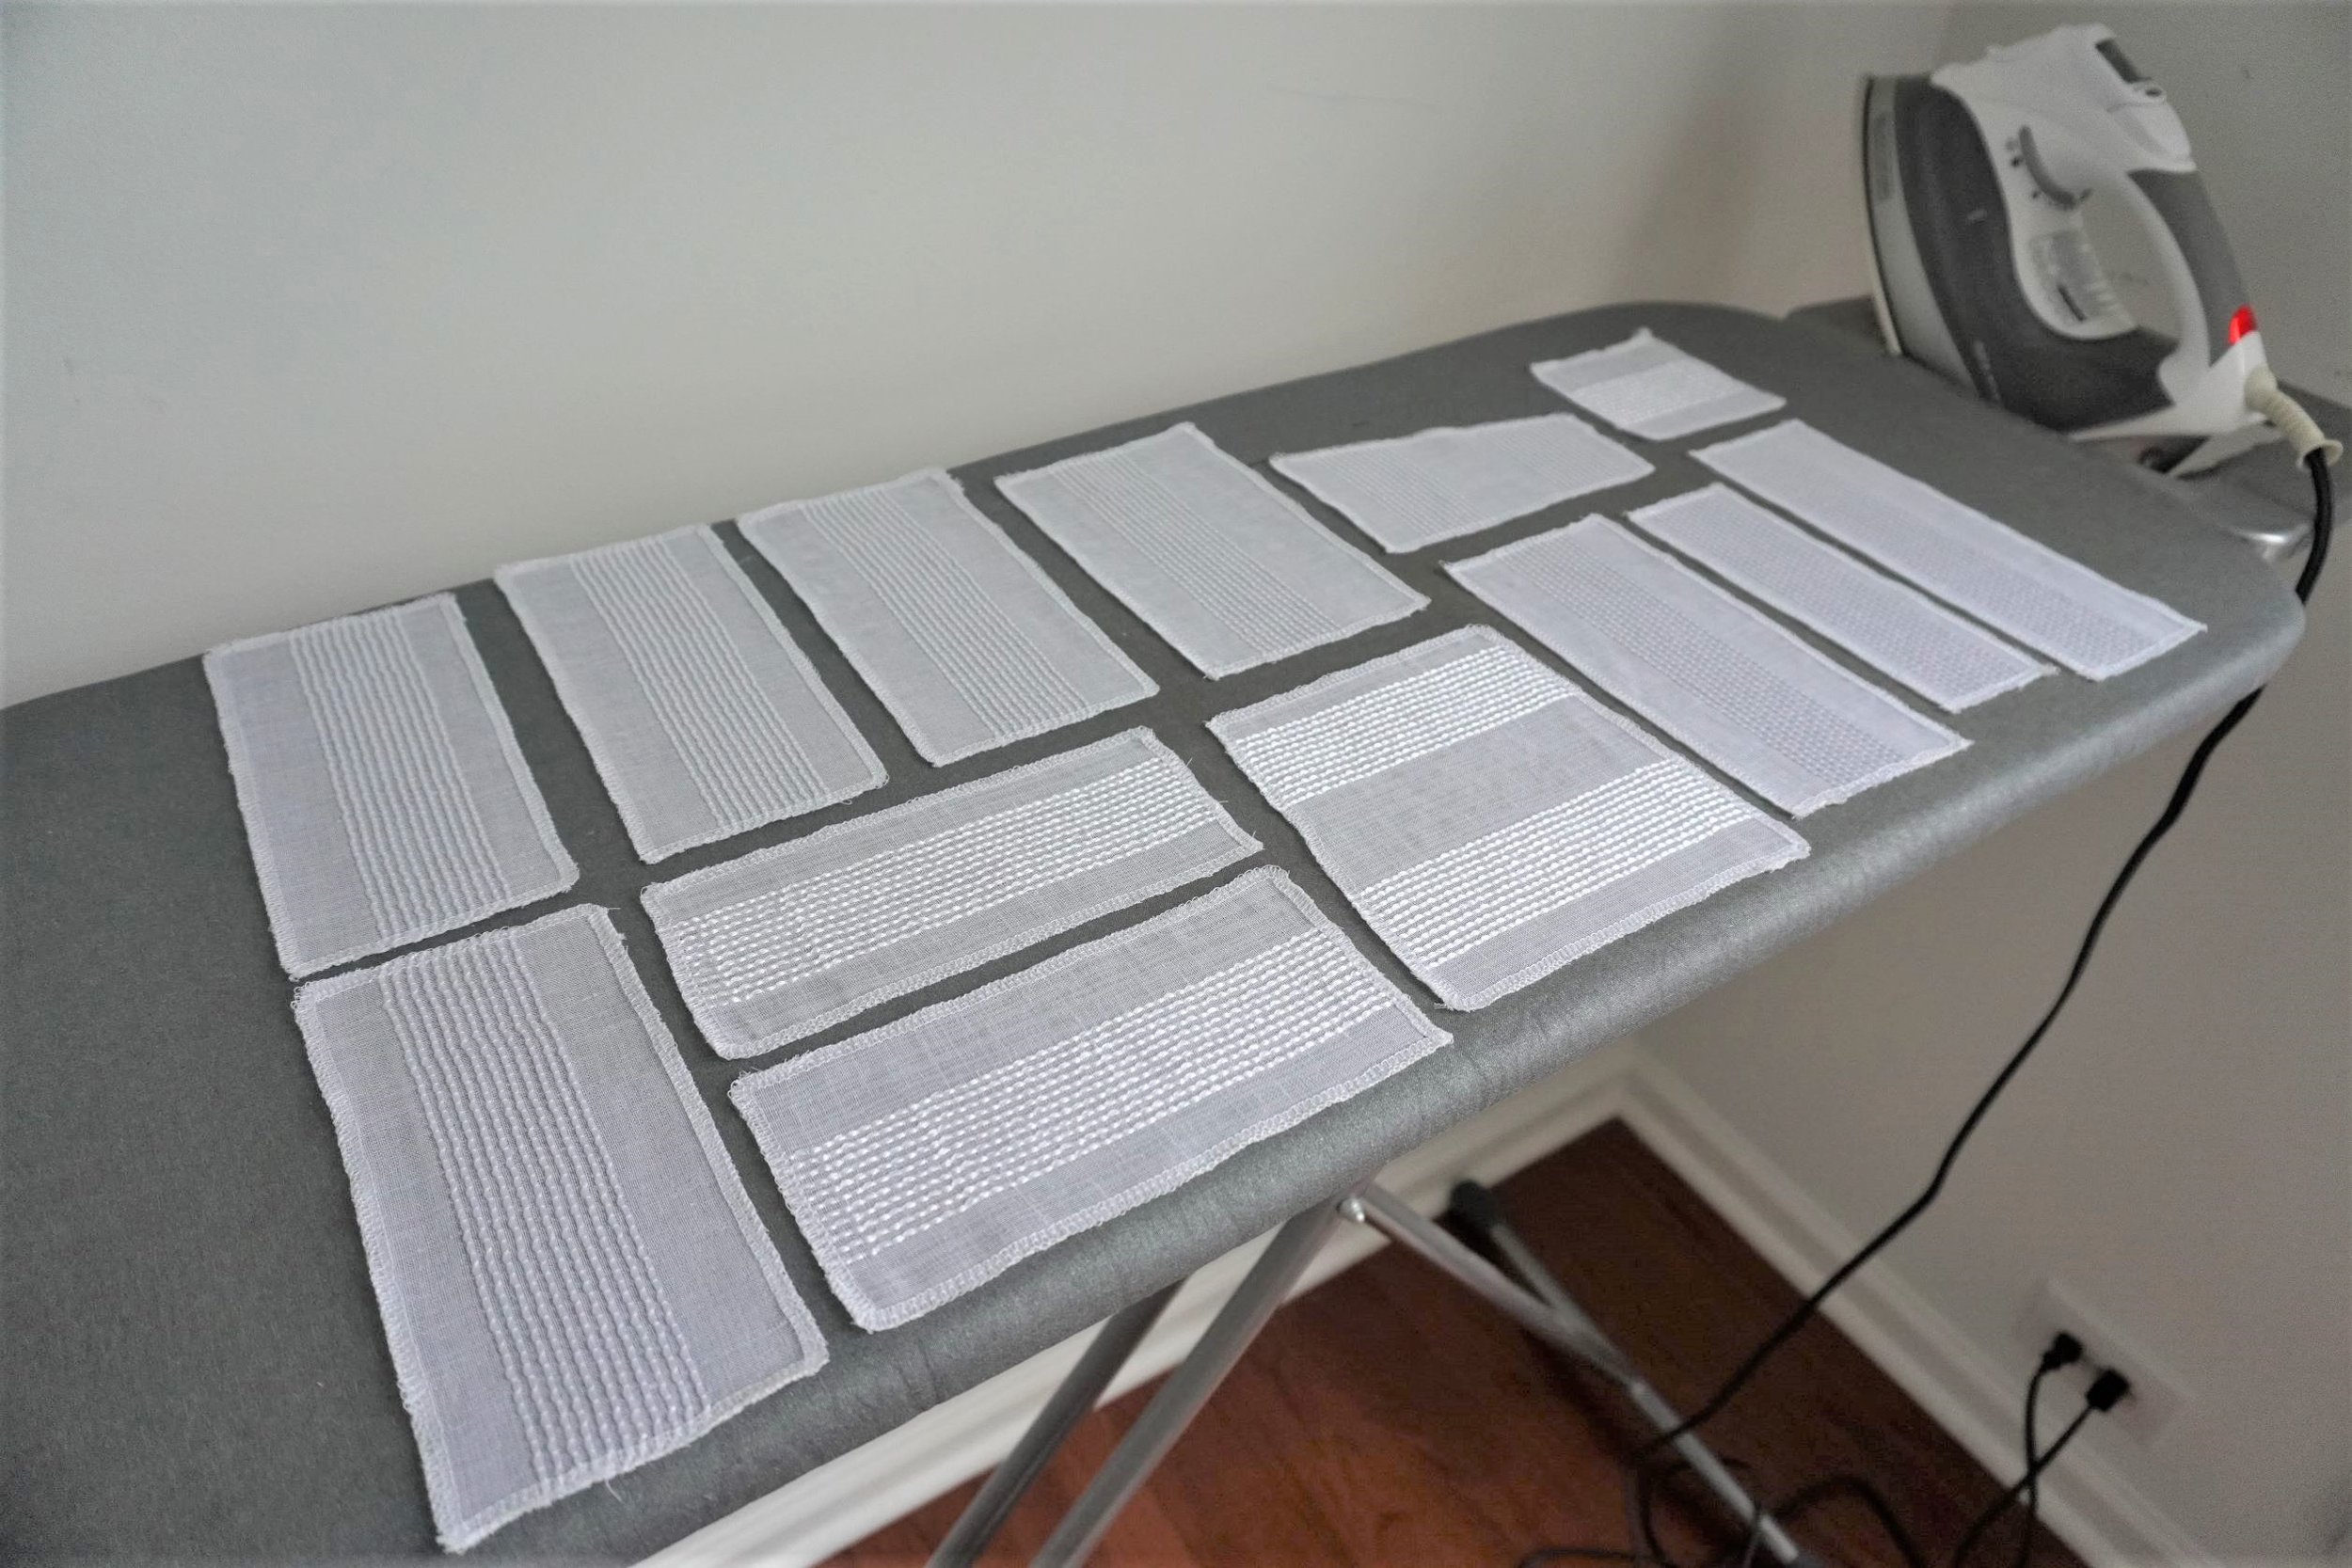
Try to cut pieces that are highly visible (e.g., the front bodice) out in full, and piece together pieces that are in less prominent areas (e.g., the back skirt and underarms of sleeves). For example, here, I just didn’t have enough fabric to fully match the stripe everywhere, so I placed the unavoidable stripe mismatch at the bottom of the back skirt, where it’s (hopefully) not very obvious to the casual observer.

Can you spot the mismatched stripes? (Answer: there’s one at the skirt hem, and the second stripe from the bottom on the right is pieced together from two different pieces of fabric to match the stripe on the left.)
Try to hide piecing seams in stripes or other lines in your printed fabric. Here, I hid the piecing seams next to or in the white stripes in the fabric. The resulting seam is nearly invisible unless you’re really looking very closely.
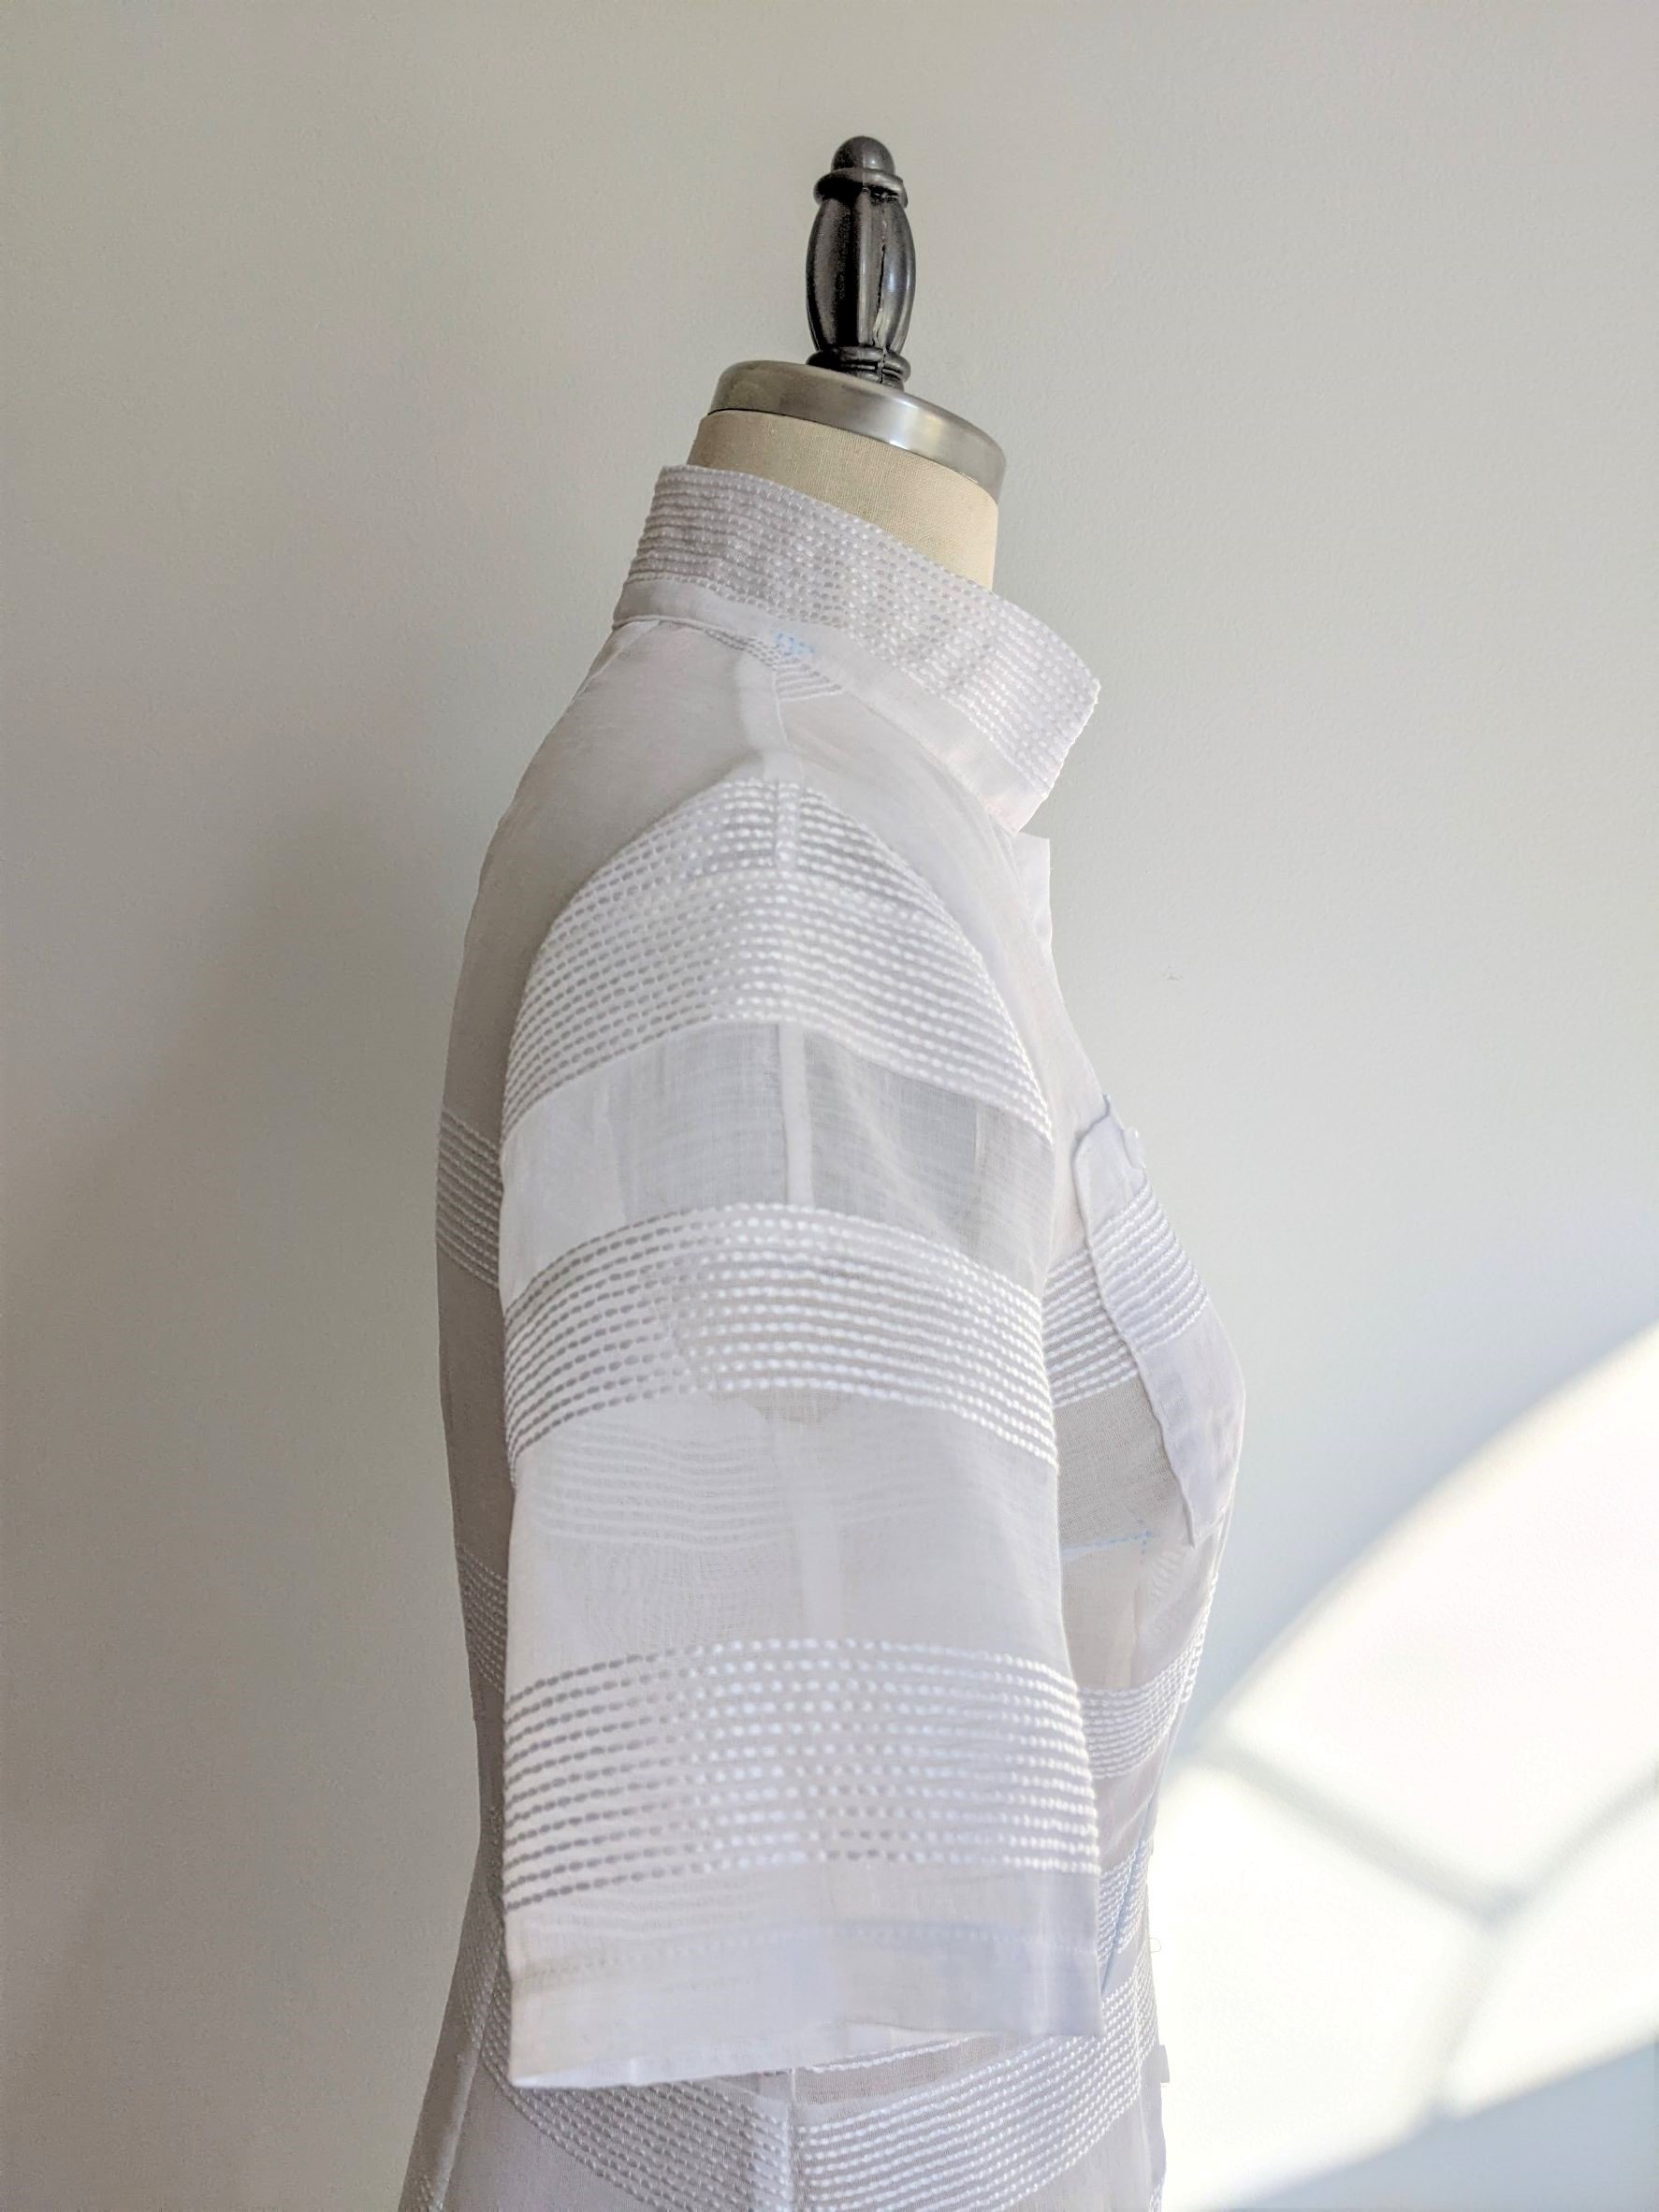
If you can’t hide the piecing seams in the stripe or print of your fabric, appliqué something on top to hide the piecing seam. Here, I had to piece together the sleeves from several bits of fabric, which led to an unavoidable vertical seam down the middle of my sleeve head. To cover that up, I cut out some of the white stripe from other fabric scraps, finished the edges, then topstitched the stripe to the top of the sleeve to cover up the vertical piecing seam. You can still see the vertical seam underneath the white stripe, but it’s much less obvious than it would be without the appliquéd stripe on top.
Dress Construction
Compared to cutting out the pieces, constructing the dress was a relatively breezy affair, even with all of the changes that I made to the pattern:
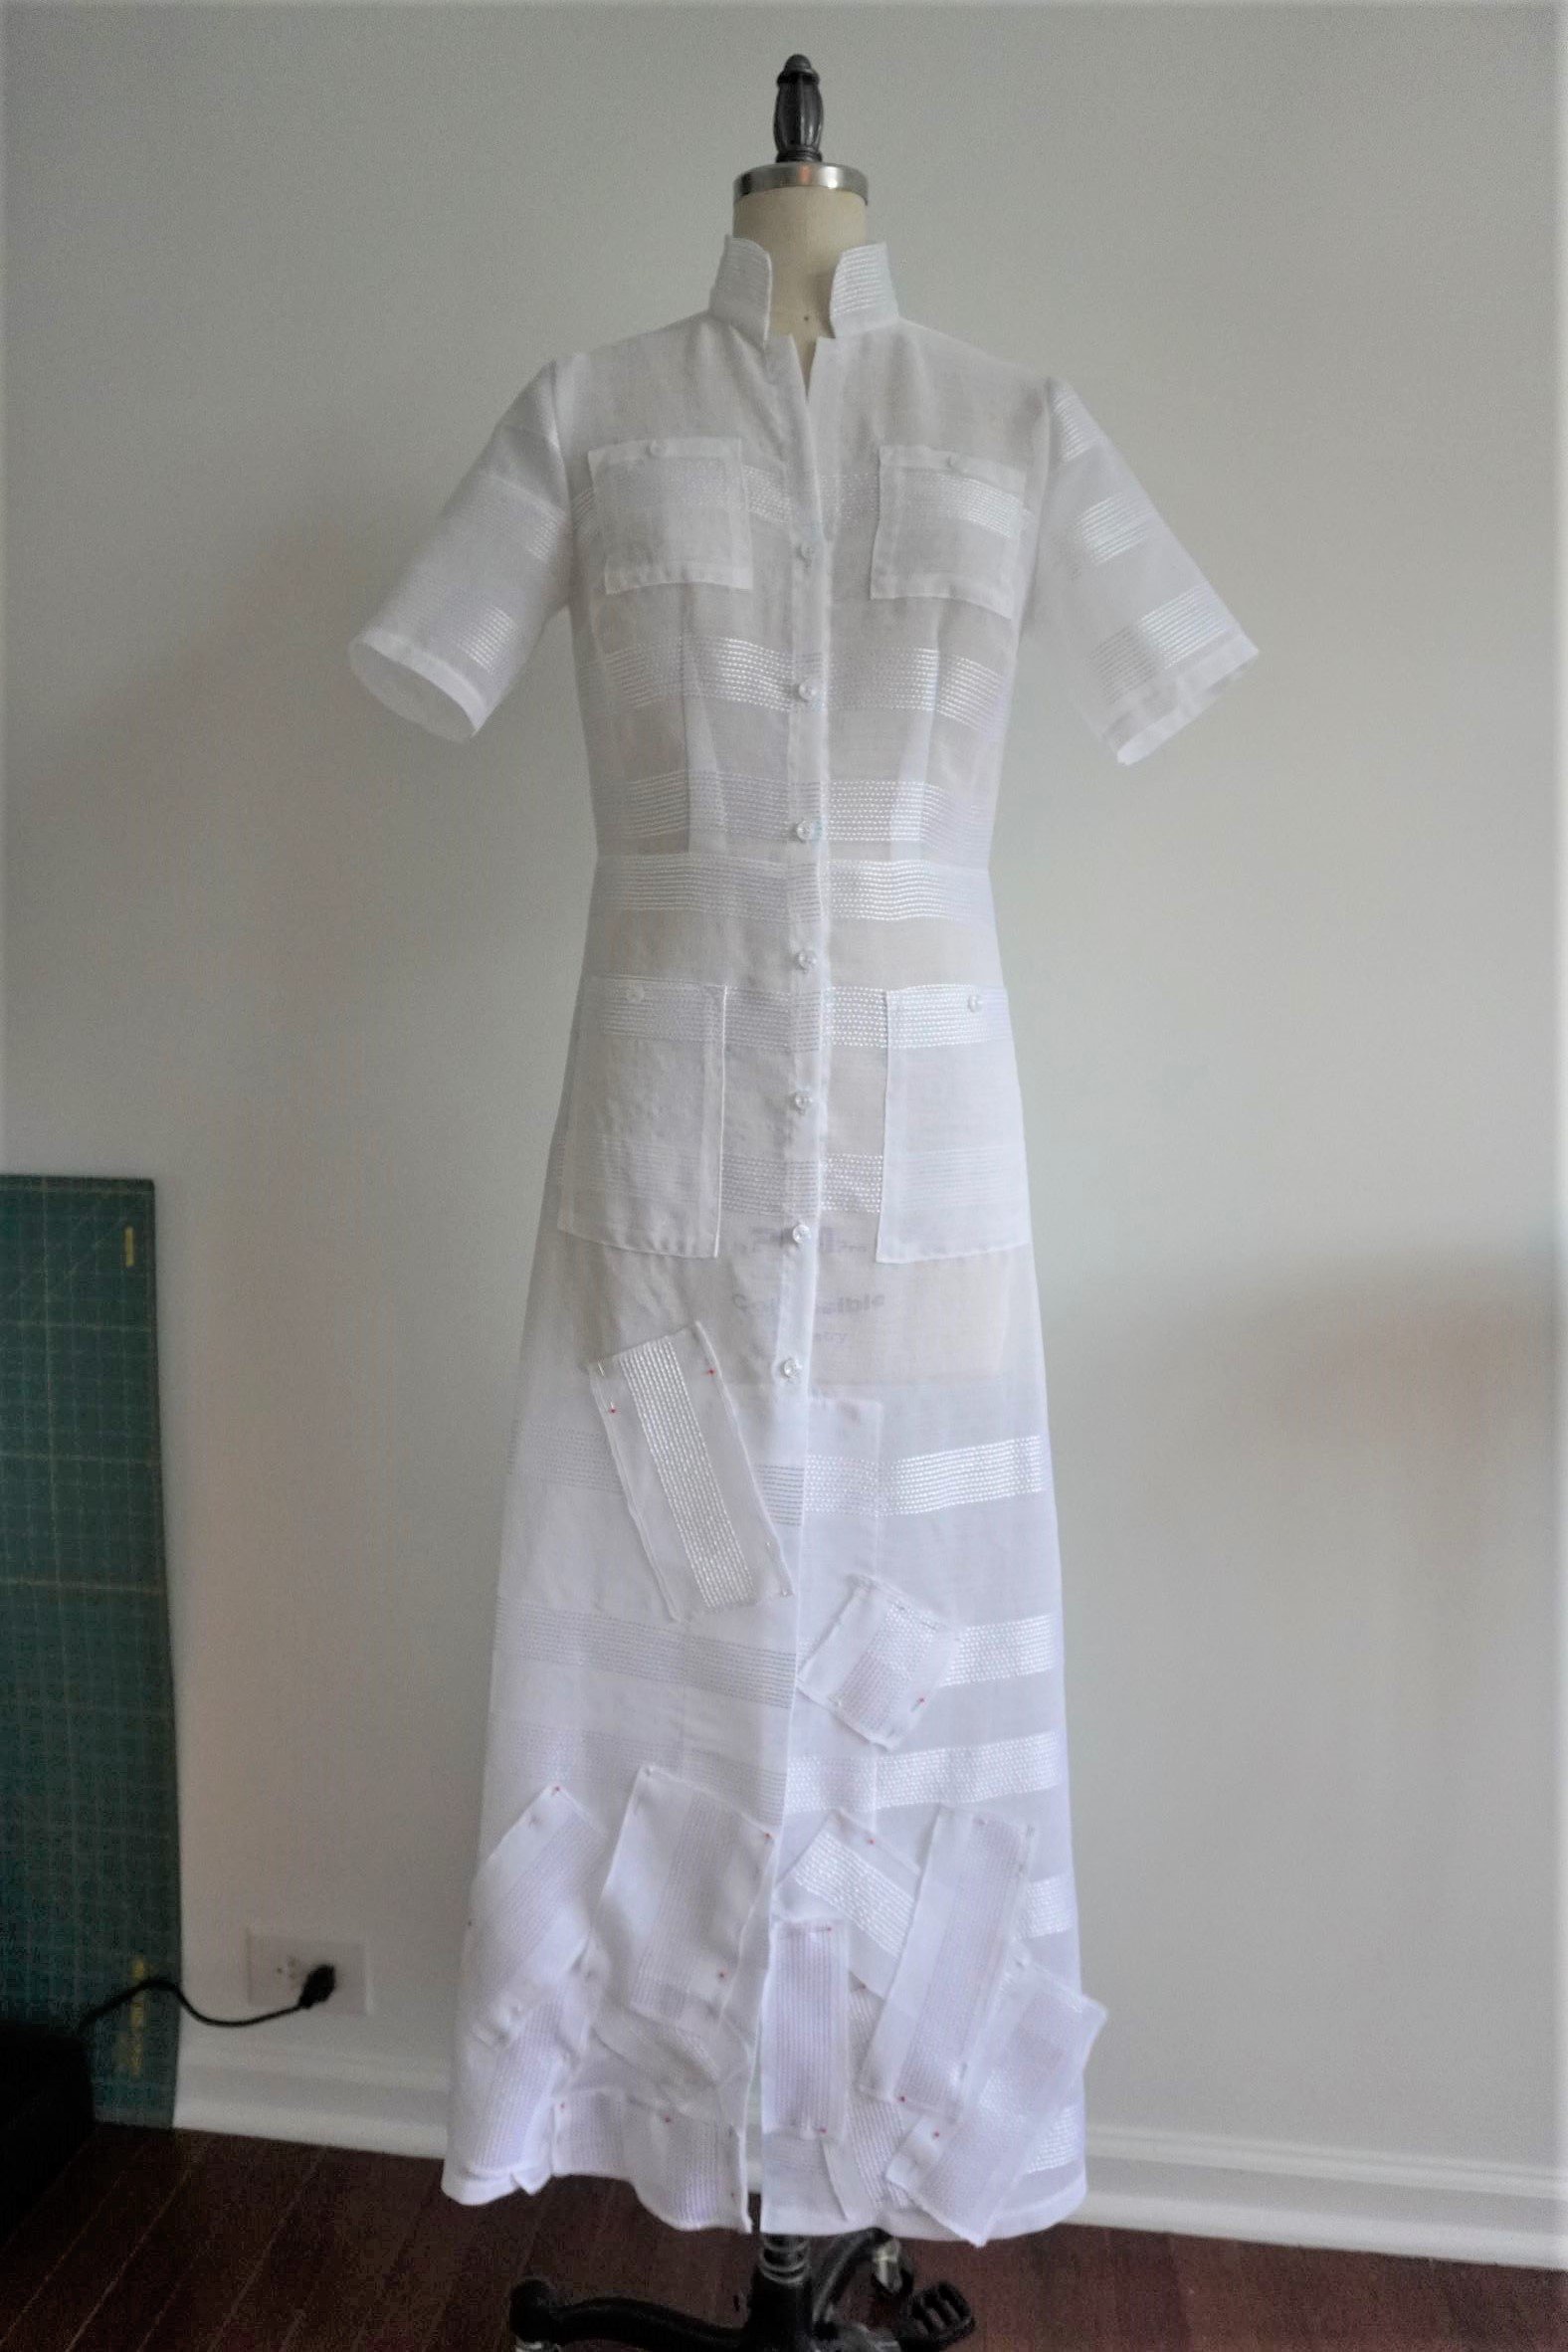
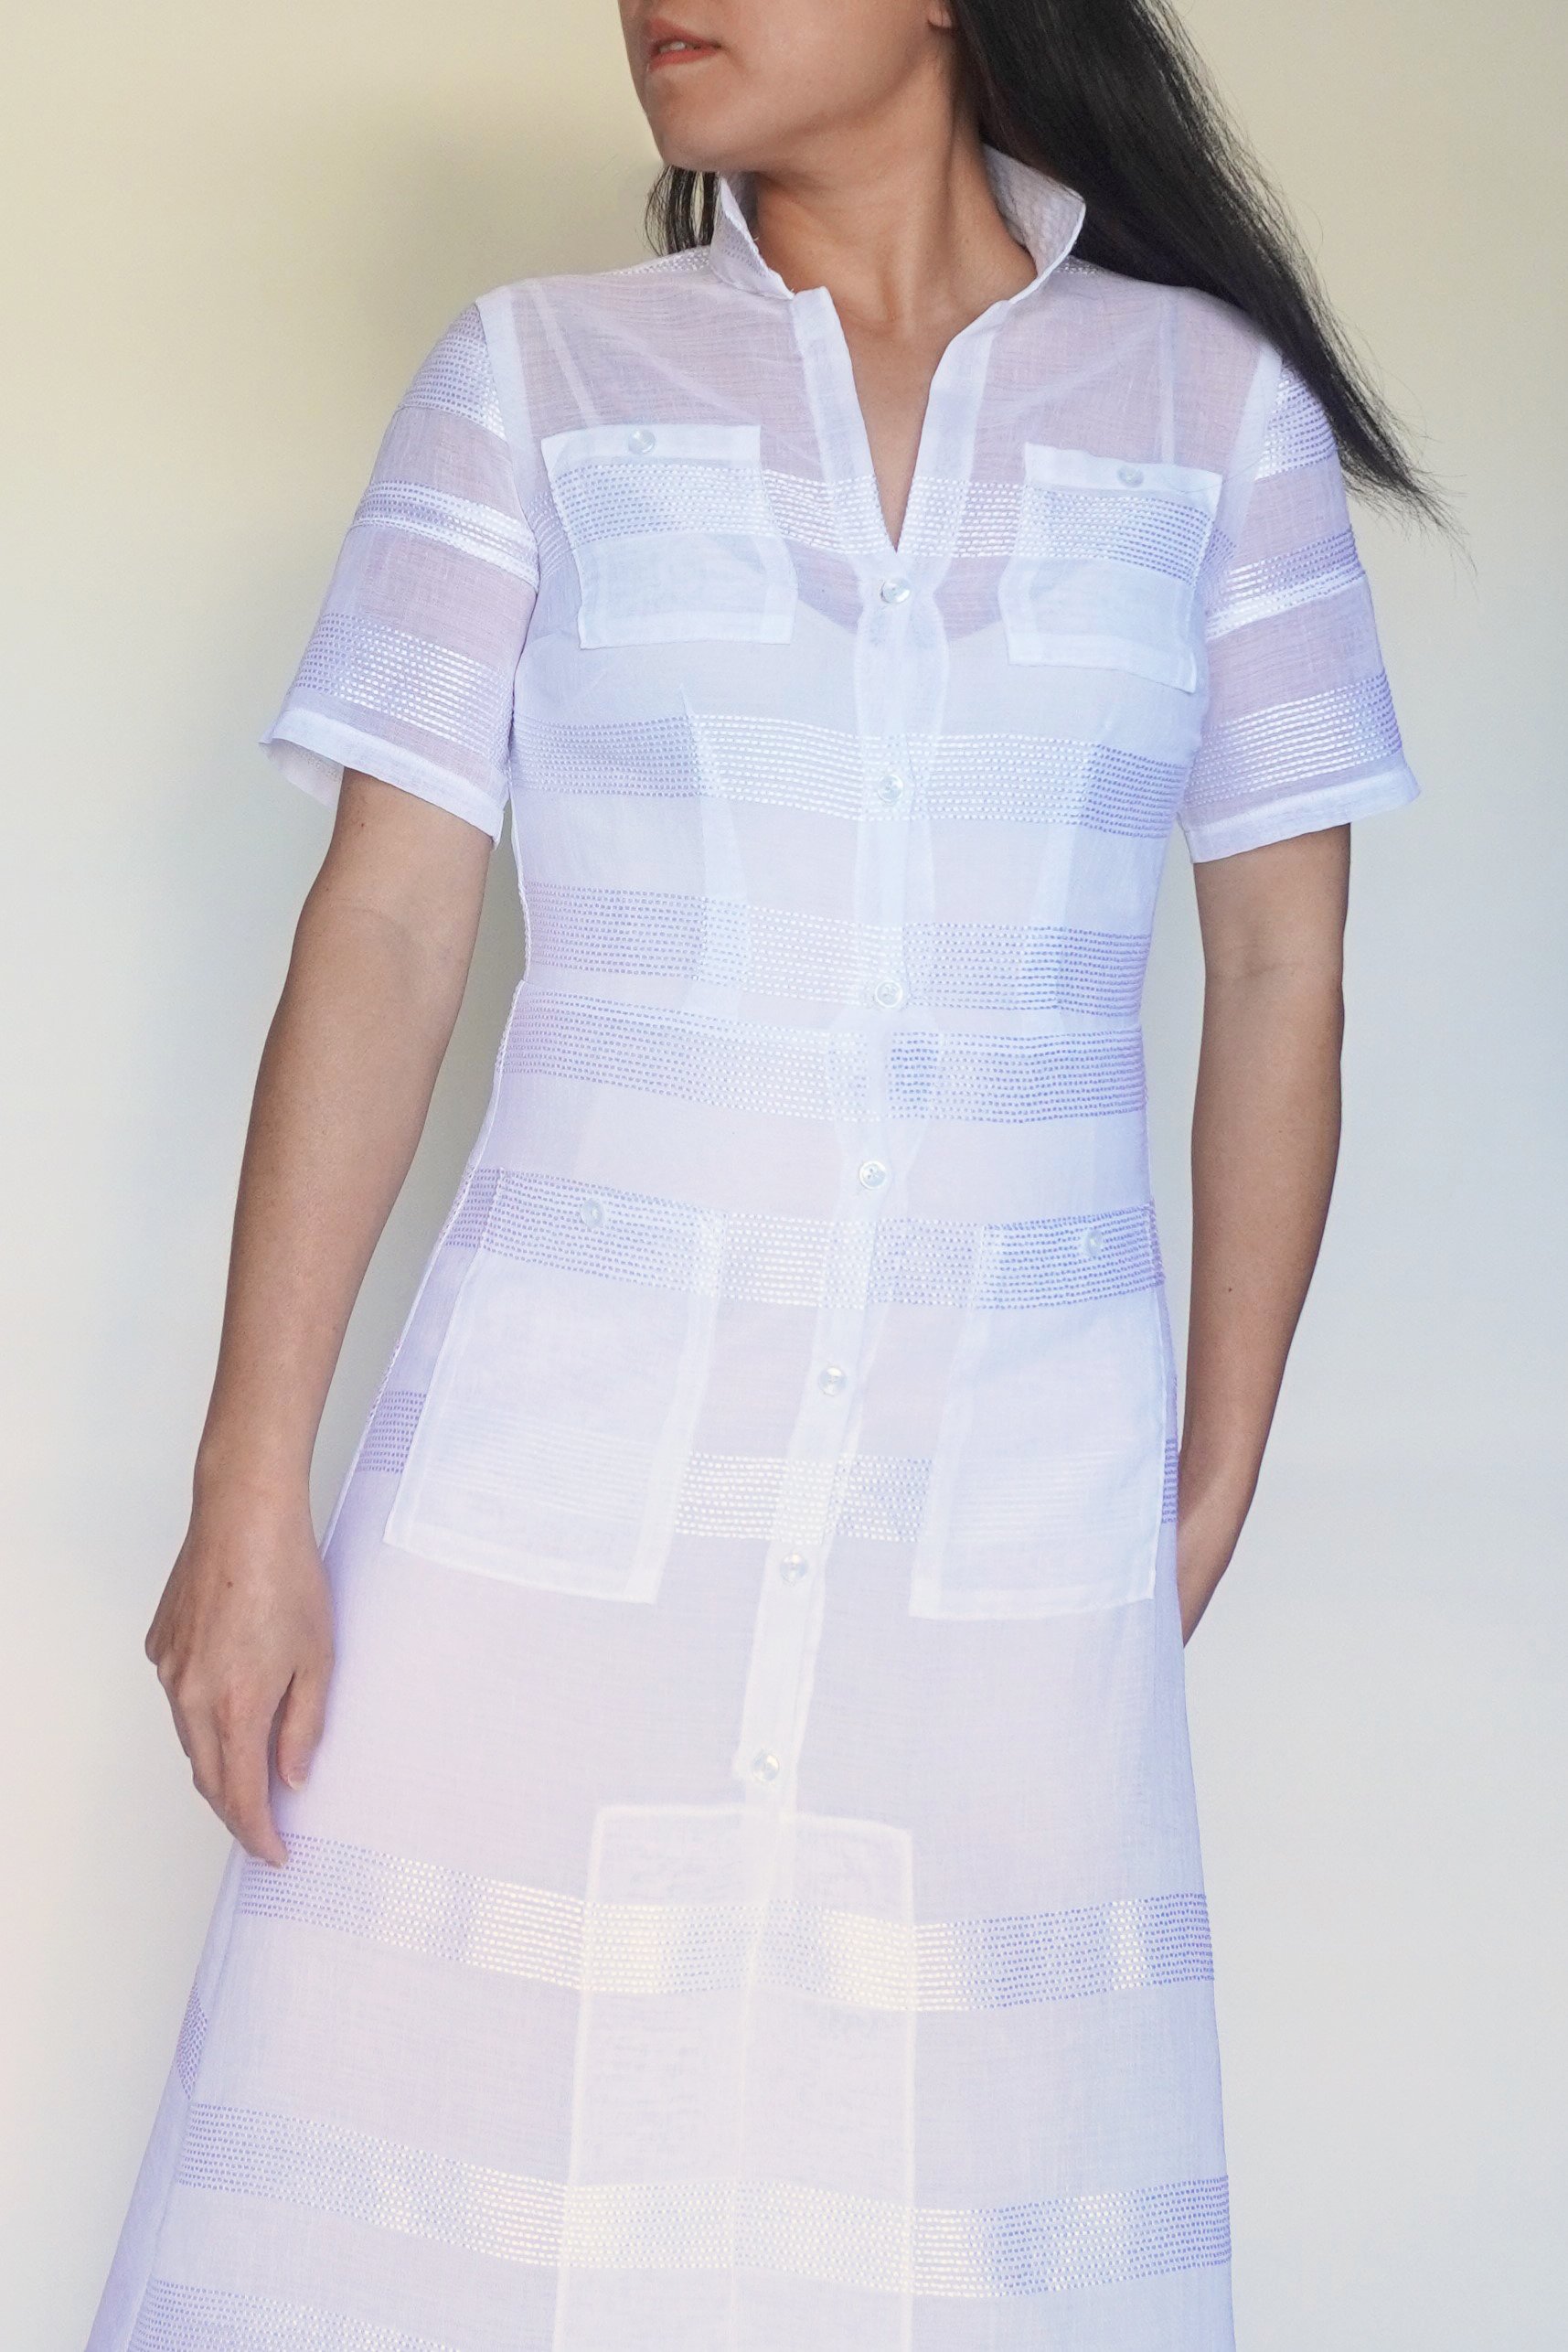
I changed the closure so that instead of zipping up the back, the dress buttons down the front. My reasoning was that for a beach coverup, it would be much more practical to have the dress button down the front, rather than struggling to zip up the back of the dress while I’m dripping wet from the pool/ocean. Plus, shifting the closure to the front would give me the option of wearing the dress open, over a pair of pants and a shirt. To make this change, I cut and sewed the bodice and skirt pieces as drafted, sewed the back bodice pieces together at the center back, then instead of sewing the front bodice pieces together at the center front as directed in the pattern instructions, I sewed a 1 ¼ inch wide panel to the center front edges (using a ¼ seam allowance) to make a button stand. I did not interface the button stand, because I wanted the button stand area to stay sheer. I then made buttonholes and sewed on ½ inch clear white shirt buttons.
I removed the panel underneath the front slit. Because I’m planning to wear this at the beach or pool, rather than somewhere more conservative where modesty might be important, I thought it was fine to let the front fall open and reveal a bit of leg. 😉
I did not apply contrast trim at the center front. Originally, I thought it might be nice to apply some of the white stripe vertically at the center front, but when I tried pinning it on the dress form the dress became much too busy. Ultimately, leaving the dress nice and clean, with just horizontal stripes, was much more sleek and sophisticated-looking.
I did not interface the collar, as I wanted it to be sheer underneath the stripes. Instead, I sewed several lines of topstitching through the inner and outer layers of the collar, along each of the horizontal stripes. This extra stitching made the collar a bit stiffer so that it stands up when the dress is worn.
I skipped the belt, which I thought was unnecessary as the dress is already quite fitted around the waist (plus, I didn’t have enough fabric left over to make the belt).
I hemmed the skirt and sleeves by folding over ¾ inch at the edge, then folding again and topstitching down. The instructions call for you to finish the hem by folding up 1 ¼ inch and sewing in place, but I didn’t do that because I didn’t want a thick opaque band cutting off my legs at the skirt hem (that is not flattering to my short little legs!).
Aside from all of those changes, sewing up the dress was a breeze. For the most part, I used French seams, so the inside of the dress is as neat as the outside, and I used a lot of pins to make sure that the stripes matched up precisely throughout the dress. There’s nothing more satisfying to me in life than a precisely matched print. (Though, admittedly, a close second is using up the very last drop of shampoo/lotion/sauce in the bottle. You can probably guess my personality type.)
The key to happiness is precisely matched stripes.
After I finished making the dress, I still had a bunch of tiny leftover scraps of white striped fabric, so I tried placing them all around the dress to add some texture and visual interest. I had grand visions/delusions in my head of concocting a tulle/chiffon fairy tale dress, à la Christian Siriano in the Project Runway years, but instead ended up with this sad-looking fashion student experiment:
Dispirited, I discarded that idea and instead played around with piecing together the scraps into a small scarf. I serged the edges of all of the pieces, then pinned and sewed them together using a zigzag stitch. I really like the net-like effect on the finished scarf, though I’m honestly not sure how I’ll wear it – perhaps I can tie it like a head scarf, or turn it into a tote bag? We’ll see.


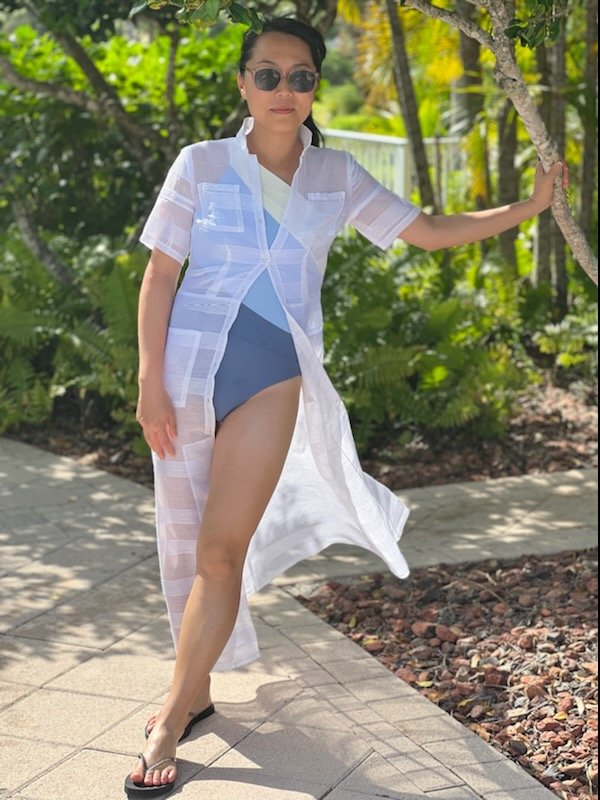
The Finished Dress
I really like the look of the finished dress, which I do think will work well as a beach or pool coverup, or even as a dress worn over pants. The dress fits well around the bodice – there’s no gaping in the neckline, and the back bodice falls smoothly across my back. My one gripe is that the polyester fabric feels a tiny bit rough against my skin, but what do you expect with 100% polyester…


I just got back from a beach vacation, and this piece was in heavy rotation on that trip! Let me know in the comments if you end up making a sheer dress from some sheer curtains – I’d love to see your version!