In the musical classic The Sound of Music, Maria von Trapp makes clothes for all of the von Trapp children using the green floral-print curtains hanging in their house. Scarlett O’Hara also famously tore down the velvet draperies hanging in her bedroom and transformed them into an opulent ballgown, fit for flirting with Rhett Butler.

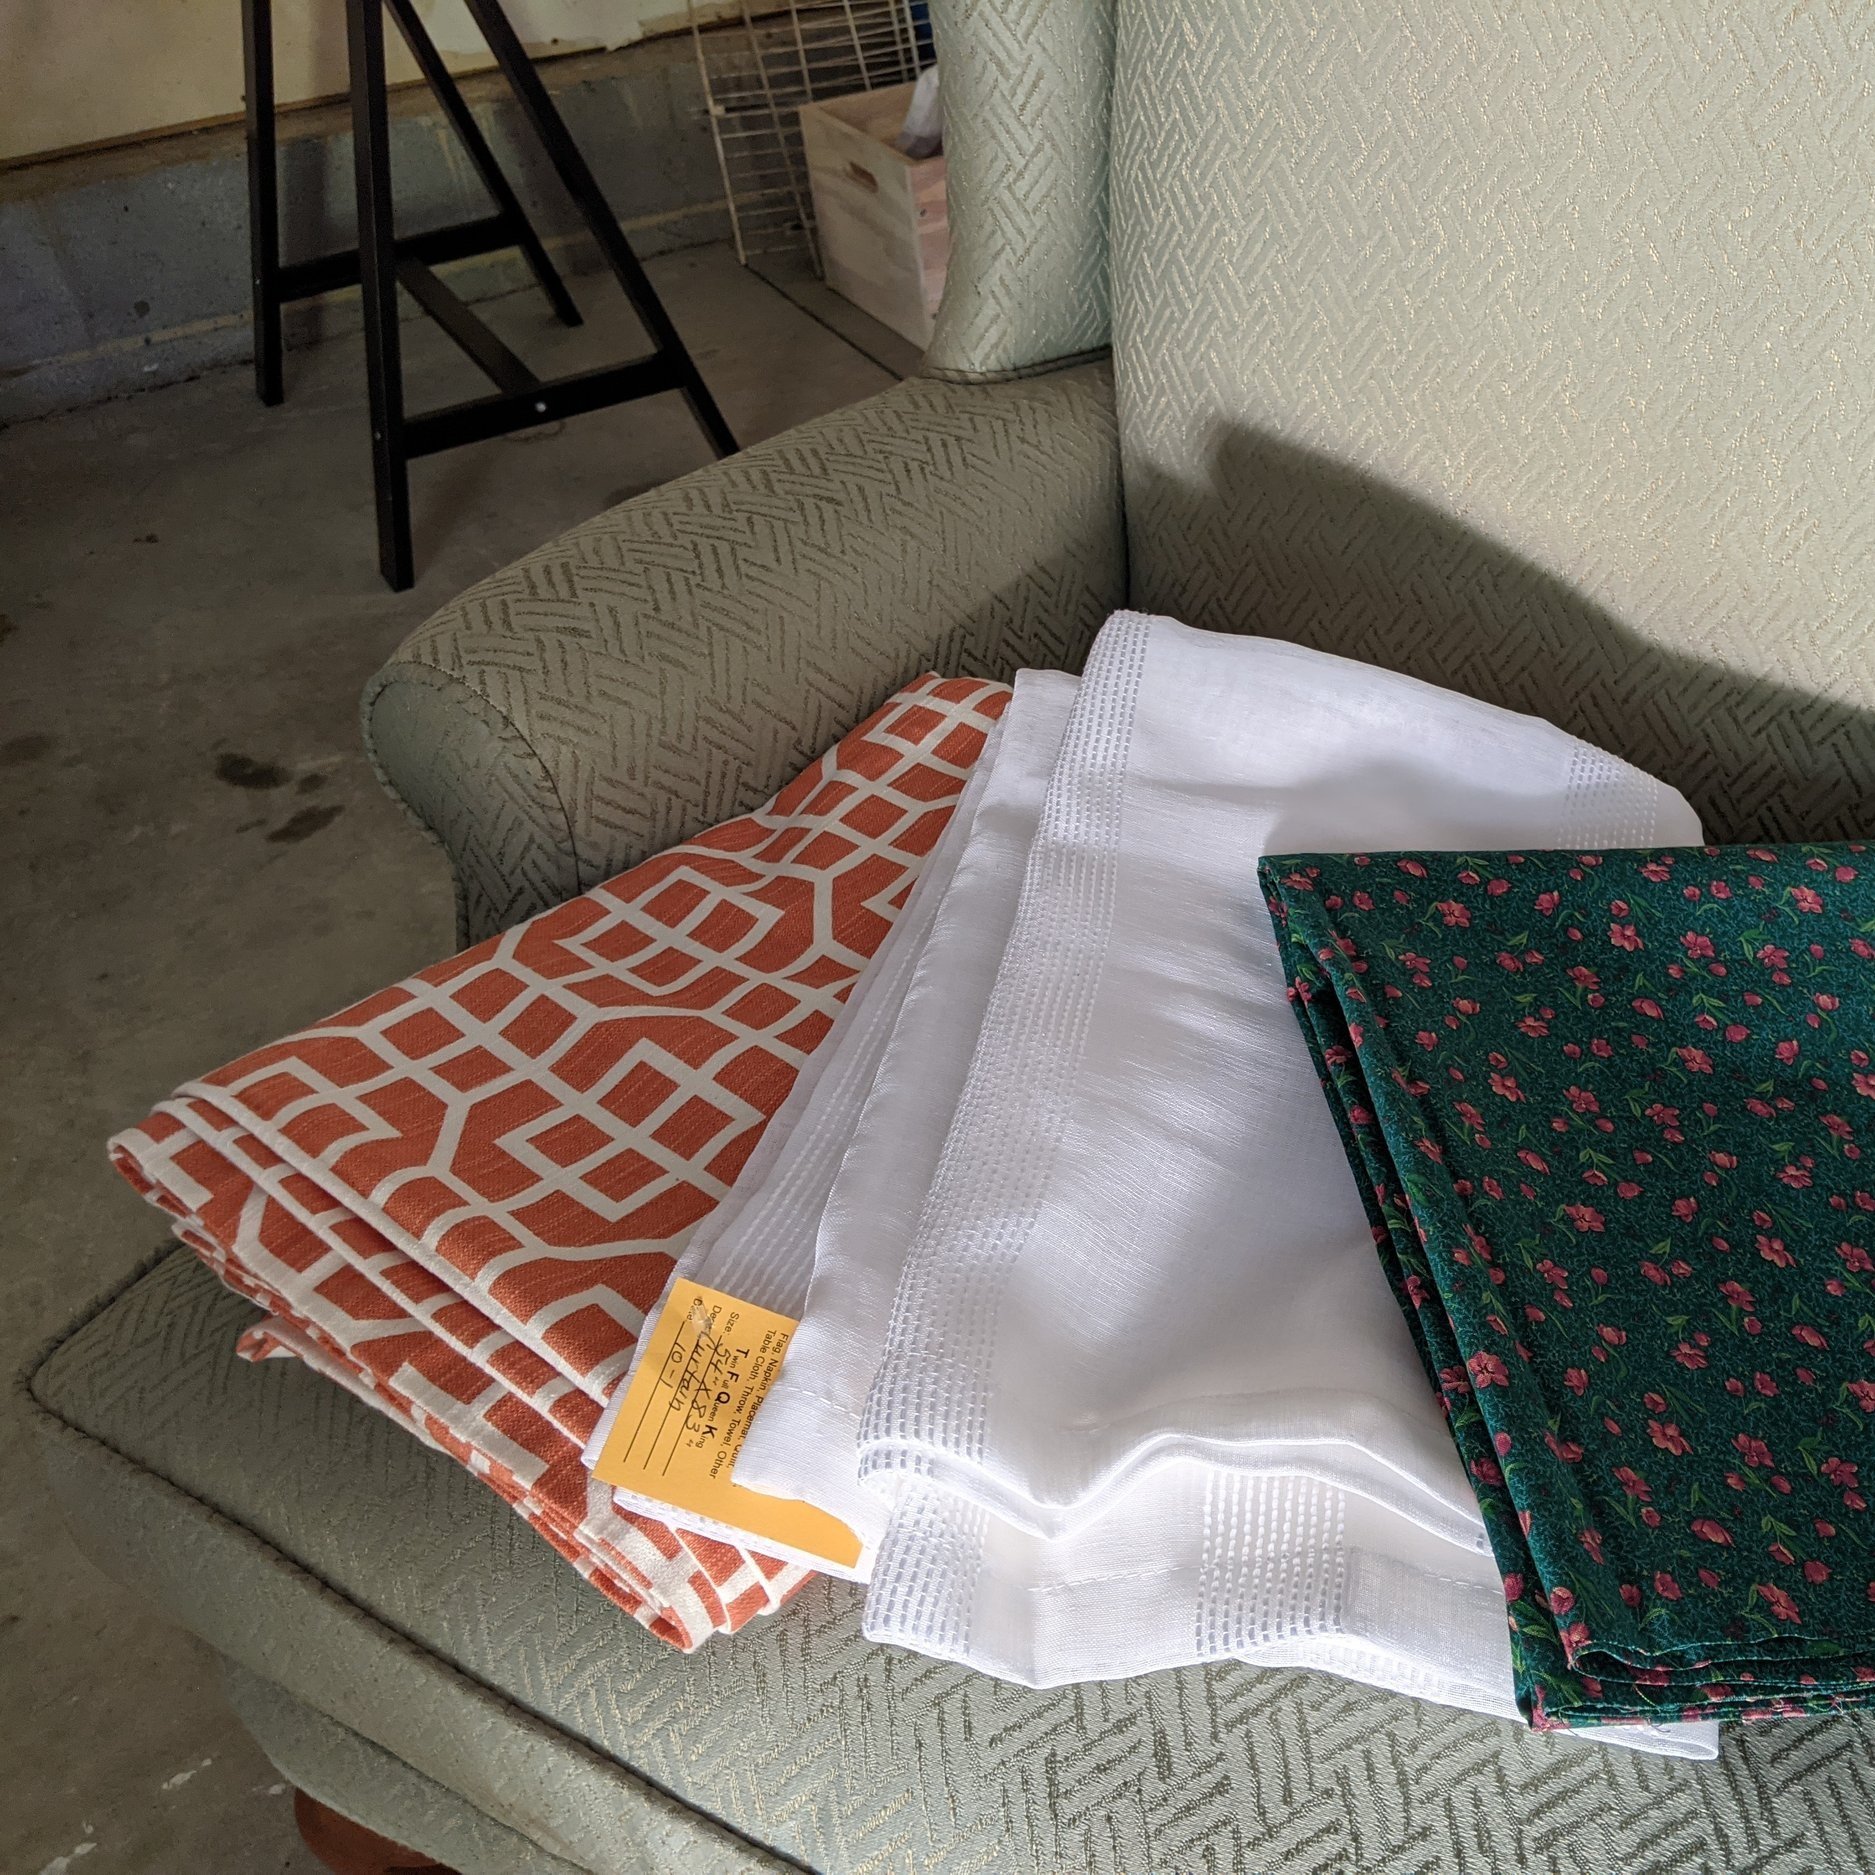
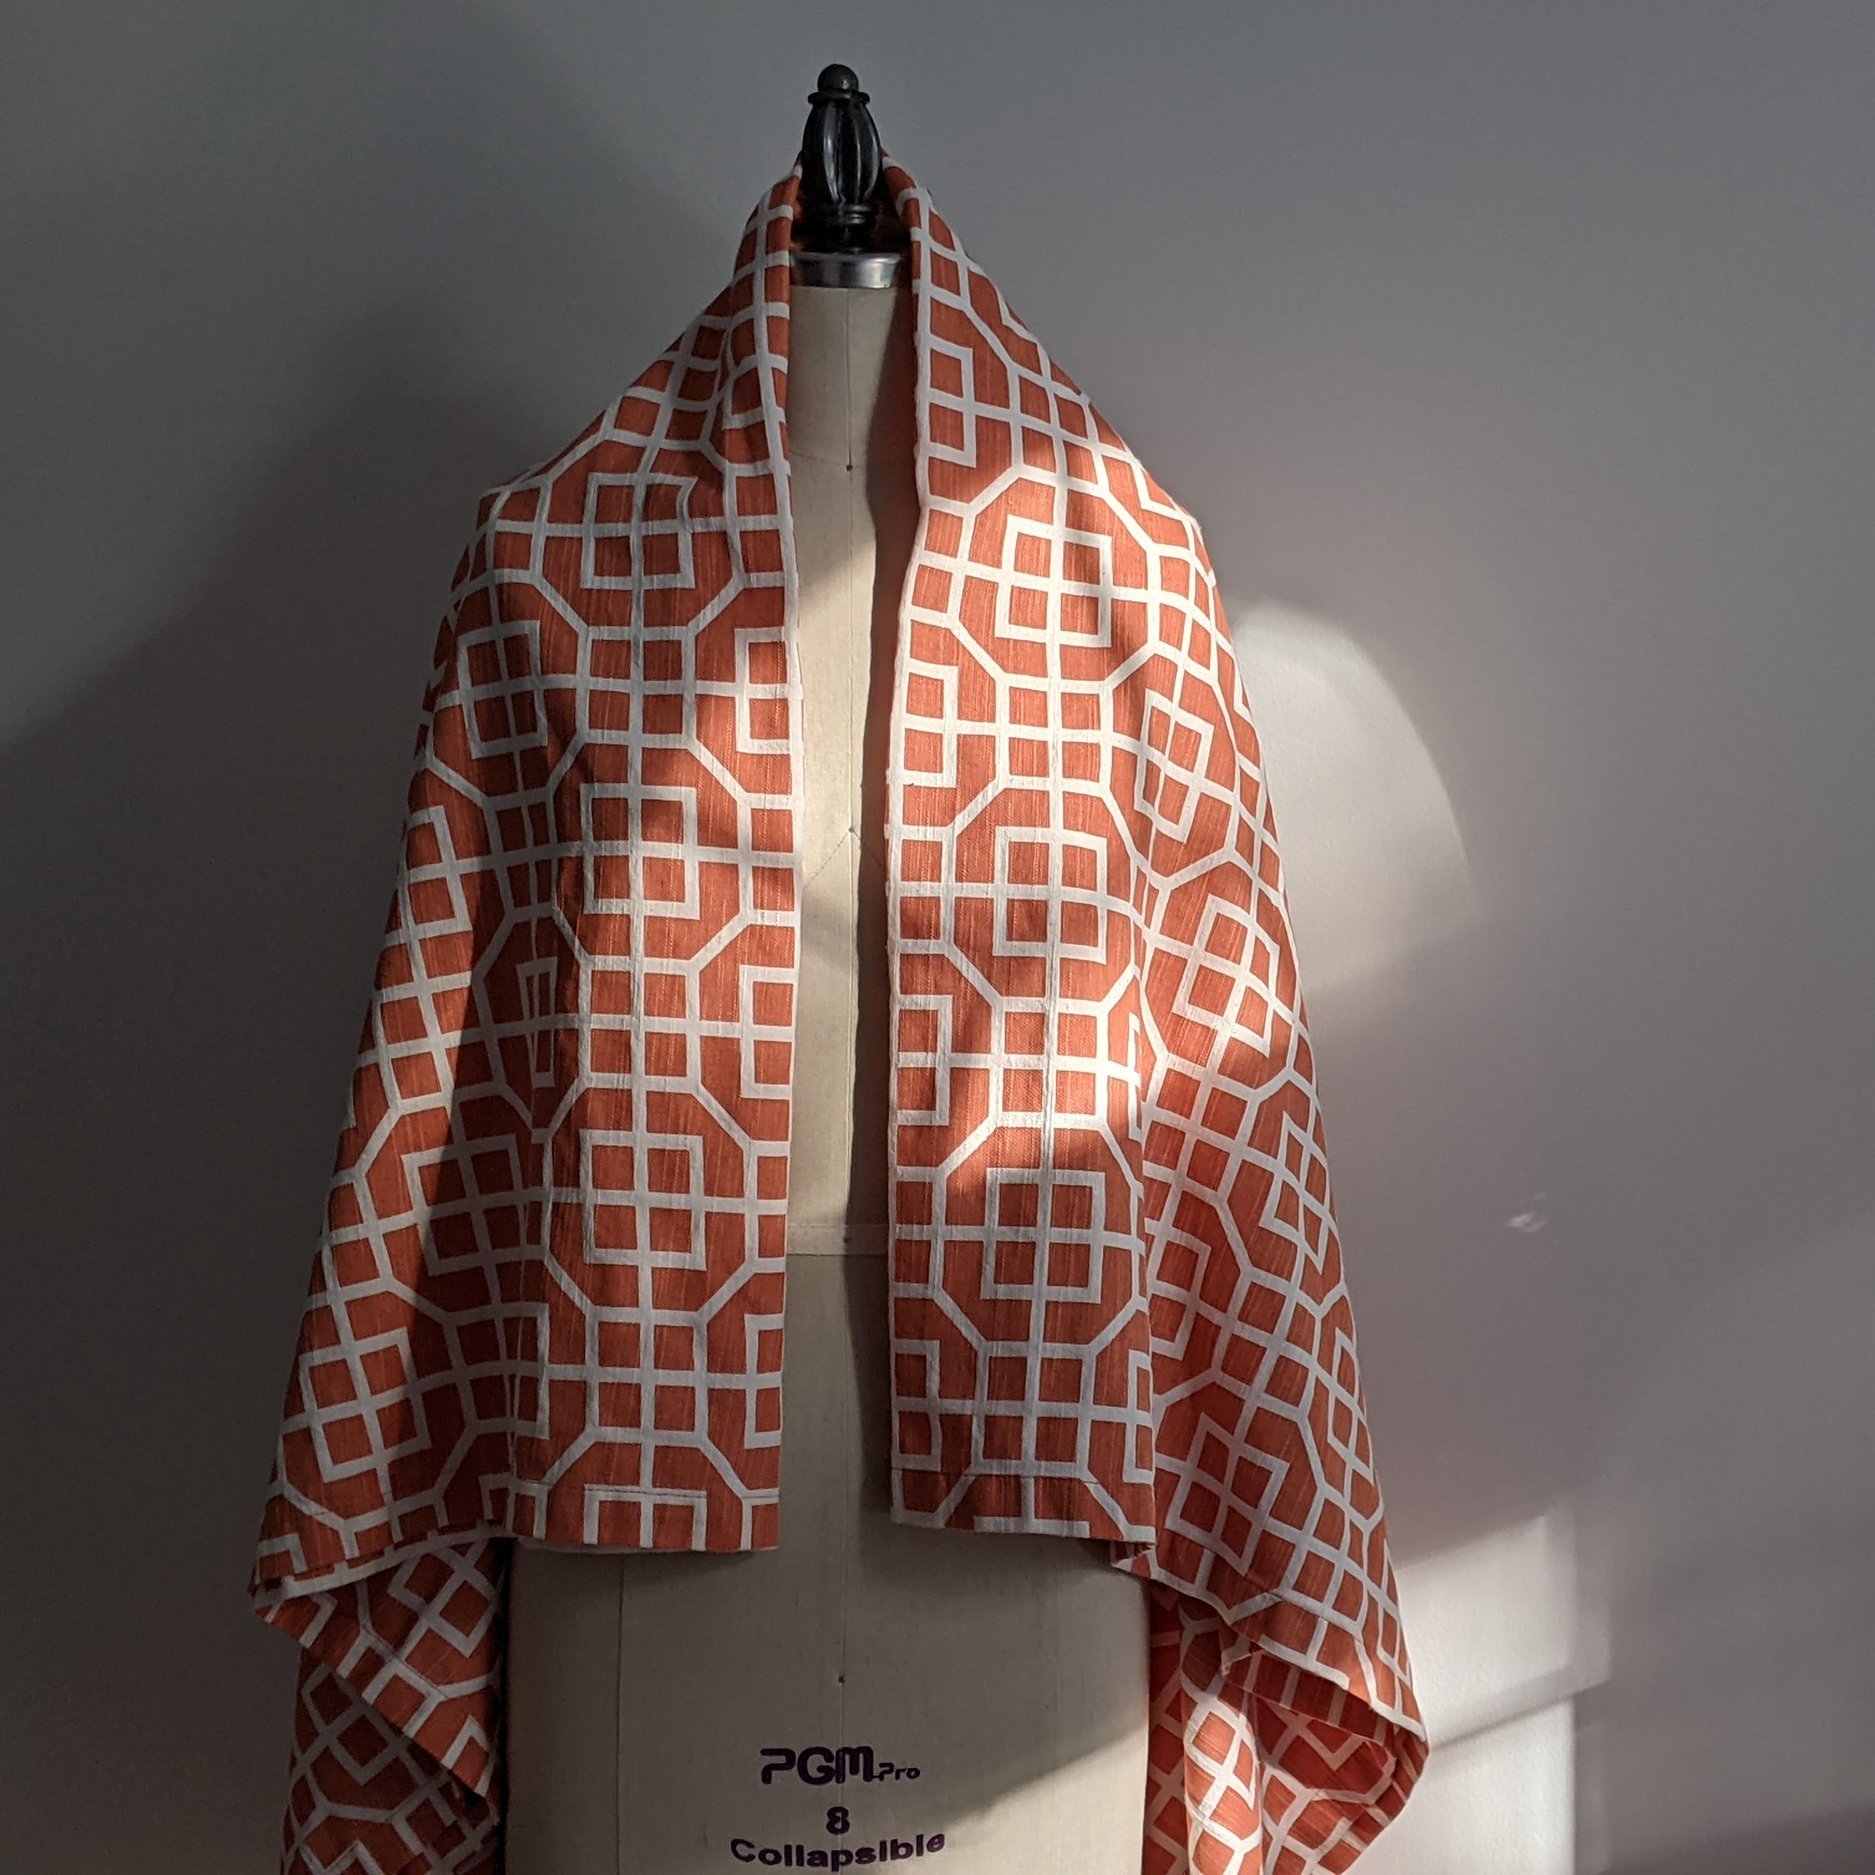
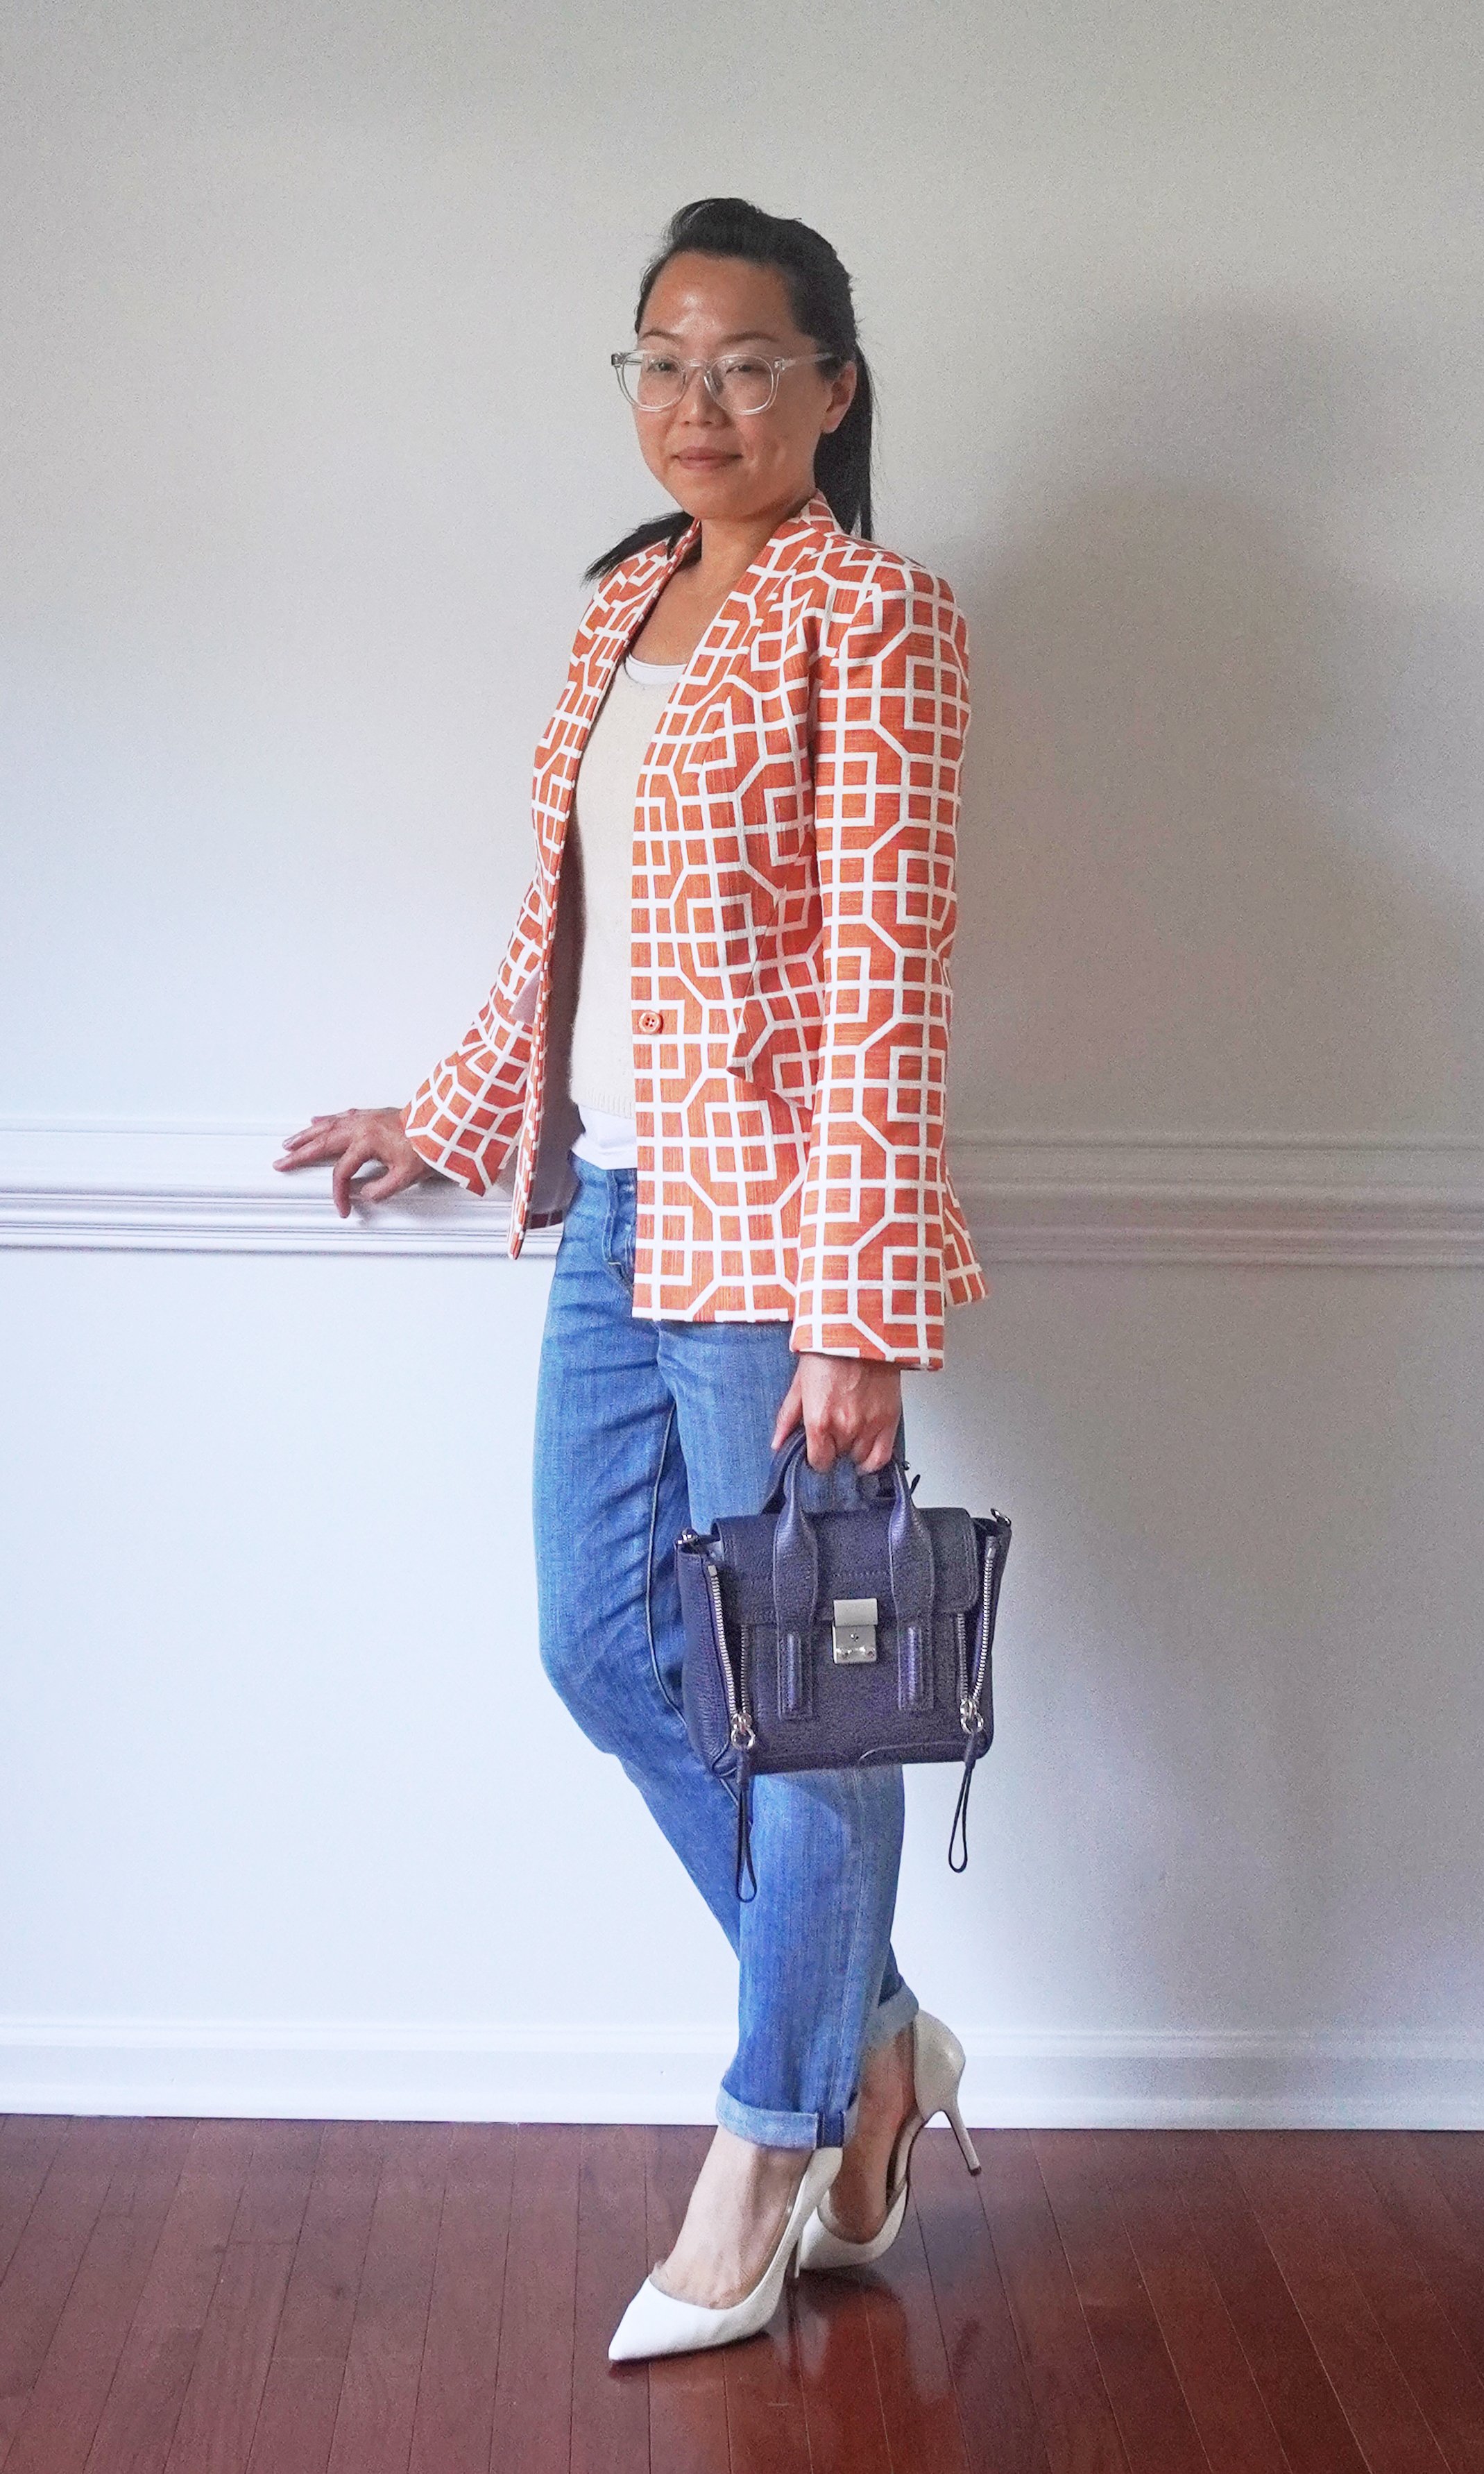
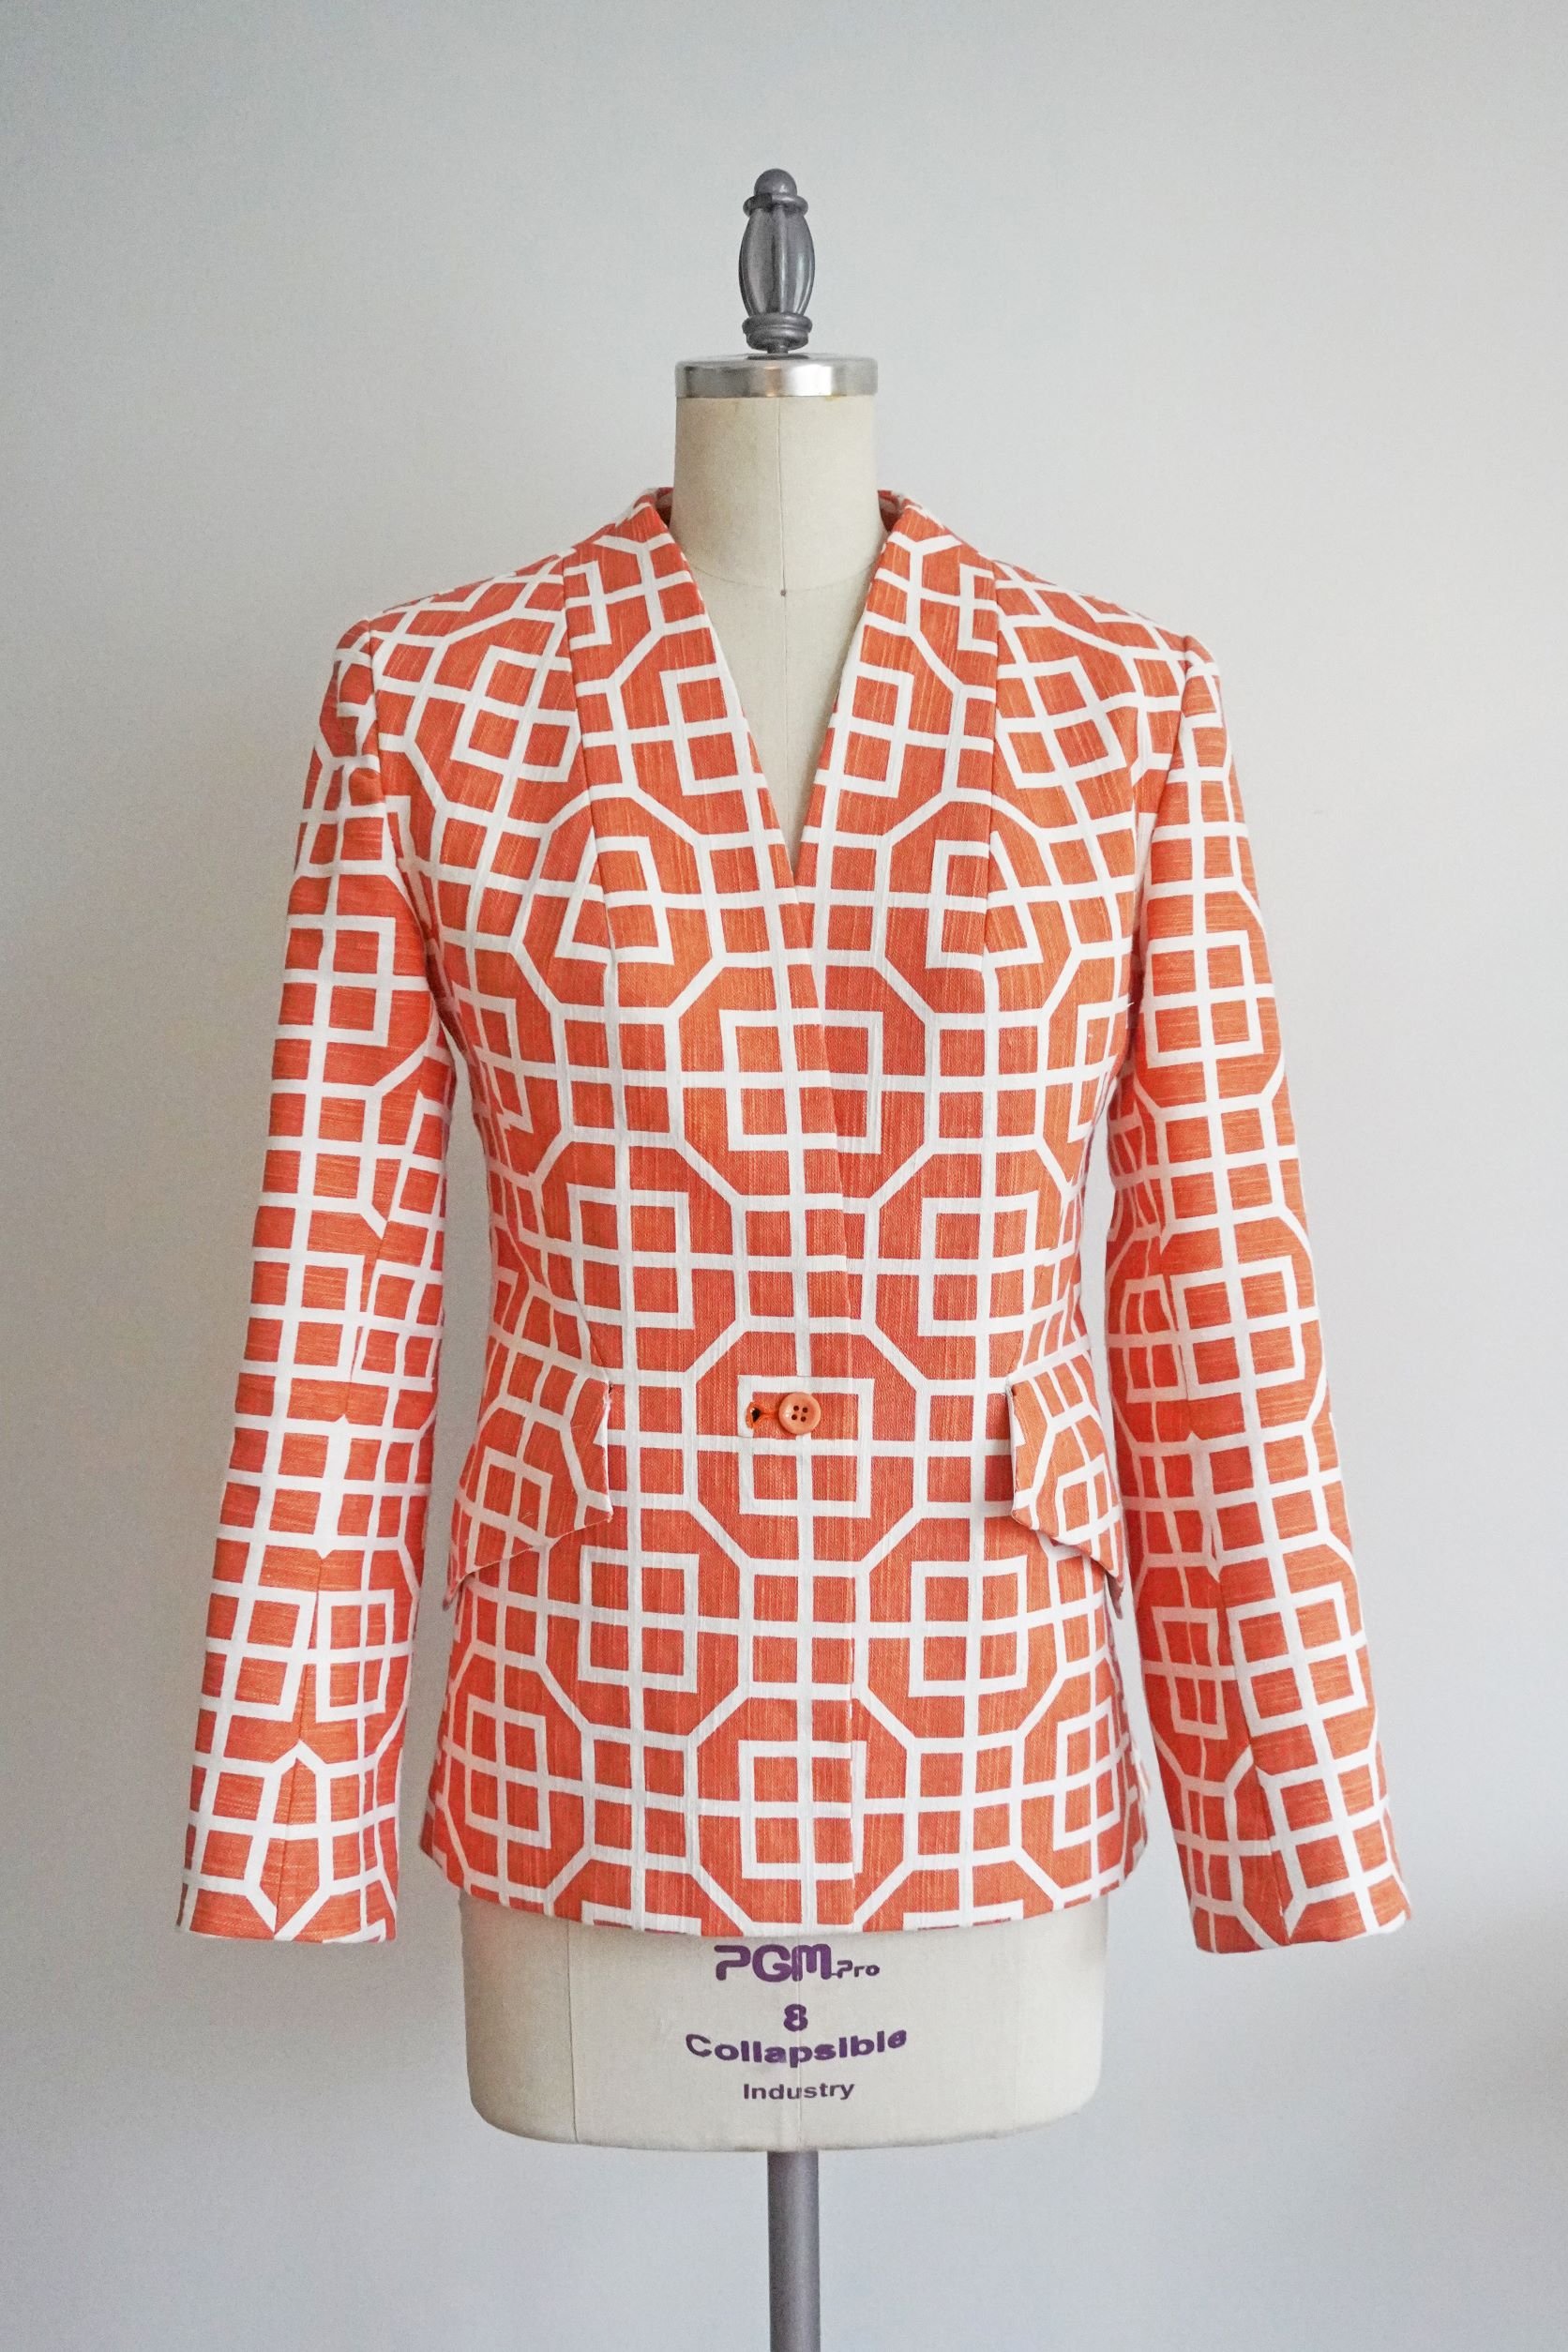
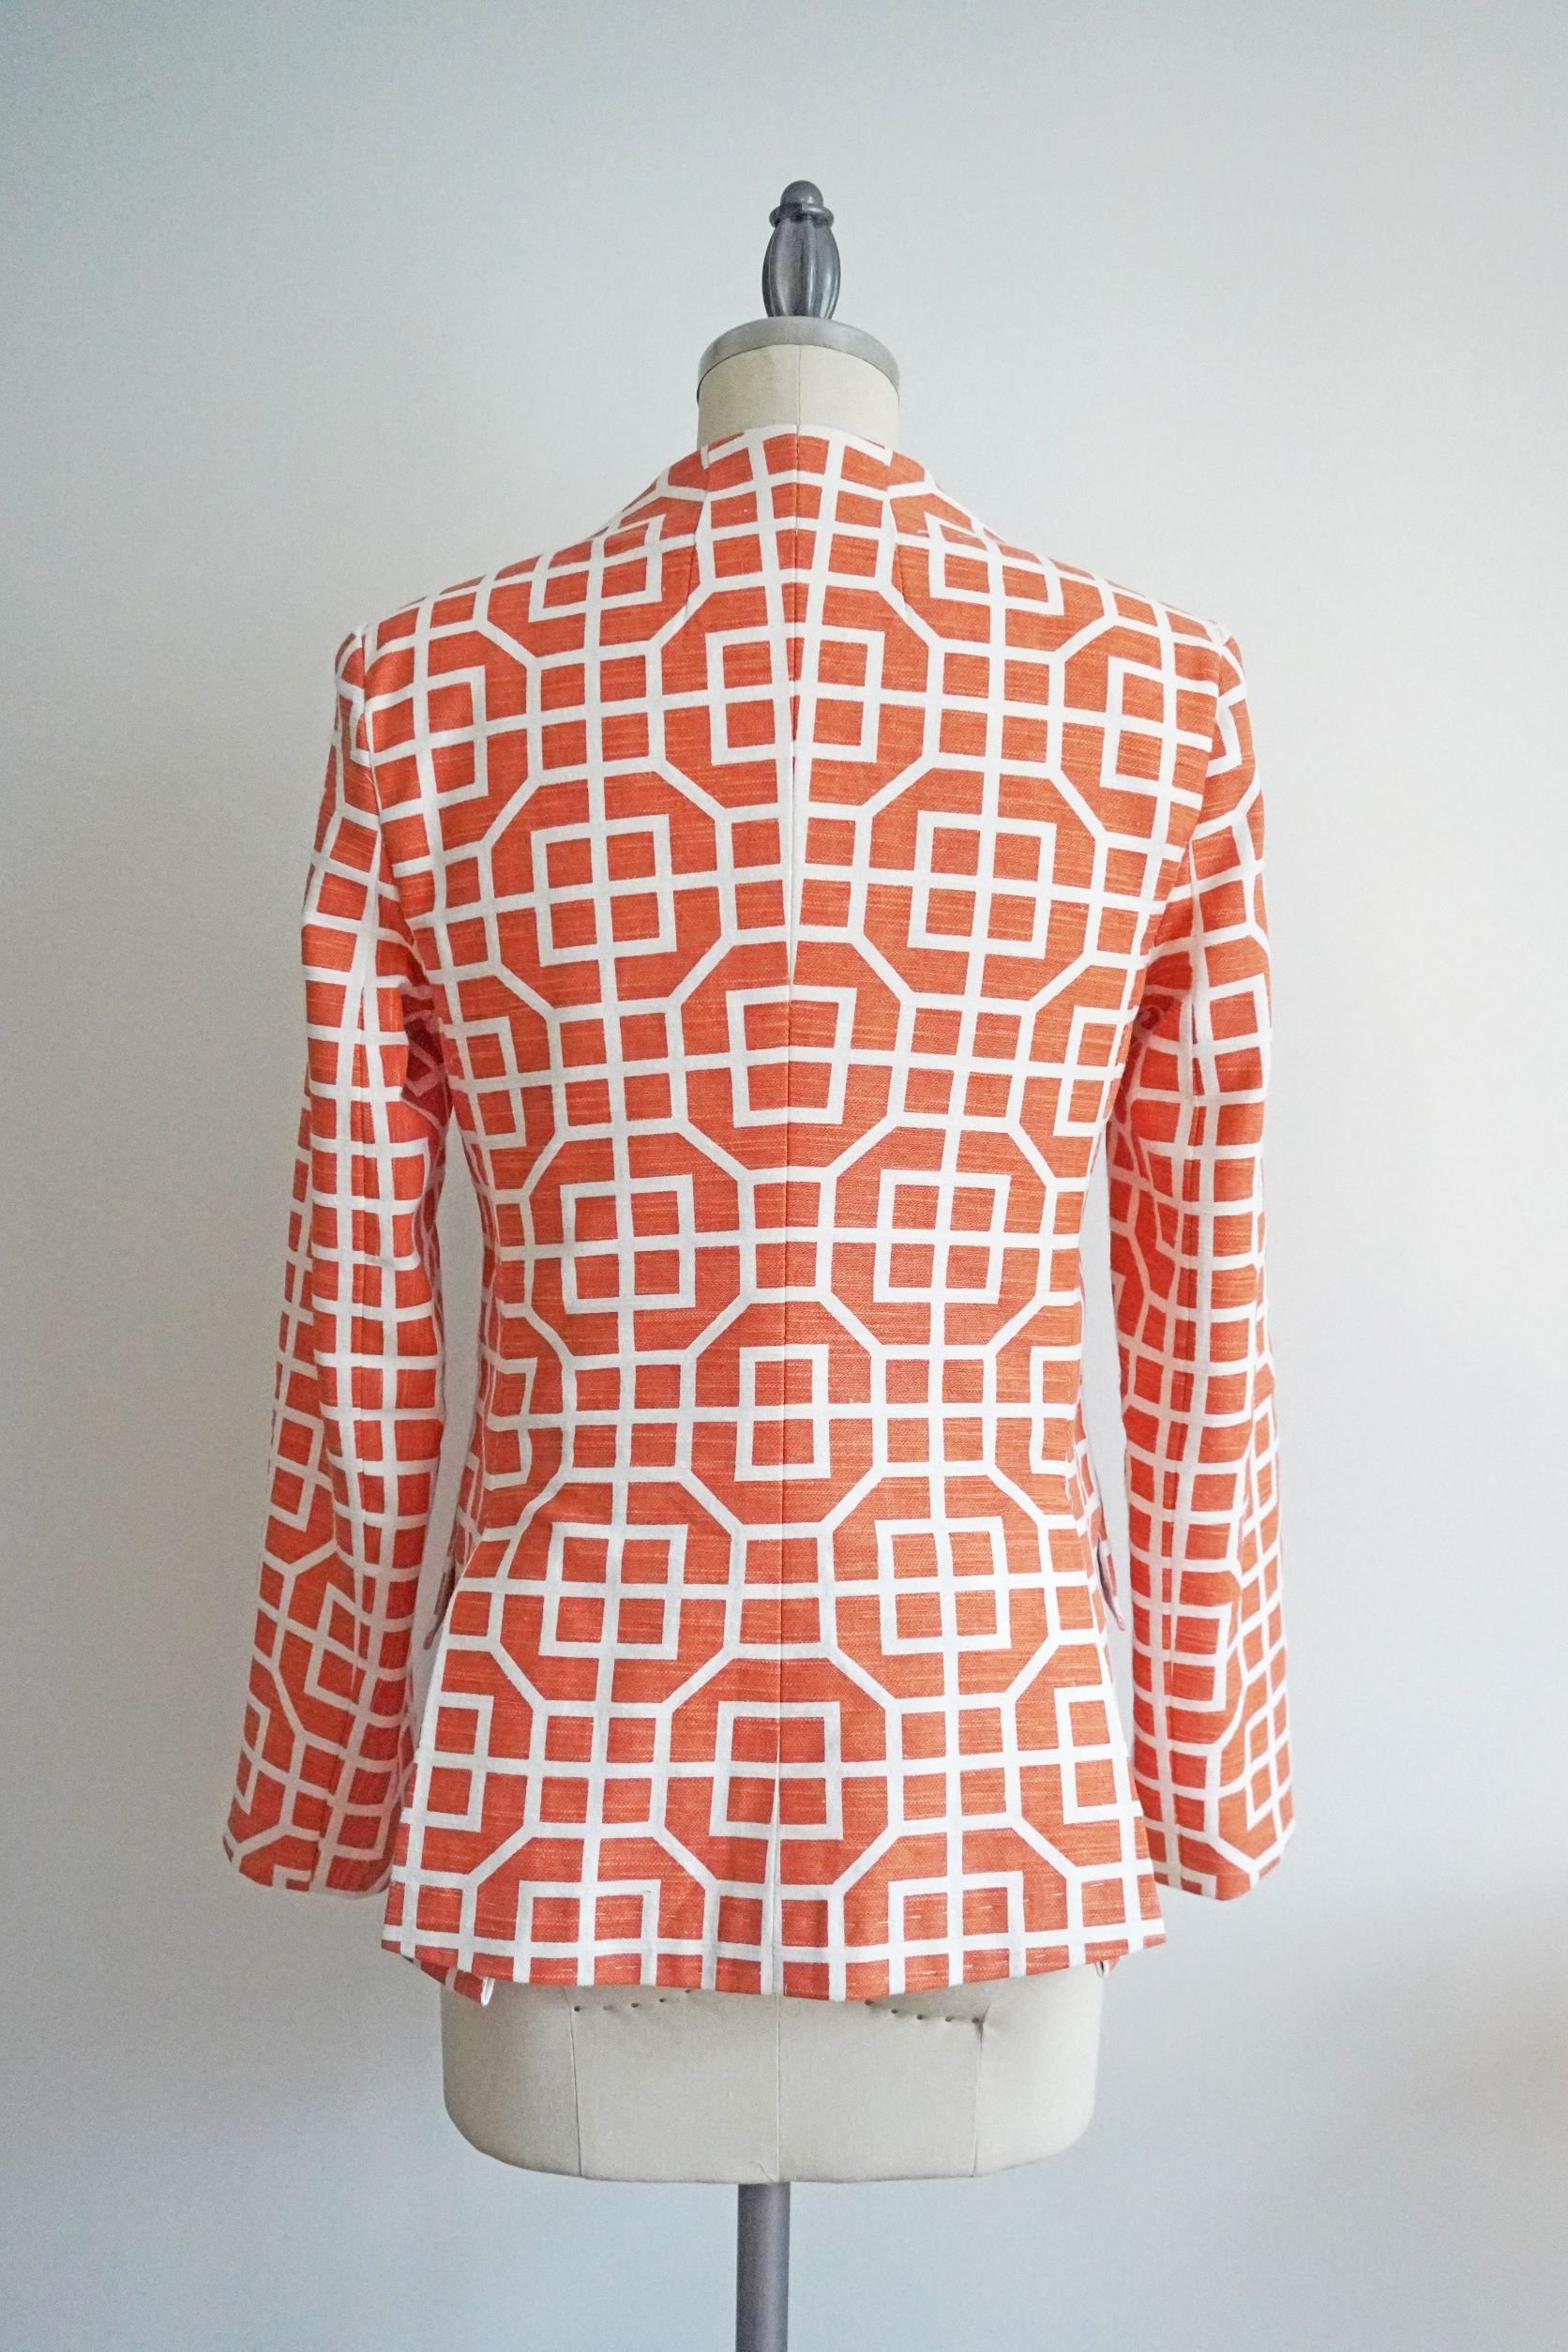
Inspired by those two divas, I decided to turn some orange curtain fabric (found at my local thrift store for $2!) into a sharp, tailored blazer. The curtain consists of a lightly textured mid-weight cotton fabric (my guess is it’s a cotton twill), and it features a bold octagonal print that I found to be really striking.
Given the large scale of the print, I thought the curtain fabric needed to be made up into something streamlined with a classic silhouette, otherwise the print would be way too much and it would overwhelm the wearer. Enter Vogue 1751, a Claire Shaeffer Custom Couture pattern for a fitted jacket with side panels. I had recently purchased the pattern because I had heard great things about Claire Shaeffer’s patterns, which are renowned for their detailed instructions that guide the sewer through couture construction techniques. They’re supposed to be great for advanced beginner or intermediate sewers because the instructions apply couture techniques to the specific garment in the pattern, so the sewer doesn’t have to consult a general reference book on couture techniques, then figure out how to apply the techniques to the specific garment they’re making.
Up until now, I had not tried one of her patterns because I usually find her designs a bit matronly for me, but this one seemed more modern because it has no lapels. I also really liked the slanted side flaps, which I hoped would give me more of an hourglass figure (I have a very boyish straight-up-and-down figure with little waist definition). I figured the streamlined silhouette would combine well with the large-scale print of the curtain fabric, and that the couture tailoring techniques would help elevate this slightly worn-out fabric.


Pattern adjustments
The first step was to cut out the pattern and make any fitting adjustments that were necessary. As this is a Vogue pattern, I used my standard set of alterations for Vogue/McCall’s/Butterick patterns. (I did not bother to make a muslin, as I’ve sewn so much with Vogue/McCall’s/Butterick patterns over the years that I know my standard set of adjustments will usually result in a well-fitted garment.)
First, I cut a size 10 at the chest and hip, and tapered to a size 12 in the waist. I then made a straight back adjustment (to account for my very upright posture) by cutting and slashing the upper part of the back pattern piece and overlapping the pieces by about ½ inch at the center back seam.

Next, I made a hollow bust adjustment in the front pattern pieces. As I have only recently learned, a hollow bust adjustment is different from a small bust adjustment. For years, I thought that I needed to make a small bust adjustment (SBA) because I have a flat chest, but then I would be confused when the finished garment still didn’t fit me in the chest area. It wasn’t until last year that I realized I actually needed to make a hollow bust adjustment, not a SBA. In essence, the difference between my full bust and high bust seems to fit the cup size that is used in drafting Vogue/McCall’s/Butterick patterns, and that’s why the area around my bust fits fine. However, the top part of my bust is not as full as the standard size for Vogue patterns, so the neckline above the bust tends to sag and/or gape on me. To fix this, I slashed the pattern from the neckline to the apex of the bust, then I overlapped the pattern at the neckline by about ½ inch.

In my experience, that adjustment fixes the issue in any garment with a V-shaped neckline (for example, I made the same hollow bust adjustment in this jumpsuit). If you’d like to learn how to make a hollow bust adjustment, here’s a link to an article outlining how to make a hollow bust adjustment on several types of bodices.
Print placement
With the pattern cut out and adjusted, it was time for the big step: cutting into my fabric. (I find this much more nerve-racking when I’m working with thrifted fabric, as I know I can never get more of that same fabric.) I knew I had to get the print placement just right, because any mismatch in the print would really show in a fabric this loud and bold.
For jackets, my biggest worry is usually the center front, which is very visible so it is imperative to make sure that the prints are properly lined up in that area. Luckily, the center front is marked on this pattern, so it was relatively easy to figure out where to place the pattern on the fabric. I decided to place the pattern on the fabric so that the center front line on the pattern was placed on one of the vertical lines that goes through the octagon shape. I then cut out the right front piece from the fabric and flipped it over, then aligned that piece on the fabric, making sure to match the print as much as possible. Once matched, I cut around the flipped-over right front piece to cut out the left front piece. This method makes it easier to cut front pieces that are exact mirror images of each other.
Once I had cut out the front pieces, I repeated the process with the back pieces, again using the flipped over right back piece to cut the left back piece. Making the pieces exact mirror images of each other was a bit tricky with this thrifted curtain fabric because the fabric had become a bit warped (possibly from hanging for so many years). To get as close to an exact print match as possible, I often had to stretch the flipped-over fabric piece or scrunch up the underlying fabric to get the print to match. I would pin the fabric in place all around the edges of the fabric piece to keep the fabric from reverting to its original shape during the cutting process.
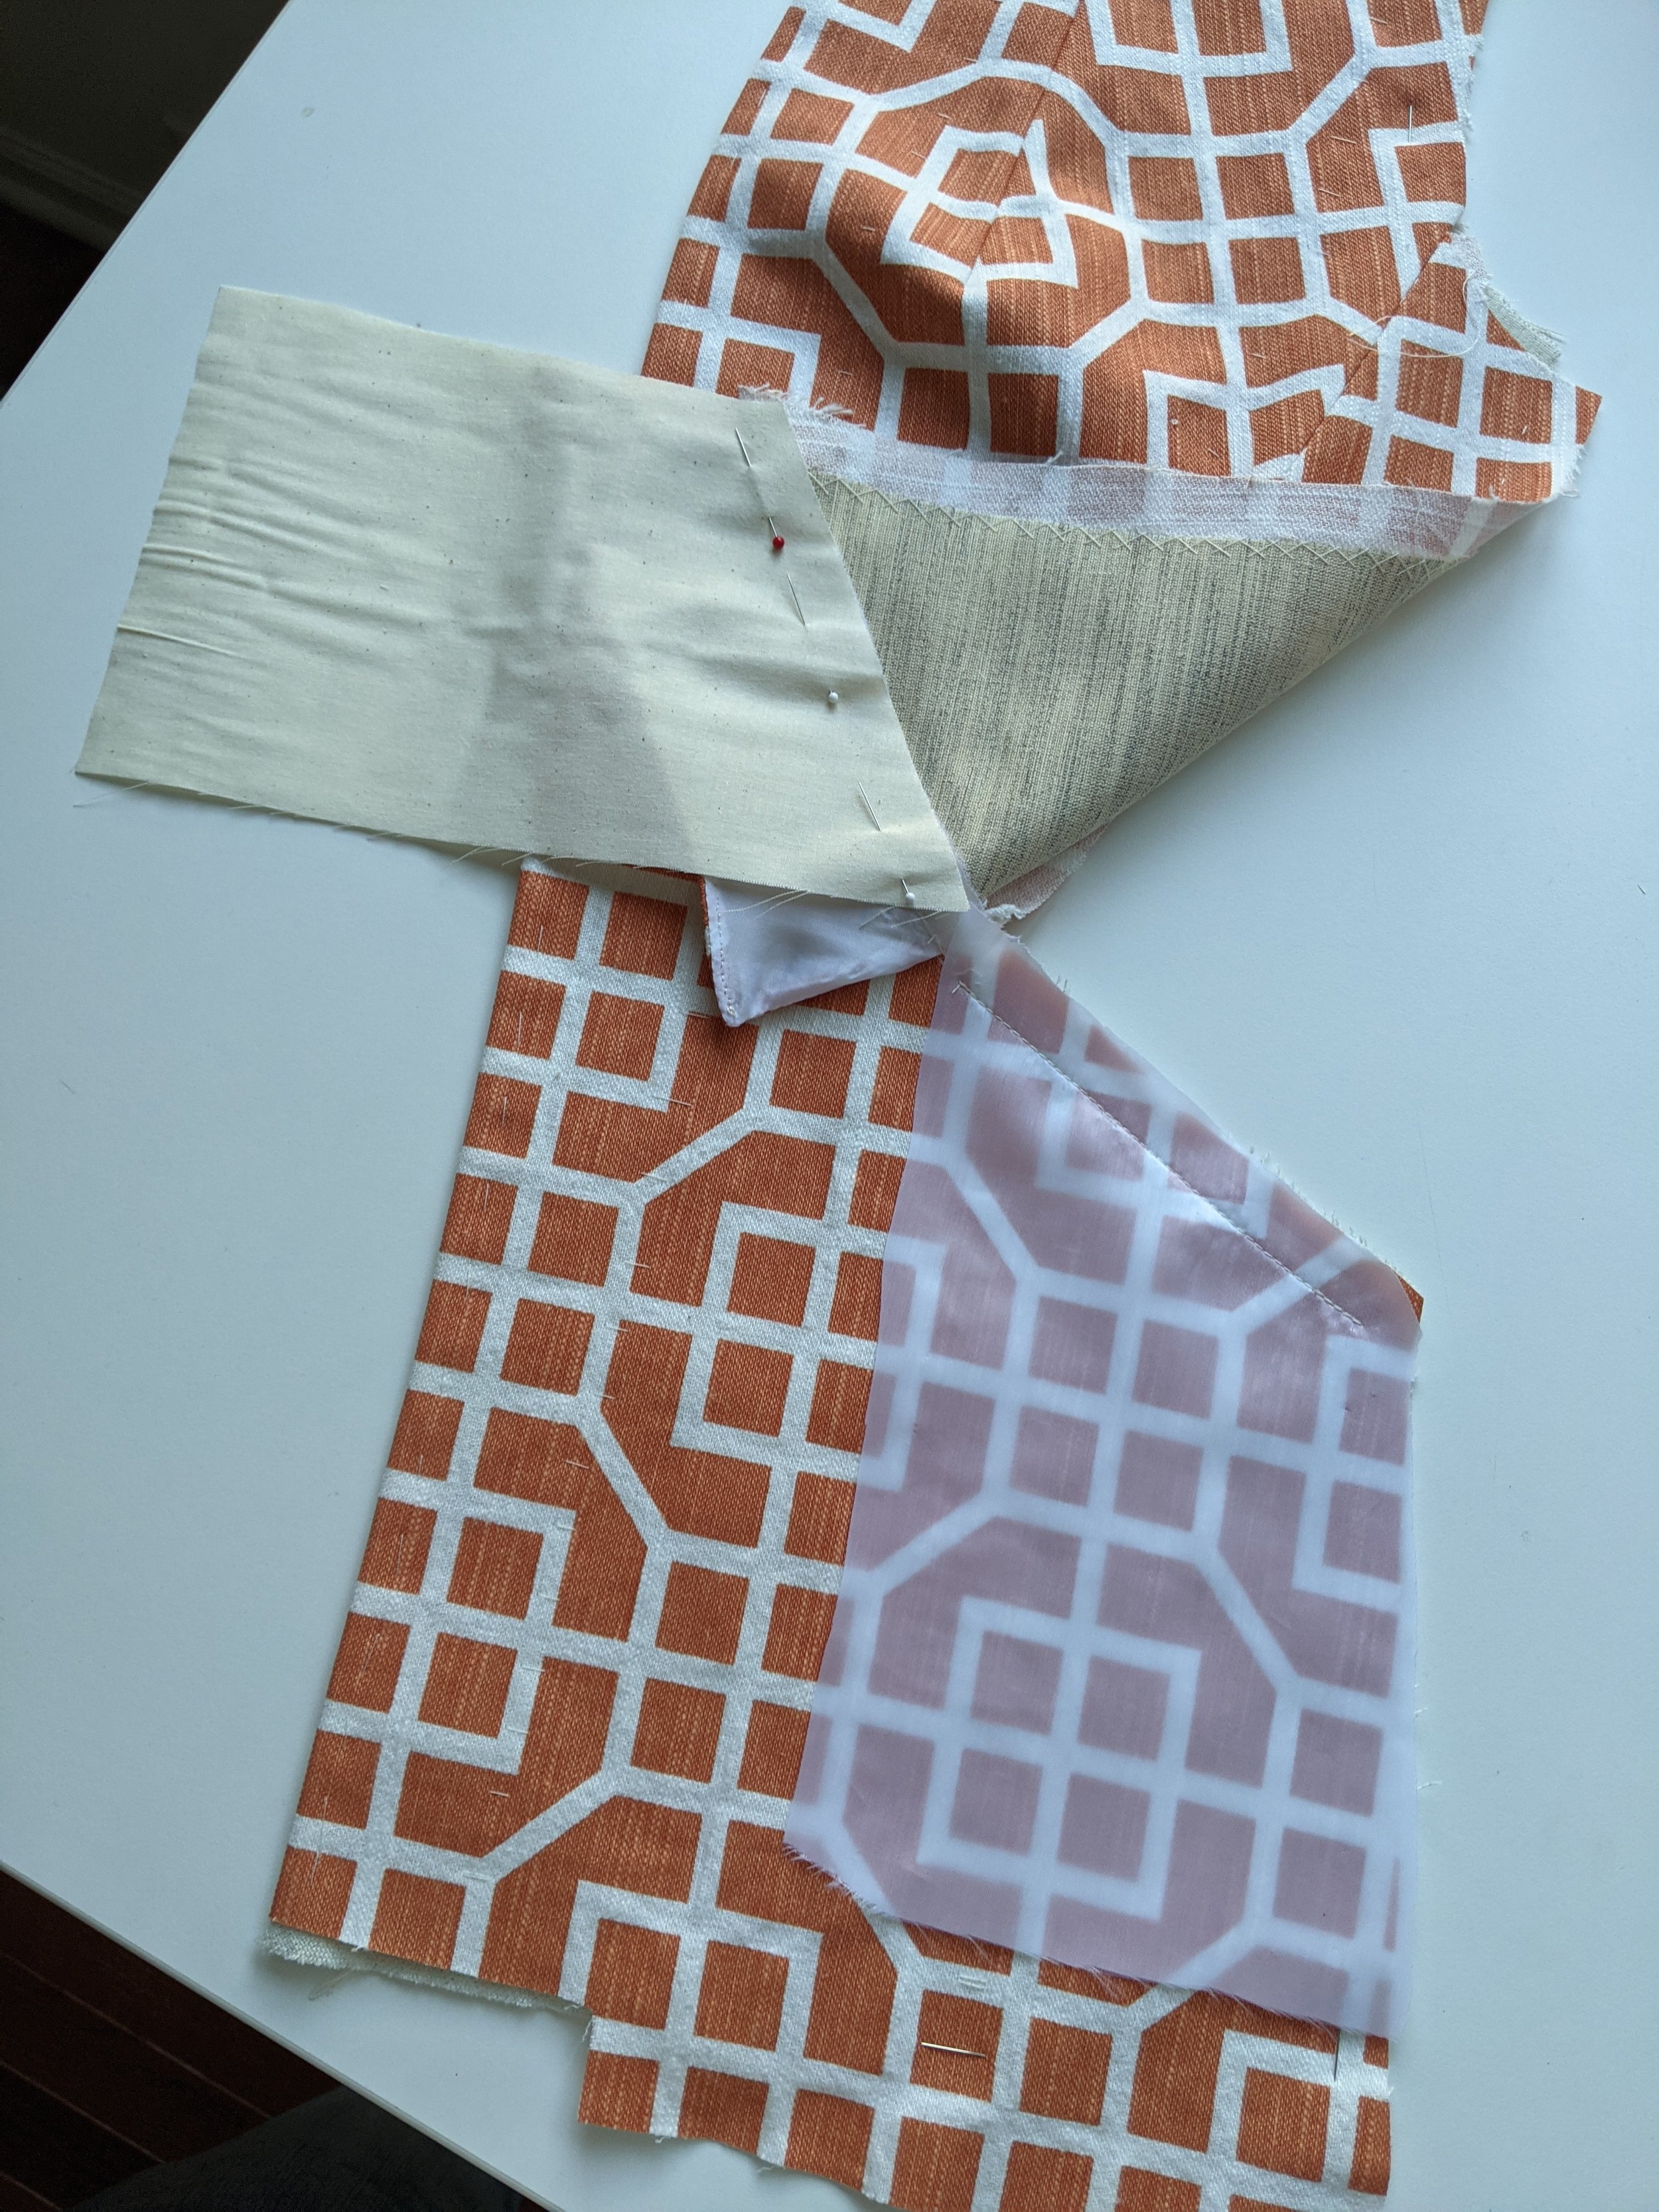
Once the pieces were cut out, I took the pieces to my ironing board and steamed them thoroughly to try to encourage them to shrink back to the shape of the original pattern piece. The interfacing also helped re-shape the fabric into the shape of the pattern. For pieces that were interfaced, the instructions call for you to baste and then hand-sew the interfacing to the fabric pieces. Because the interfacing is relatively stable, sewing the interfacing to the fabric pieces helped encourage the warped pieces into the proper shape.

Sewing the fabric to interfacing helped encourage the warped pieces to assume the right shape.
After cutting the front and back pieces, I had very little fabric left to work with, so I didn’t have the luxury of placing the print on the sleeves. I did the best I could by lining up the octagons on the lower half of the sleeve (where the print is more visible). That unfortunately meant the pattern did not line up on the upper half of the sleeve, but that part is in the armpit area anyway so it’s much less visible.

After cutting out the pieces from the fashion fabric, I cut the lining pieces from some lightweight silk from my stash (I bought it years ago, so I can’t remember exactly what it is, but my guess is it’s China silk or habotai). I also cut out the interfacing pieces. It took me awhile to decide what to use for interfacing. I knew that I needed to use some kind of sew-in (not fusible) interfacing, but the pattern didn’t specify what kind. The pattern calls for multiple layers of interfacing in the front chest area, so I wanted to make sure that I didn’t use interfacing that would add too much bulk. In the end, I consulted my favorite tailoring book, Tailoring: the Classic Guide to Sewing the Perfect Jacket, which walks through all of the interfacing options, and decided to use horsehair canvas for all of the interfacing pieces. Note that the sleeve interfacing (pattern piece #17) is NOT a sleeve head – instead, it’s the interfacing to keep the hem of the sleeve crisp. I didn’t realize that at first, so I cut that piece out of flannel (as you would if you were cutting a sleeve head) and had to recut the piece out of horsehair later.
Jacket construction
With all of the pieces cut out, it was finally time to sew! For the most part, I followed the instructions exactly as written, and I found them exceptionally detailed and very clear. This pattern is billed as a “Custom Couture” pattern, so not surprisingly the construction involved hours and hours of hand-sewing. Luckily, I find hand-sewing therapeutic, and I wasn’t in a hurry, so I was happy to do all of the hand-sewing suggested in the instructions, with one big exception: BASTING. Why, oh why, is there so. much. basting in couture?! I understand that sometimes you need to baste to hold things together while the garment is being constructed (for example, holding the layers of interfacing together, or holding the lining to the exterior fabric). However, I do NOT understand why you need to baste a seam together, only to immediately sew it together using a sewing machine five minutes later. It’s not like this fabric is slippery or hard to handle, and you need the basting to prevent it from shifting during machine sewing – I was using midweight cotton fabric that was pretty stable, so I simply did not see a need to baste all of my seams before sewing. (Please feel free to try to convince me otherwise in the comments to this post.)
One other minor pet peeve: I really hated the way that the front facing and back neck facing was sewn together (step #53). The instructions have you sew the front facing into the jacket first, then sew the back neck facing in, then you have to sew them together at the shoulder seams after they are already sewn into the jacket. That’s pretty awkward to do when you have a heavy jacket with multiple layers of interfacing weighing it down. I would have preferred to sew the front and back neck facing pieces together first, then sew the combined facing piece into the jacket all in one piece. That’s the way it is done in most other home sewing patterns, and I don’t think doing that way would interfere with some of the other couture touches suggested in this pattern. (For example, steps 36-38 have you hand-sew the edges of the front facing to the hem and the front interfacing; I think that could still be done if you sew the back neck and front facing pieces together first.)
Other than those two (minor) quibbles, I thought that all of the handsewing and other steps suggested in the instructions were worthwhile. The only other change I made in the construction of the jacket was to convert the side flaps into pockets. The pattern description says that these are pockets, but they are not – they are merely decorative flaps of fabric going down the side of the jacket. I decided that was a wasted opportunity and decided to convert them into pockets by adding pocket bags. This was a very simple addition: I simply sewed the pocket bag to the lower edge of the flap, then flipped the pocket bag to the wrong side of the jacket and stay-stitched the pocket bag to the seam allowance. I sewed the other half of the pocket bag to the upper edge of the flap, then brought the pocket bag to the wrong side of the jacket. I then aligned the pocket bags and sewed around the edges to form the pocket bag.


The finished pockets are fairly small, but they are definitely big enough to hold small items like keys or stationery. I don’t plan to use the pockets a lot, but I think they’re a worthwhile addition because I’ve definitely had moments when I was running late to a meeting, and I just wished I had a small pocket to stash my pen or a USB key.
One other random note on construction: the instructions walk you through making buttonholes by hand. As someone who owns a sewing machine that makes mediocre button holes, I thought that these handworked buttonholes were a nice touch that made the finished garment look more polished. To get them right, you really need buttonhole gimp (i.e. a firm, thin cord used to reinforce the edges of buttonholes). I got mine through Cloning Couture on Etsy, and it was great because I was able to order just a small quantity of gimp for a very reasonable price. I’ll admit that my buttonhole is not flawless; it looks a bit scraggly and the buttonhole gimp peeks out in some places (especially around the circular hole at one end of the buttonhole). I should have invested in some silk buttonhole thread, which would have been thicker and would have filled in all of the space around the gimp, but I couldn’t find any in an orange color that matched my fabric. Instead, I used regular all-purpose thread, strengthened with some wax, and the thread was clearly not thick enough to make a perfect buttonhole. Lesson learned for next time.

The finished jacket
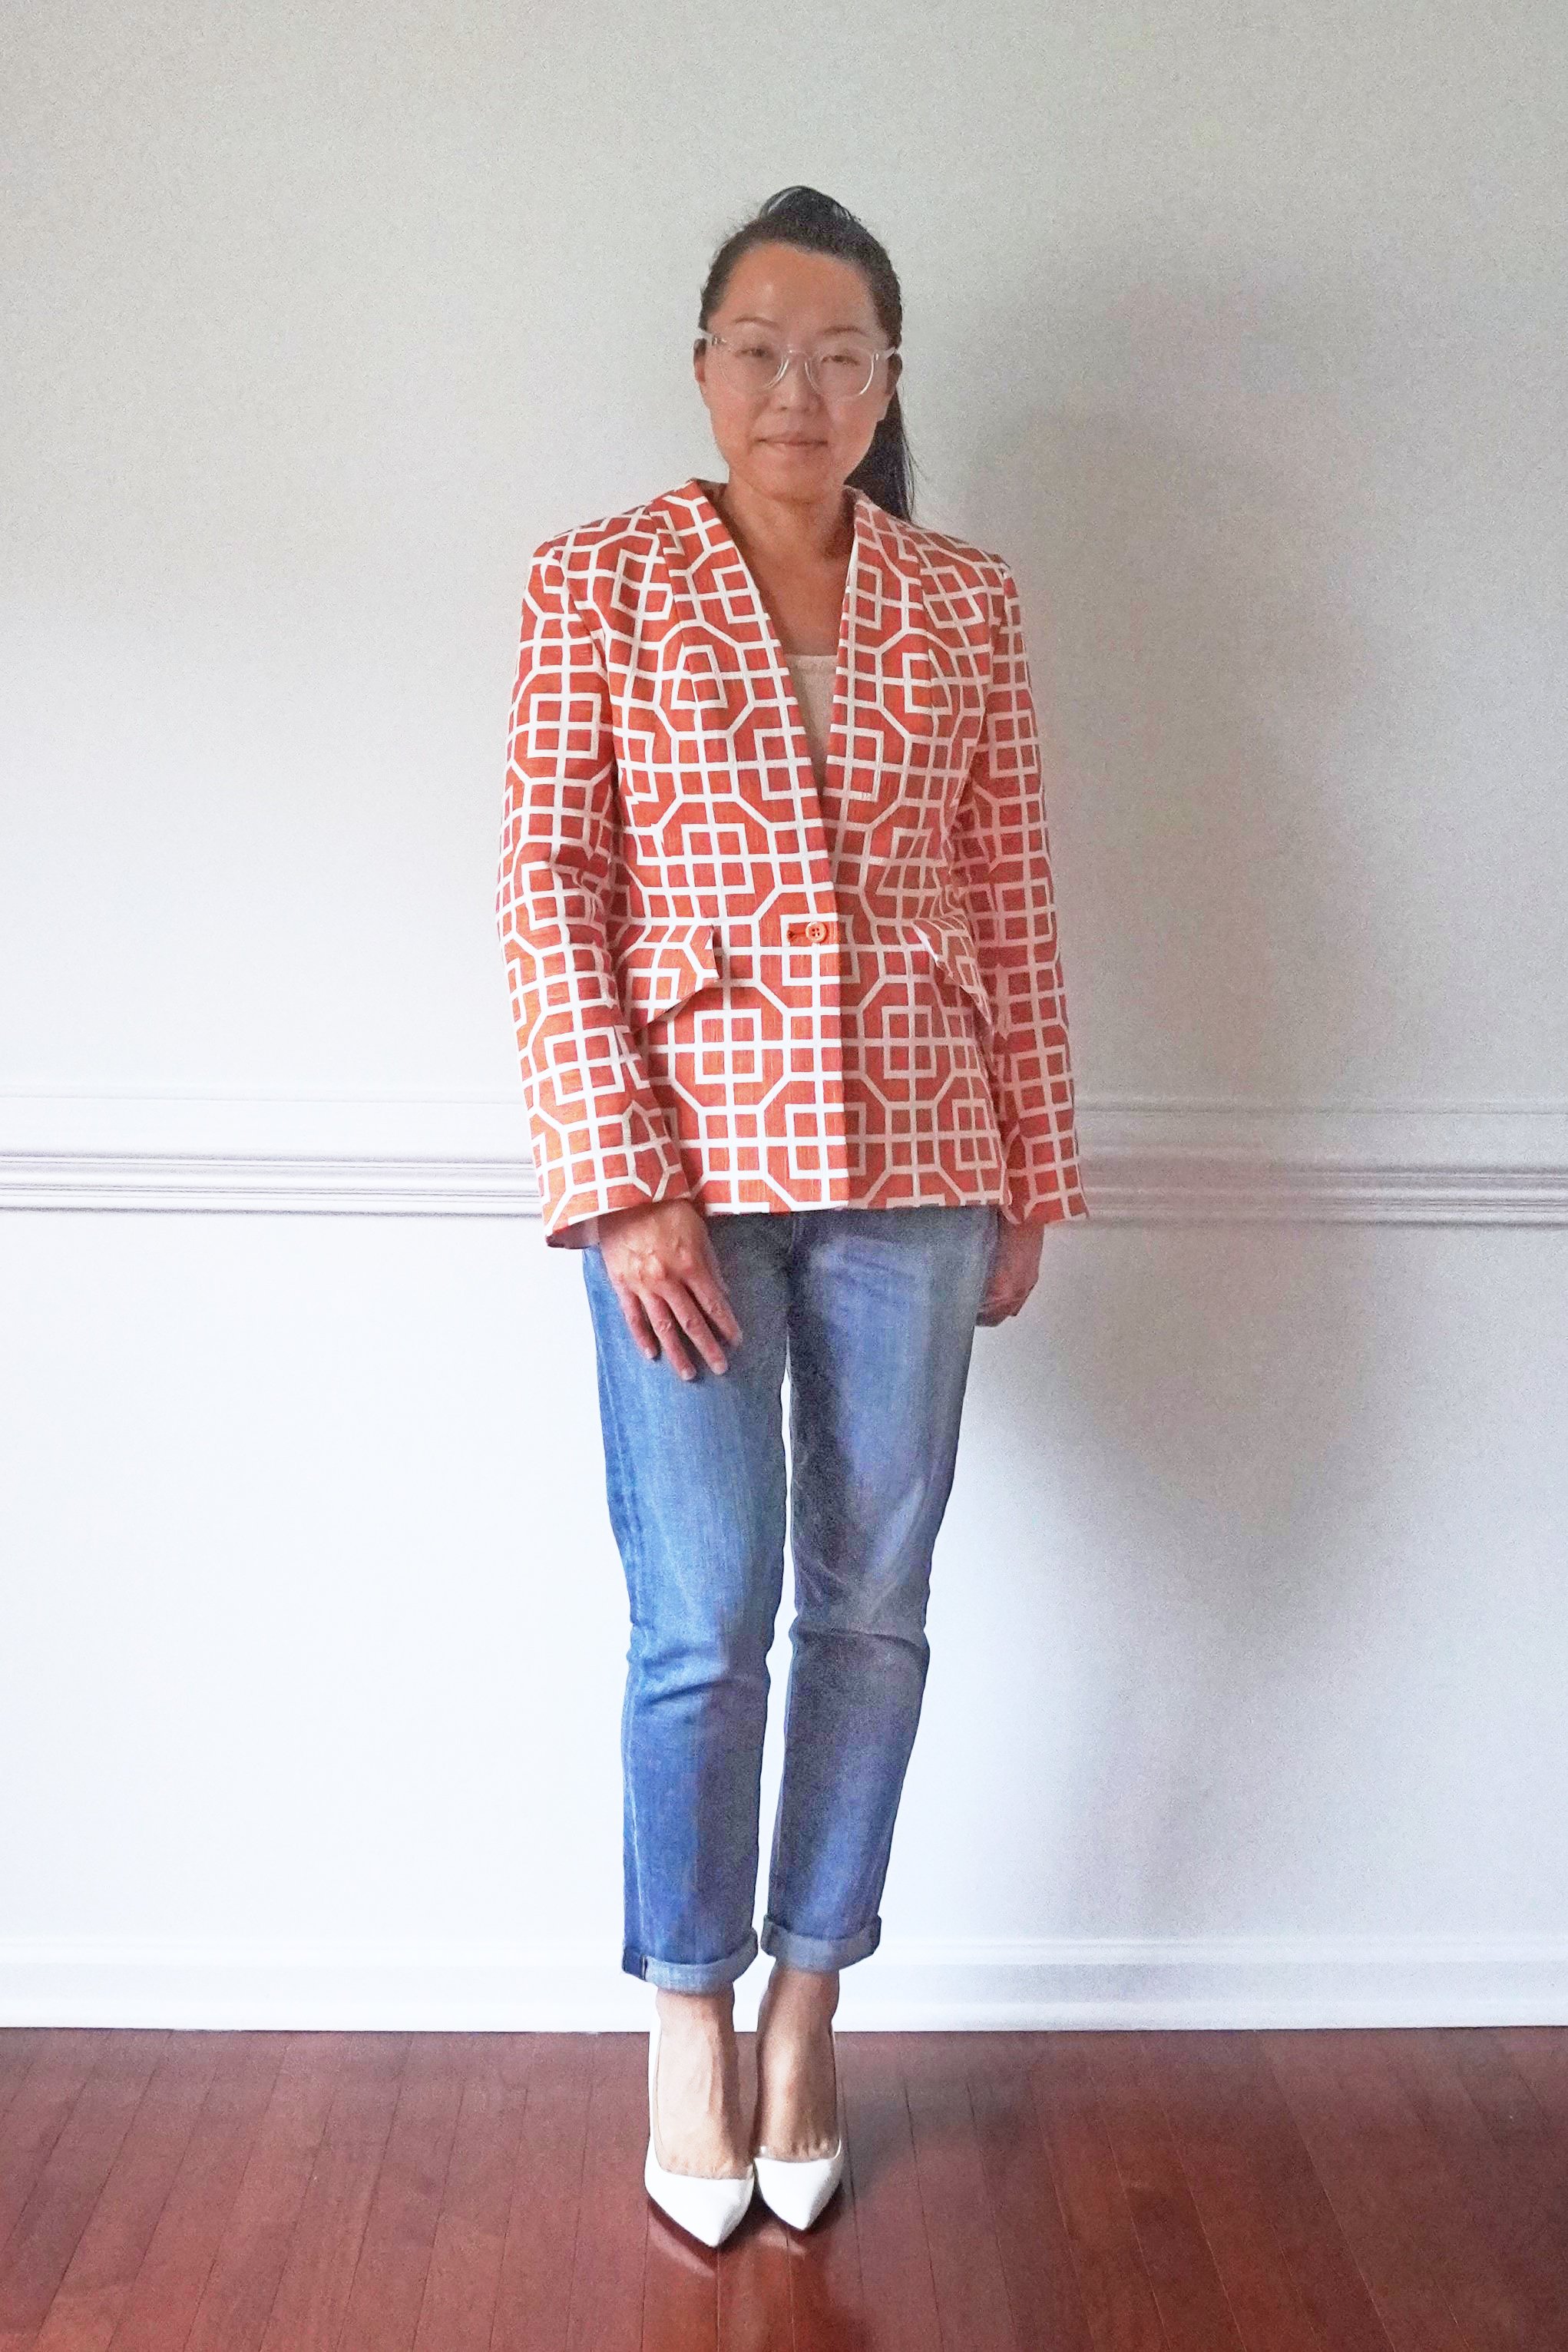
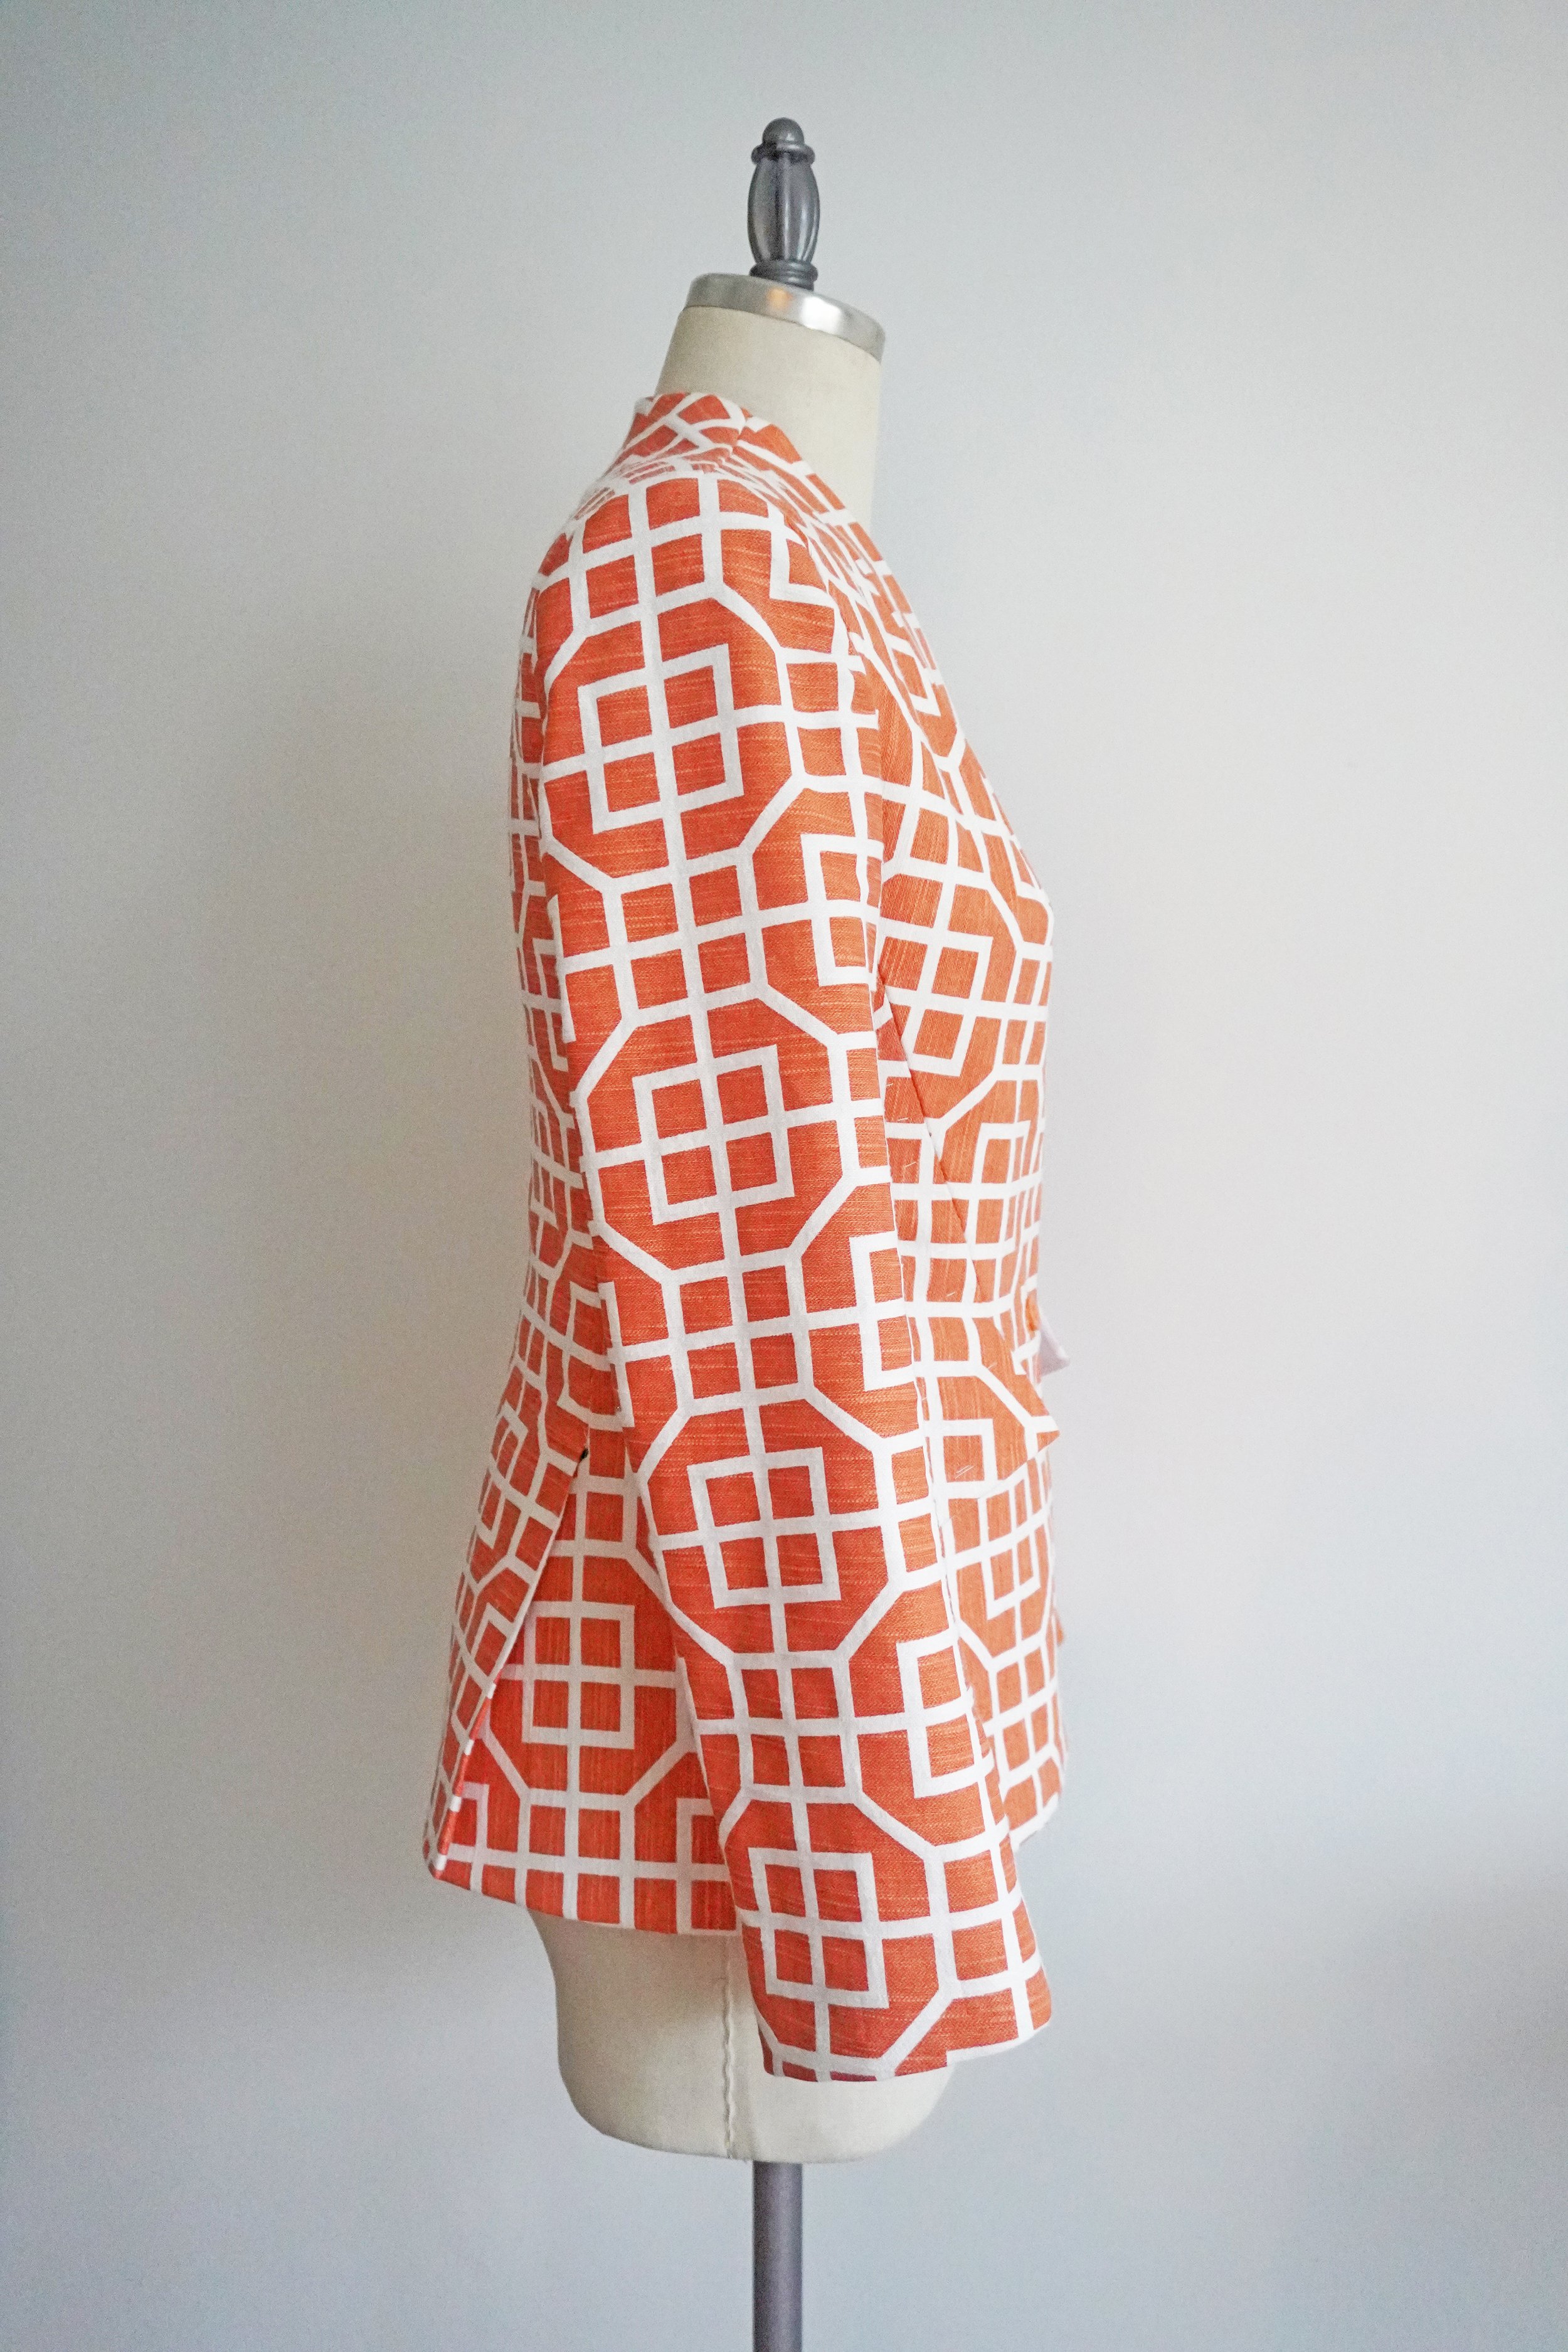
Overall, I’m very happy with my finished jacket. The jacket fits very well – there is no gaping in the neckline, no excess fabric down the back, and the sleeves are very comfortable for a fitted sleeve. The print matches pretty well at the center front and center back of the jacket. Best of all, the couture techniques really turned this slightly worn thrifted curtain fabric into a crisp, sharply tailored jacket.

That said, the jacket isn’t perfect. The lining fabric that I used was far too translucent for this project – you can see the interfacing and handsewing on the inside of the jacket, which makes the inside of the jacket look quite messy. With an ordinary jacket, this matters less because there is less interfacing and handsewing on the inside, but with a couture tailored jacket, there is a lot of inner construction work that needs to be hidden away by the lining.

The interior ‘guts’ of the jacket show through the translucent lining fabric.
I also wish I had used a thinner shoulder pad. The instructions didn’t prescribe any specific thickness for the shoulder pad, so I used a ½ inch all-purpose shoulder pad. For me, the end result is a bit too padded (and it verges on an 80s-style power suit, which pains me as a child of the 80s). I might rip out the shoulder pad and replace it with a ¼ inch shoulder pad, which would give me a bit of definition in the shoulder without turning me into a linebacker.
More generally, while I had a lot of fun using this pattern, I probably should have chosen a pattern with fewer seamlines, that didn’t break up the print as much. This pattern has seamlines going down the front that break up the print in the upper chest area, forming little mini-targets right above the bust (!). (See dress form pics below to see what I’m talking about.) Also, the flaps kind of disappear in this busy print, so I think this pattern would be more effective rendered in a solid fabric.
Overall, this is a good pattern for sewists who have never made a jacket using handmade tailoring techniques before, and they don’t want to invest in a couture sewing or tailoring reference book. If, however, you’ve ever taken a tailoring class, or you have my favorite tailoring reference book (Tailoring: the Classic Guide to Sewing the Perfect Jacket), then I don’t think this pattern is really necessary. I personally prefer the traditional tailoring techniques that are shown in Tailoring, and those techniques are illustrated with step-by-step photos that make it easy to apply the techniques to any jacket or coat pattern.
What do you think of my orange curtain jacket? Do you want to defend basting? Let me know in the comments!