If you’re like me, you probably have a closet full of old clothes that you no longer wear. Obviously, you can always donate those clothes to Goodwill or the Salvation Army, but I like to refashion them into fresh new (on-trend) pieces. Take for example this old sweater dress:
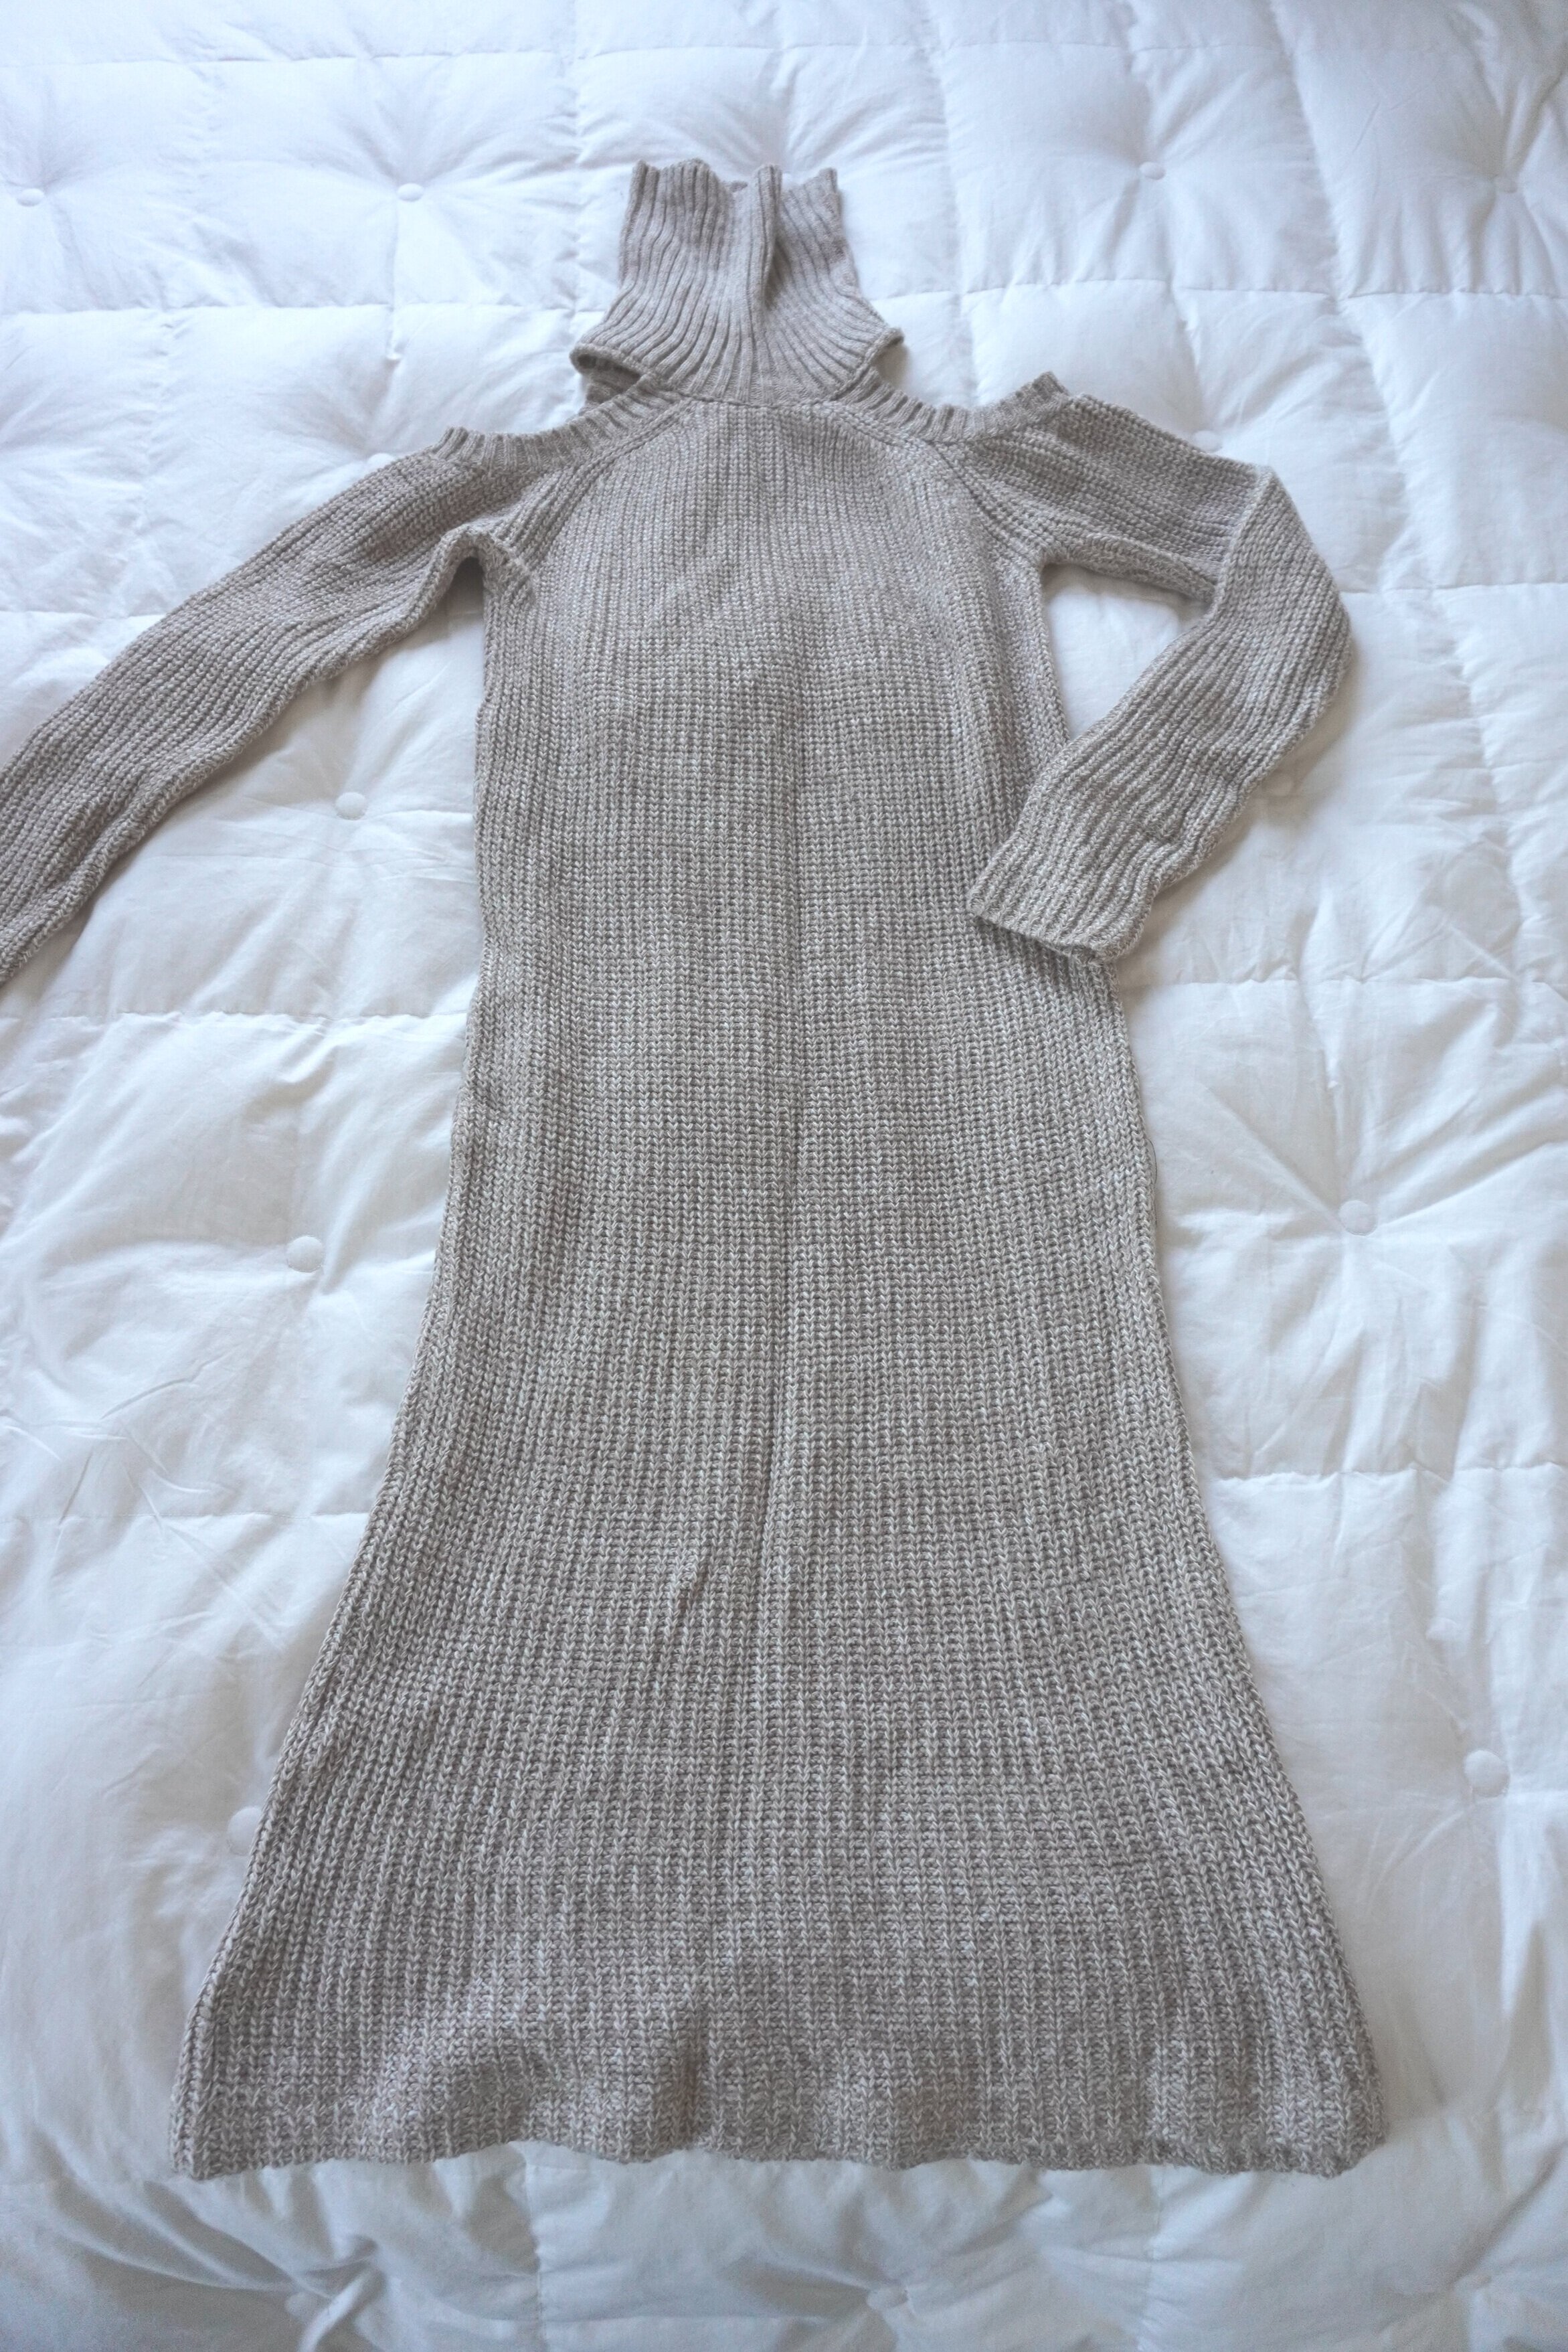
The sweater dress had all the raw ingredients for a great transformation - the fabric was in good condition and it had some nice chunky ribbing which would give great texture to the new garment. Plus, it was a midi length dress, which gave me lots of fabric to play with.
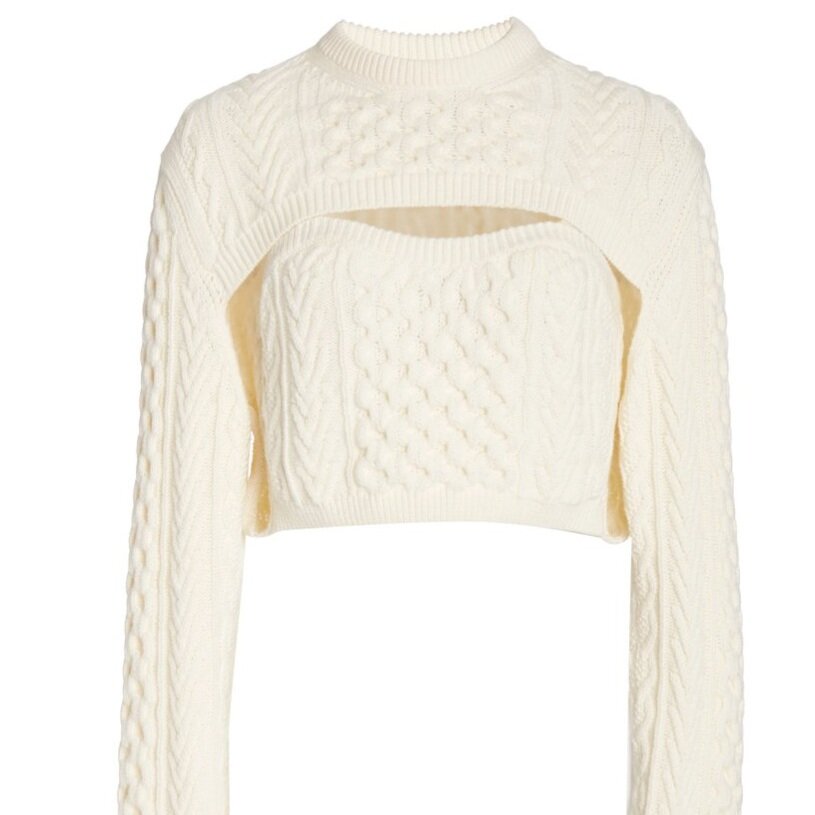
I decided to transform this old sweater dress into a trendy cropped cardigan set. About two weeks ago, I posted about a Rosie Assoulin cropped cardigan set that I fell head over heels in love with, and how I thought McCall’s 8003 could be adapted to make a DIY version.
Using my old sweater dress, I played around with different cutting layouts and found that I could (just barely!) squeeze all of the pieces out of the dress. As I usually do when refashioning a garment, I tried to use or save features in the existing garment where possible:
I cut the tank top bodice pieces along the bottom hem of the original dress, to save myself the trouble of having to hem those pieces later on.
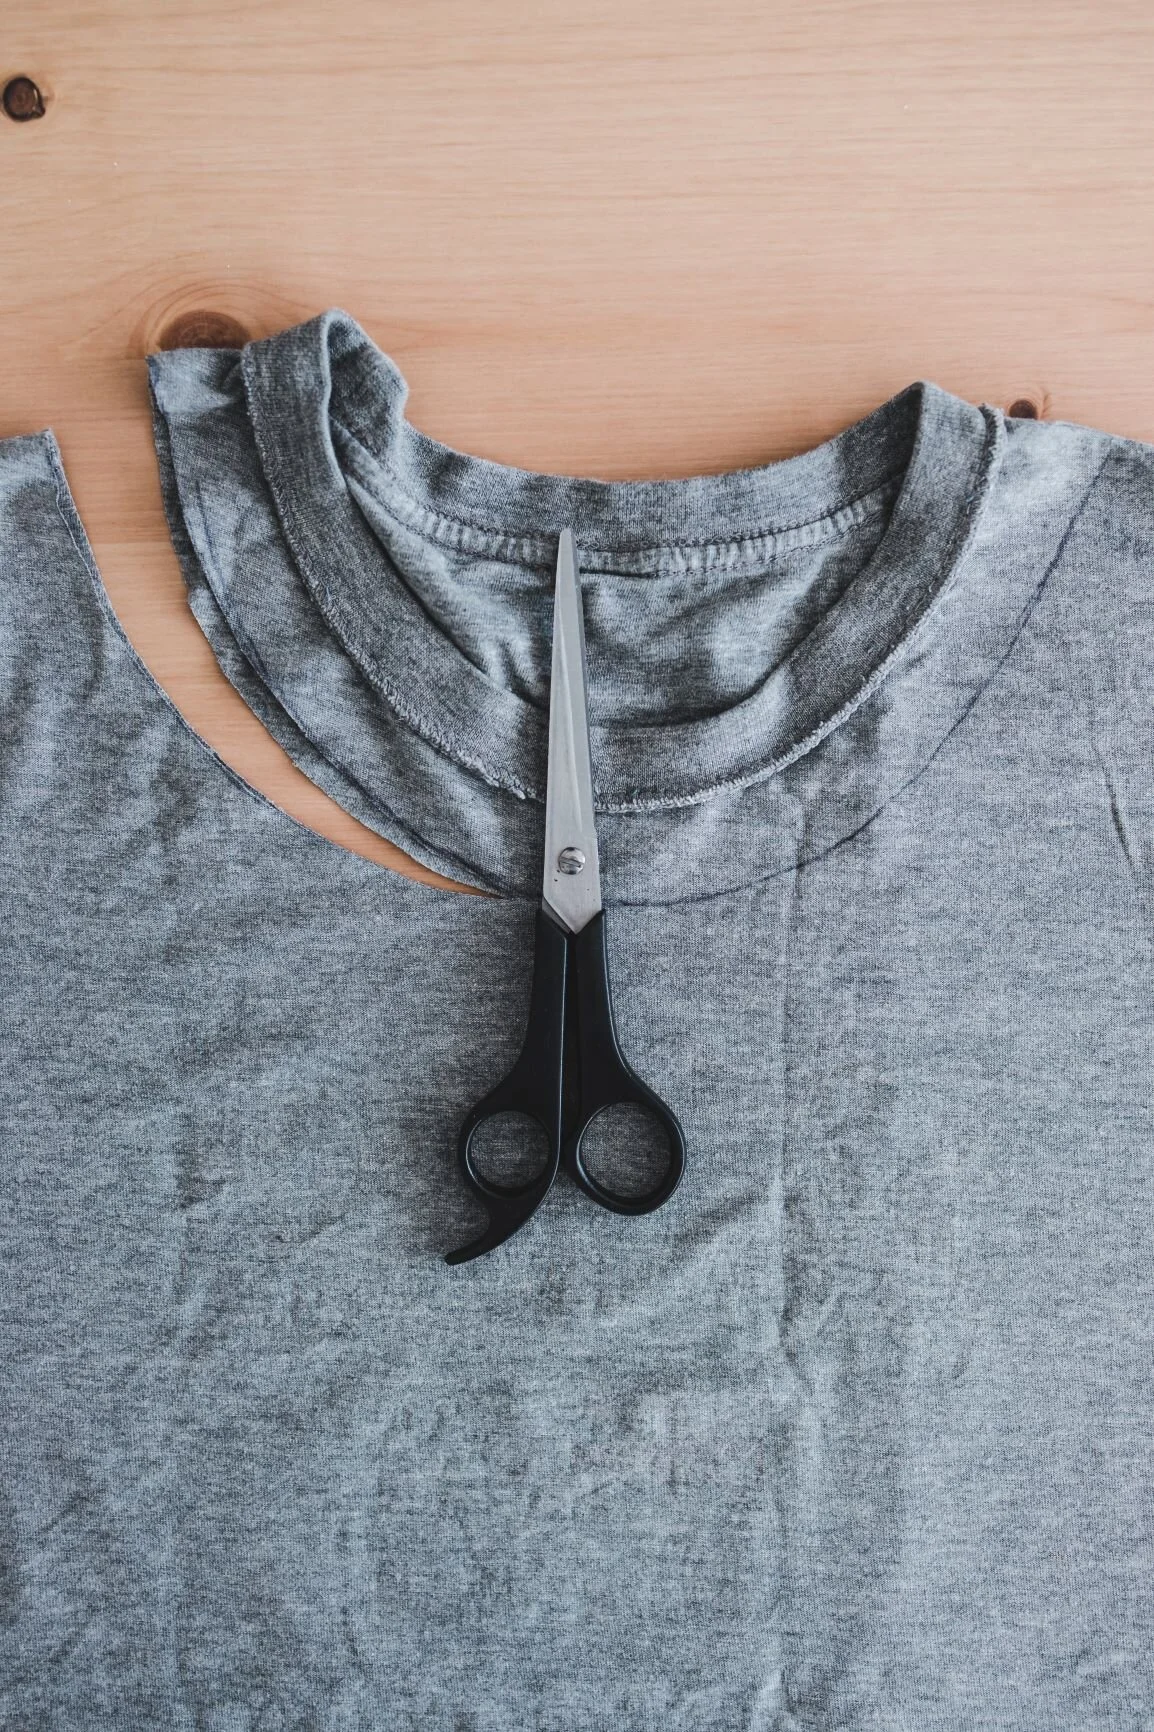
I salvaged the ribbed collar.
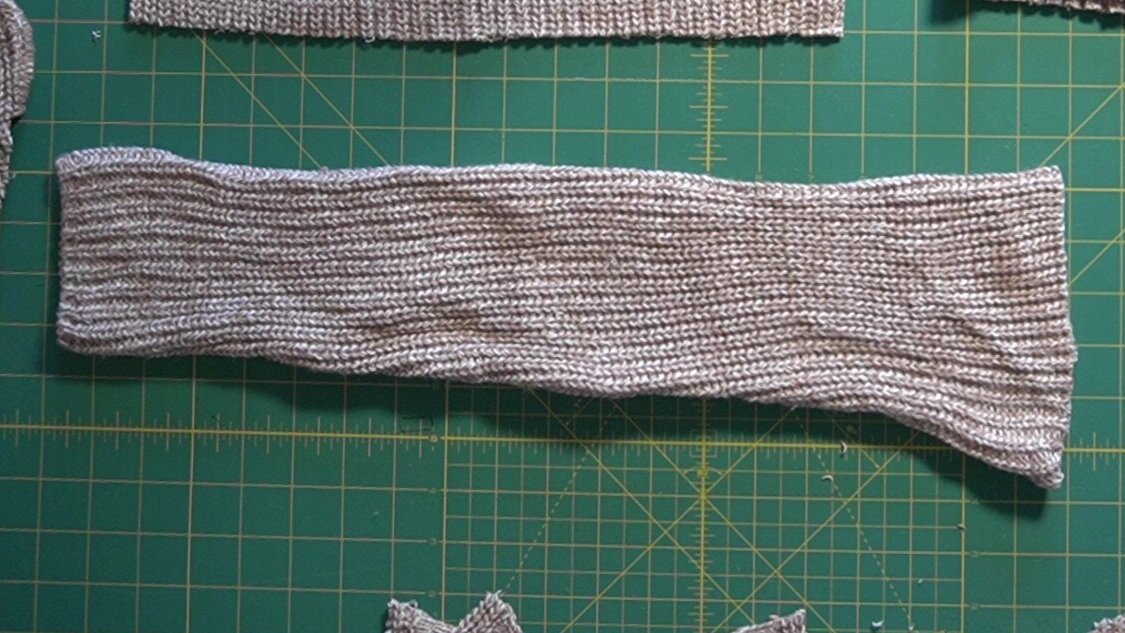
I salvaged the curved ribbing.
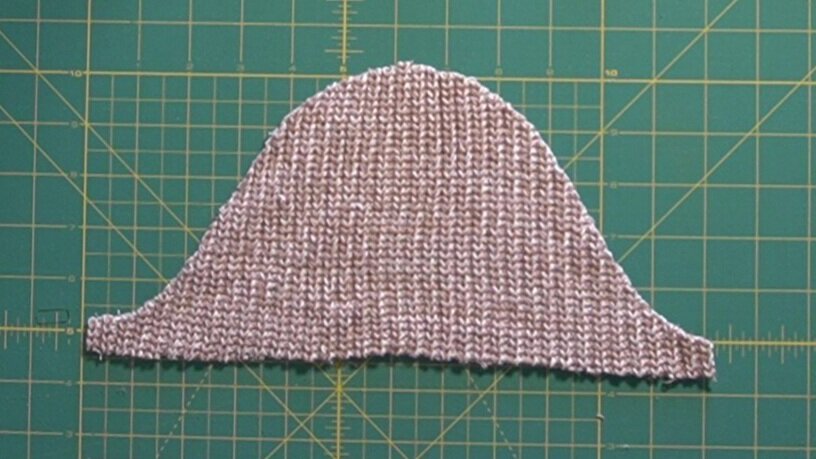
I used most of the original sleeve.
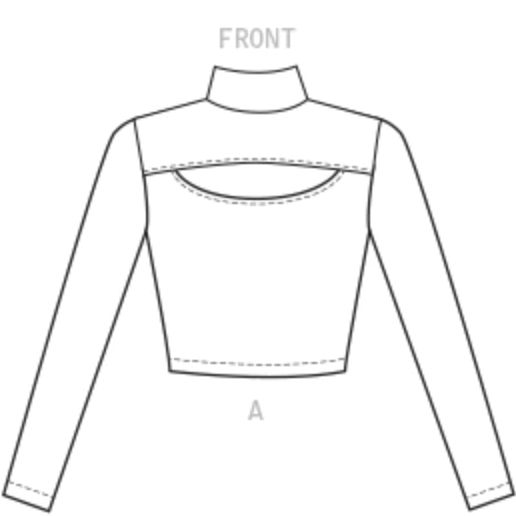
I cut View A, size 10 in the pattern and followed all of the pieces exactly as marked, with three exceptions:
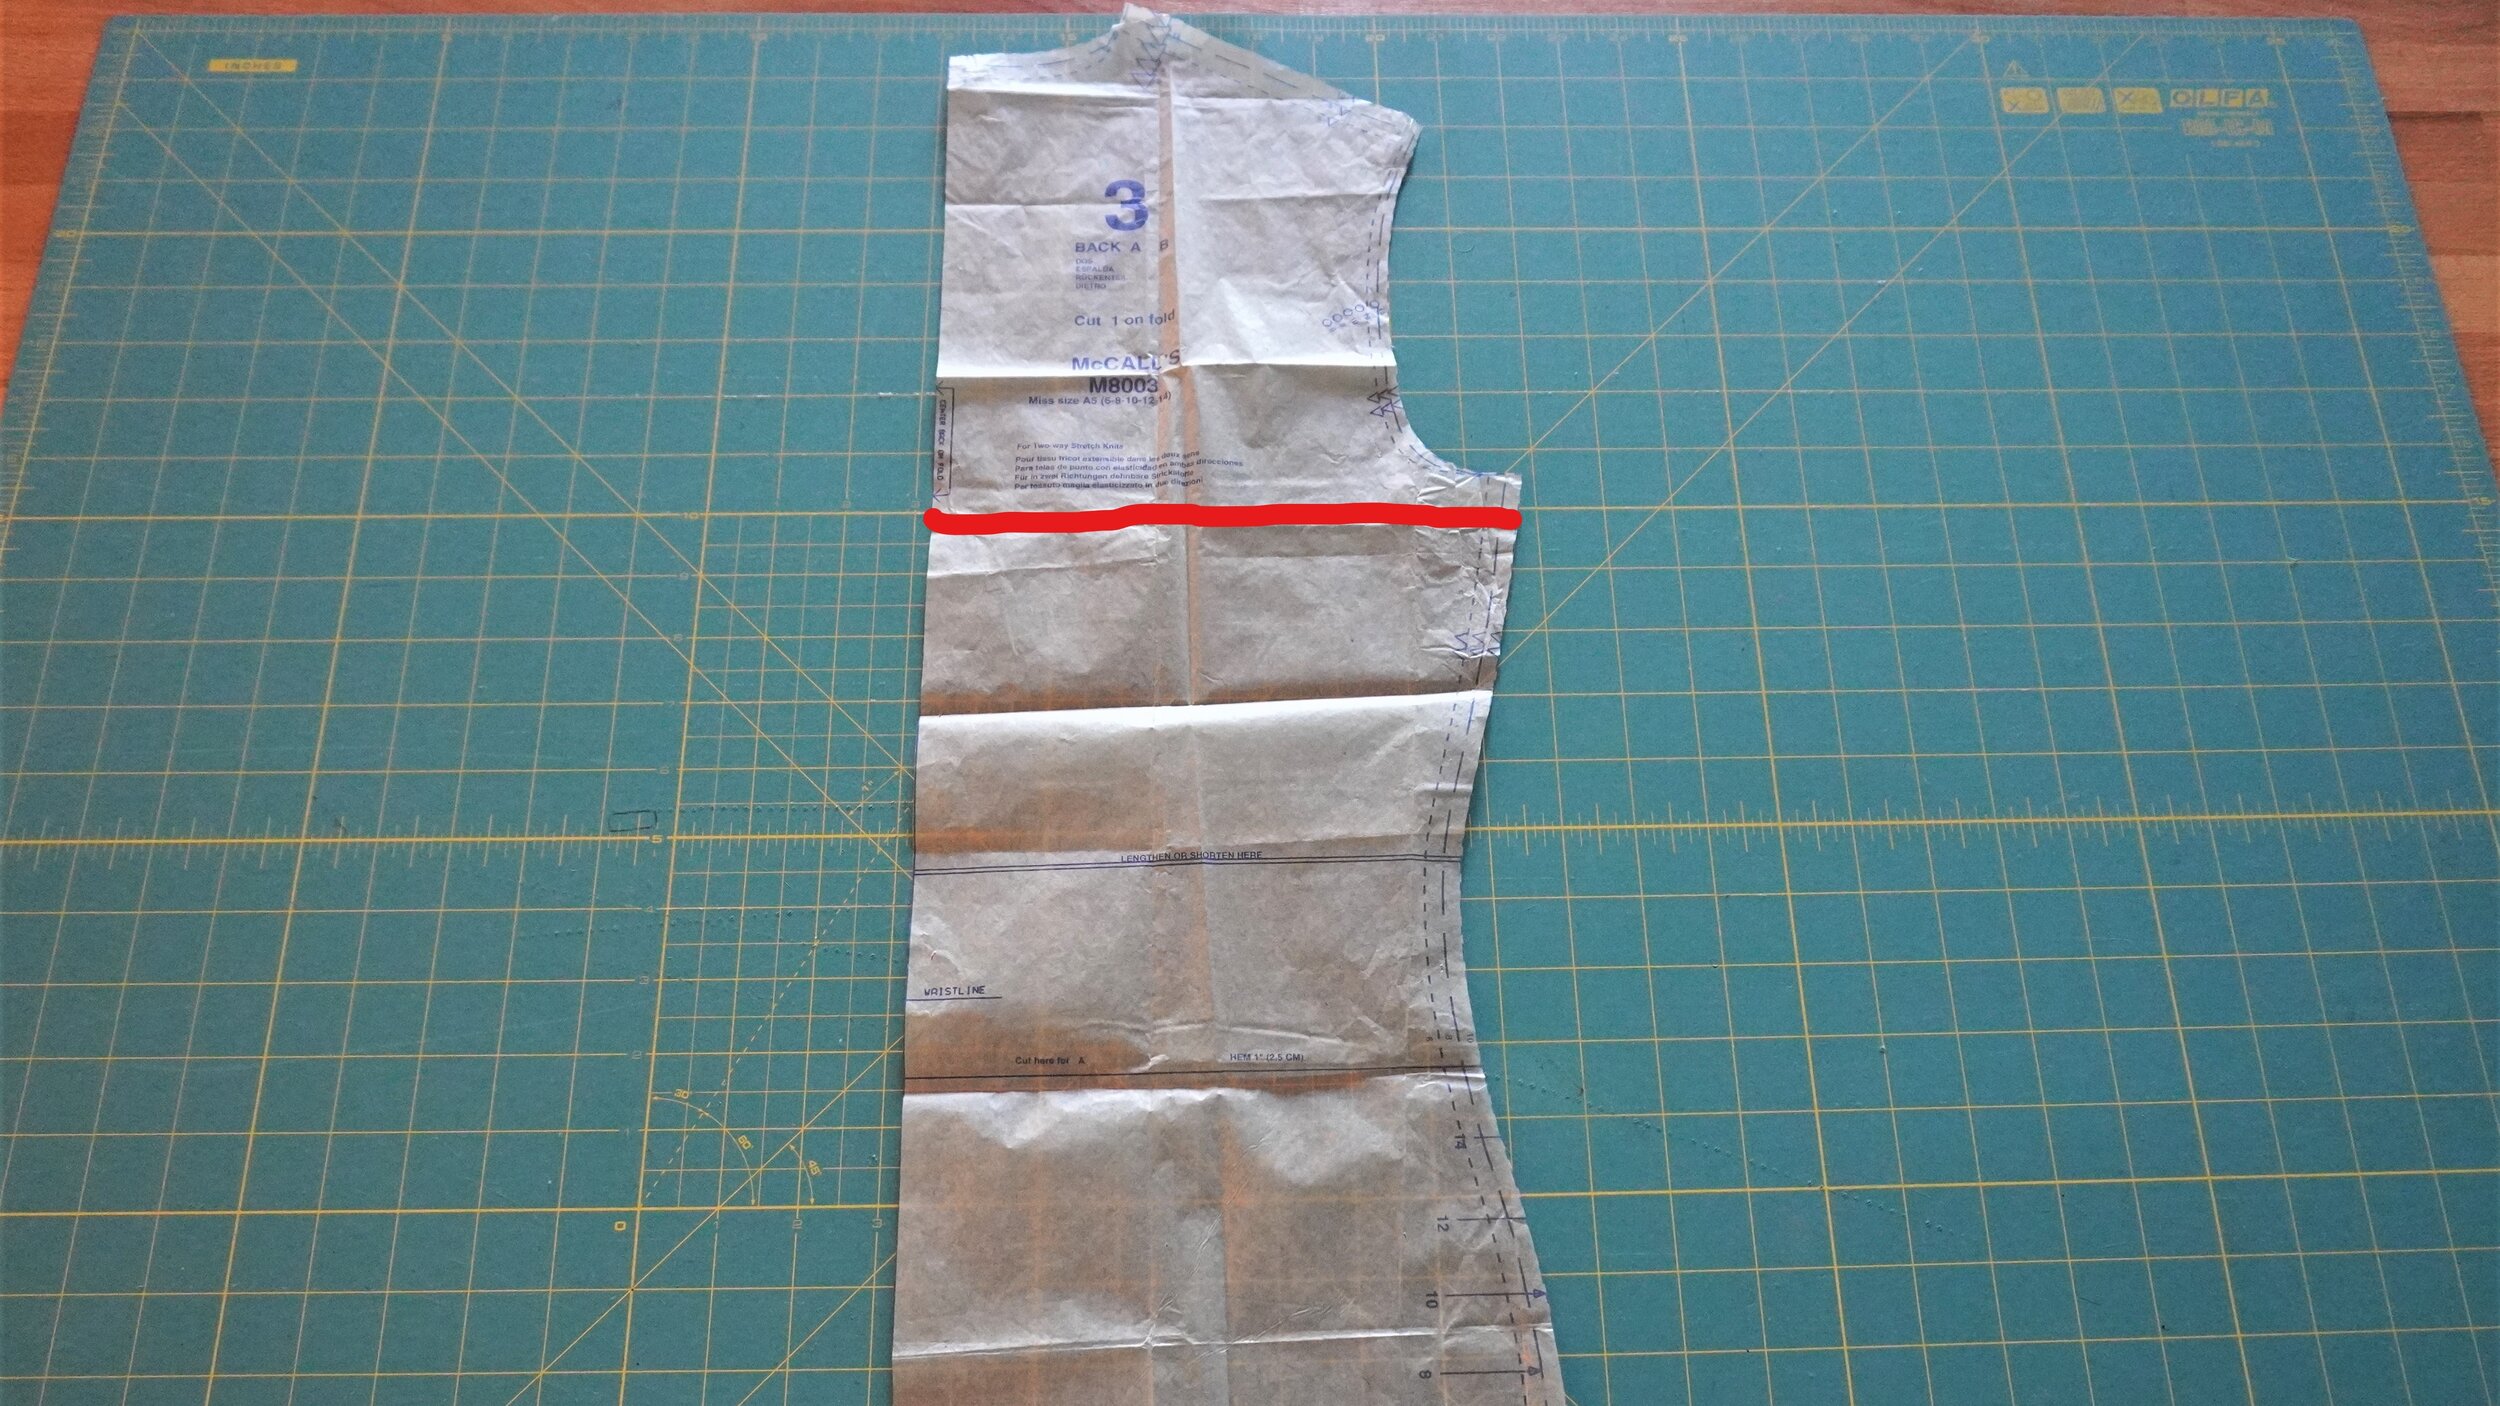
I cut a back bodice piece for the cropped cardigan using the back bodice piece from the original pattern. I chopped off the back bodice piece 5/8 inch below the armhole. (See picture below)
I did not cut out the collar according to the pattern, as I did not want a stand collar. Instead, I planned to use the curved ribbing I salvaged from the shoulder cutouts of the original sweater dress.
I cut out sleeve caps using the top part of the sleeve pattern. As noted above, I salvaged the original sleeve but the sleeve did not have a sleeve cap (because the original sweater dress had a cold shoulder cutout), so I had to cut extra sleeve caps from the rest of the dress. (See pictures below)

The first part of the project was pretty straightforward - I had to sew together the front and back of the tank top at the side and shoulder seams. For this project, I really wanted to use my regular sewing machine instead of my serger, just to prove that it is in fact possible to sew knits without a serger. I used my zigzag stitch with the stitch width set to 5 and the stitch length set to 1.5. (Tip: remember that the lines on the plate of our sewing machine indicate distance from the sewing machine needle when it is in the center position. The needle won’t be in the center position when you are using a zig zag stitch, so be sure to measure the distance from the needle when it is in the left position, and set your seam guide according to that distance.)
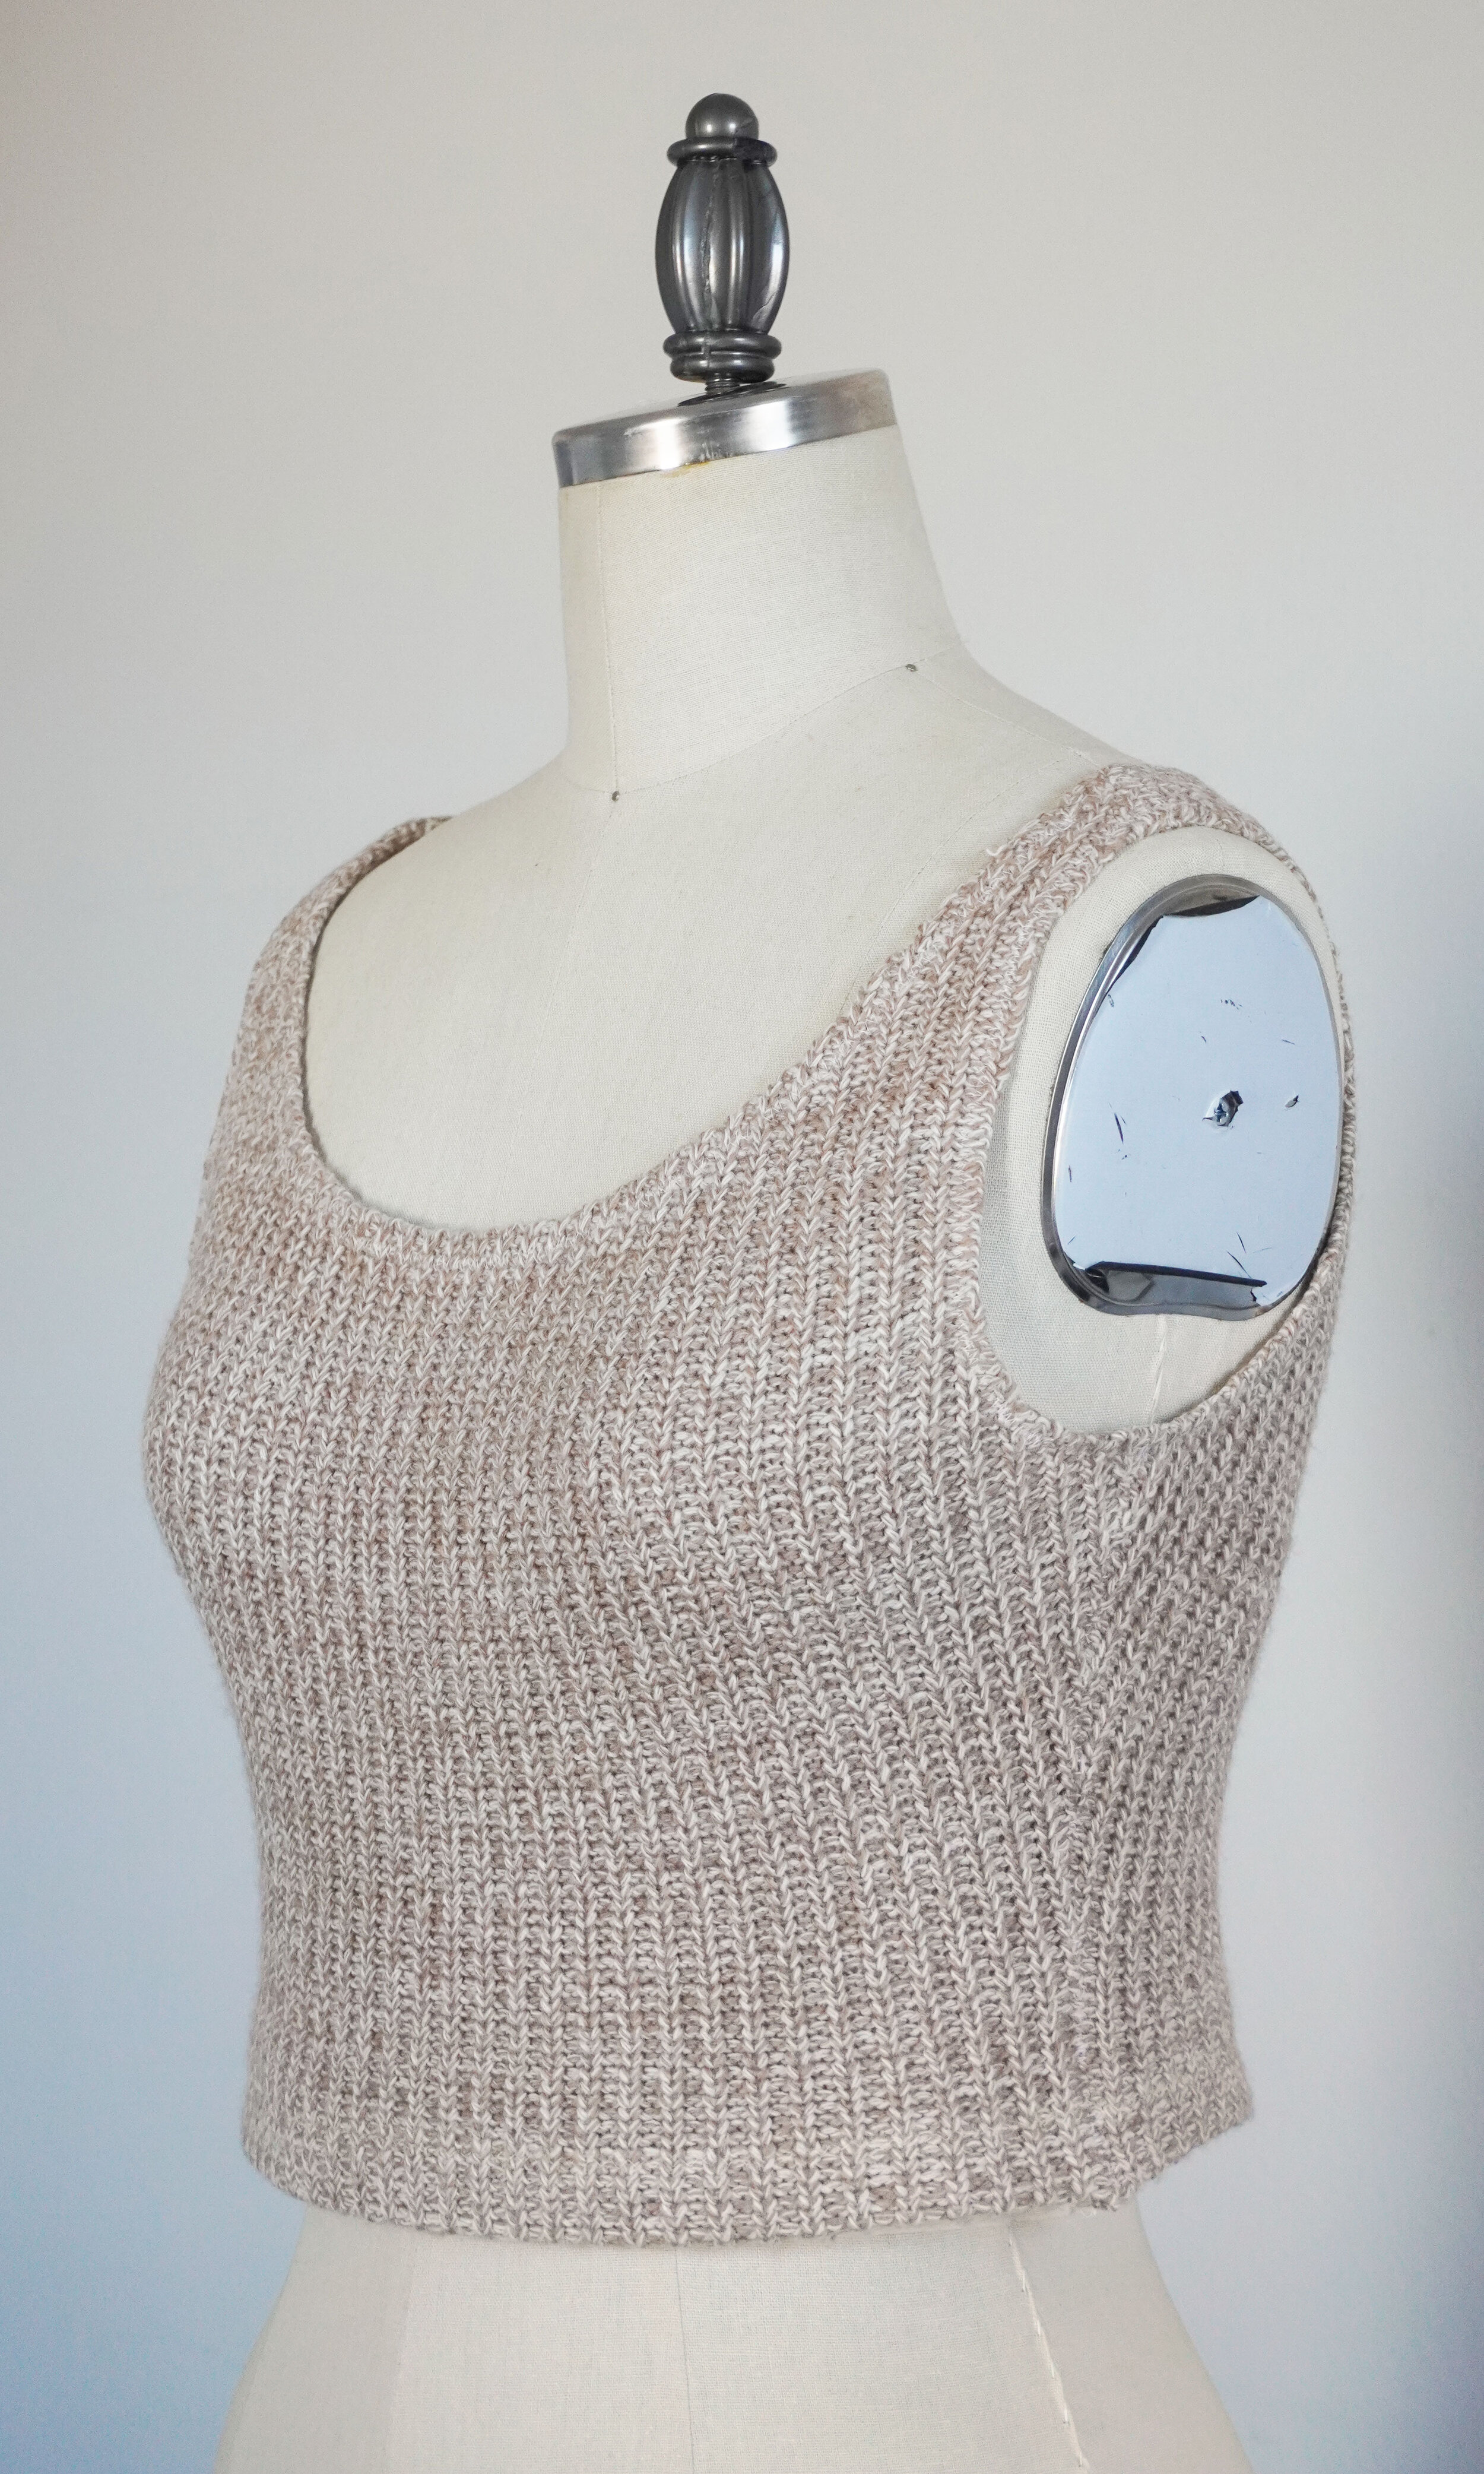
Once the shoulder and side seams were sewn, I trimmed the back neckline to blend in with the neckline in front. I also cut the armholes in a bit, to narrow the width of the shoulder strap to more closely approximate the look of the inspo garment and lower the bottom of the armhole a bit. The original pattern draft had a tight armhole because the bodice was supposed to connect to the sleeves, but that no longer made sense now that we were making two separate pieces. After trying the tank top on, I decided that the top was too constricting so I decided to lower the armholes to make the top more comfortable to wear.

The next step was to finish the neckline and armholes. My favorite way to finish the edges of knit fabrics is to sew clear elastic to the edge (taking care not to stretch the fabric), then turn the elastic over to the inside of the garment and stitch the edge in place. This gives me a clean finish every time and it also ensures that the seam will not stretch over time. (Check out the video below if you want to see what I’m talking about.) If you find that your edge is wavy or ruffled or not sitting smoothly, hover your iron over the edge and apply lots of steam - the steam will shrink the fabric and get your edge to lay flat again. Trust me, it really is magic - I frequently find that I have wavy edges when I first finish stitching the edge, but applying steam fixes the problem instantly.
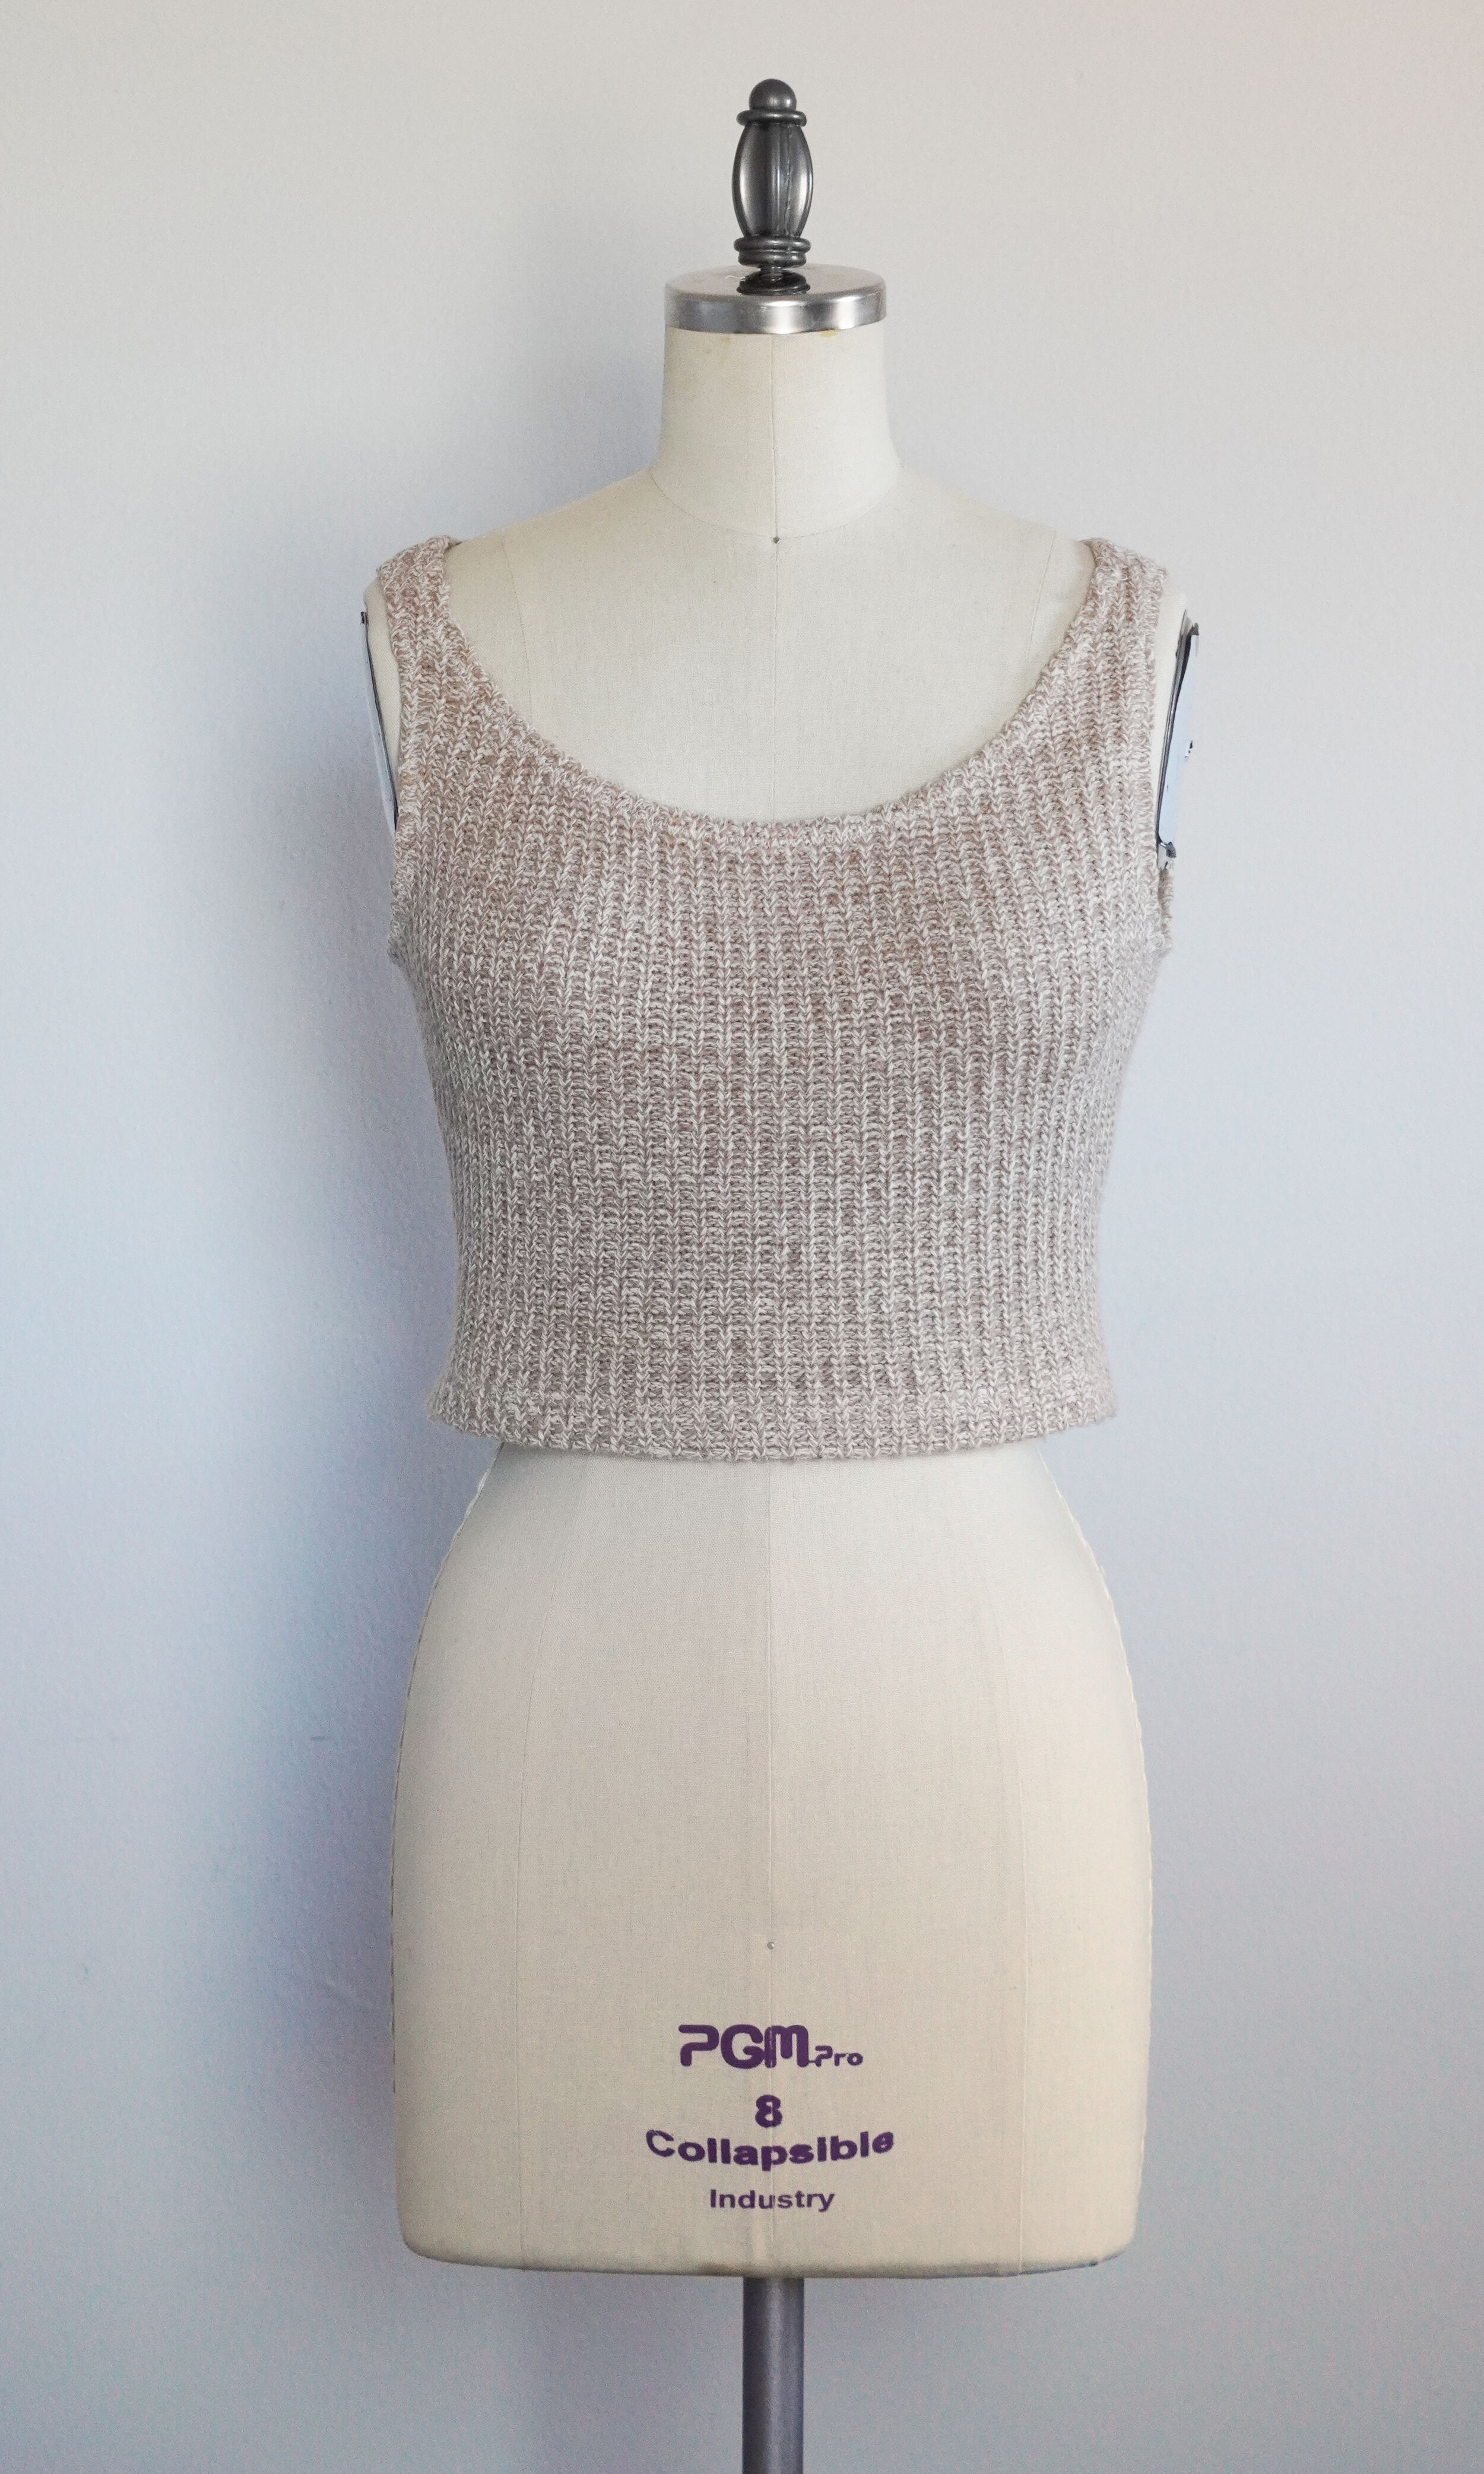
With that, the tank top was done (note that I didn’t have to finish the bottom hem because I used the existing hem from the original garment - hooray for time savers!). It was now time to move on to the cropped cardigan/shrug.

This was a pretty straightforward sew, complicated only by the fact that I had to sew on new sleeve caps to the sleeves that I took from my original sweater dress. I used the ribbing that I had salvaged from my original sweater dress and used that for the neckline and the hem in the front. The top part of the sleeve is attached to the bodice, but the bottom of the armhole is not, so I finished the edge of that part of the armhole using clear elastic. I also finished the hem in the back with more clear elastic, to prevent the hem from stretching out. I might go back and add clear elastic to the front hem as well, if I see that the hem is stretching out after some wear.
For whatever reason, after trying the cropped cardigan/shrug on, I found that I needed to pinch out quite a lot of excess at the shoulder seam to get everything to lie flat. I also found that the armhole and sleeves were too wide and I ended up re-sewing the sleeves in with a wider seam allowance to bring the armhole in a bit on my shoulder. I’m not sure why I needed to do this, as I don’t think it’s an issue with the pattern - it might just be a quirk of my loose knit fabric, so take this with a grain of salt. I point it out only to note that after you have constructed the cropped cardigan and tried it on, you might find that you need to make some adjustments to make the cropped cardigan more fitted.
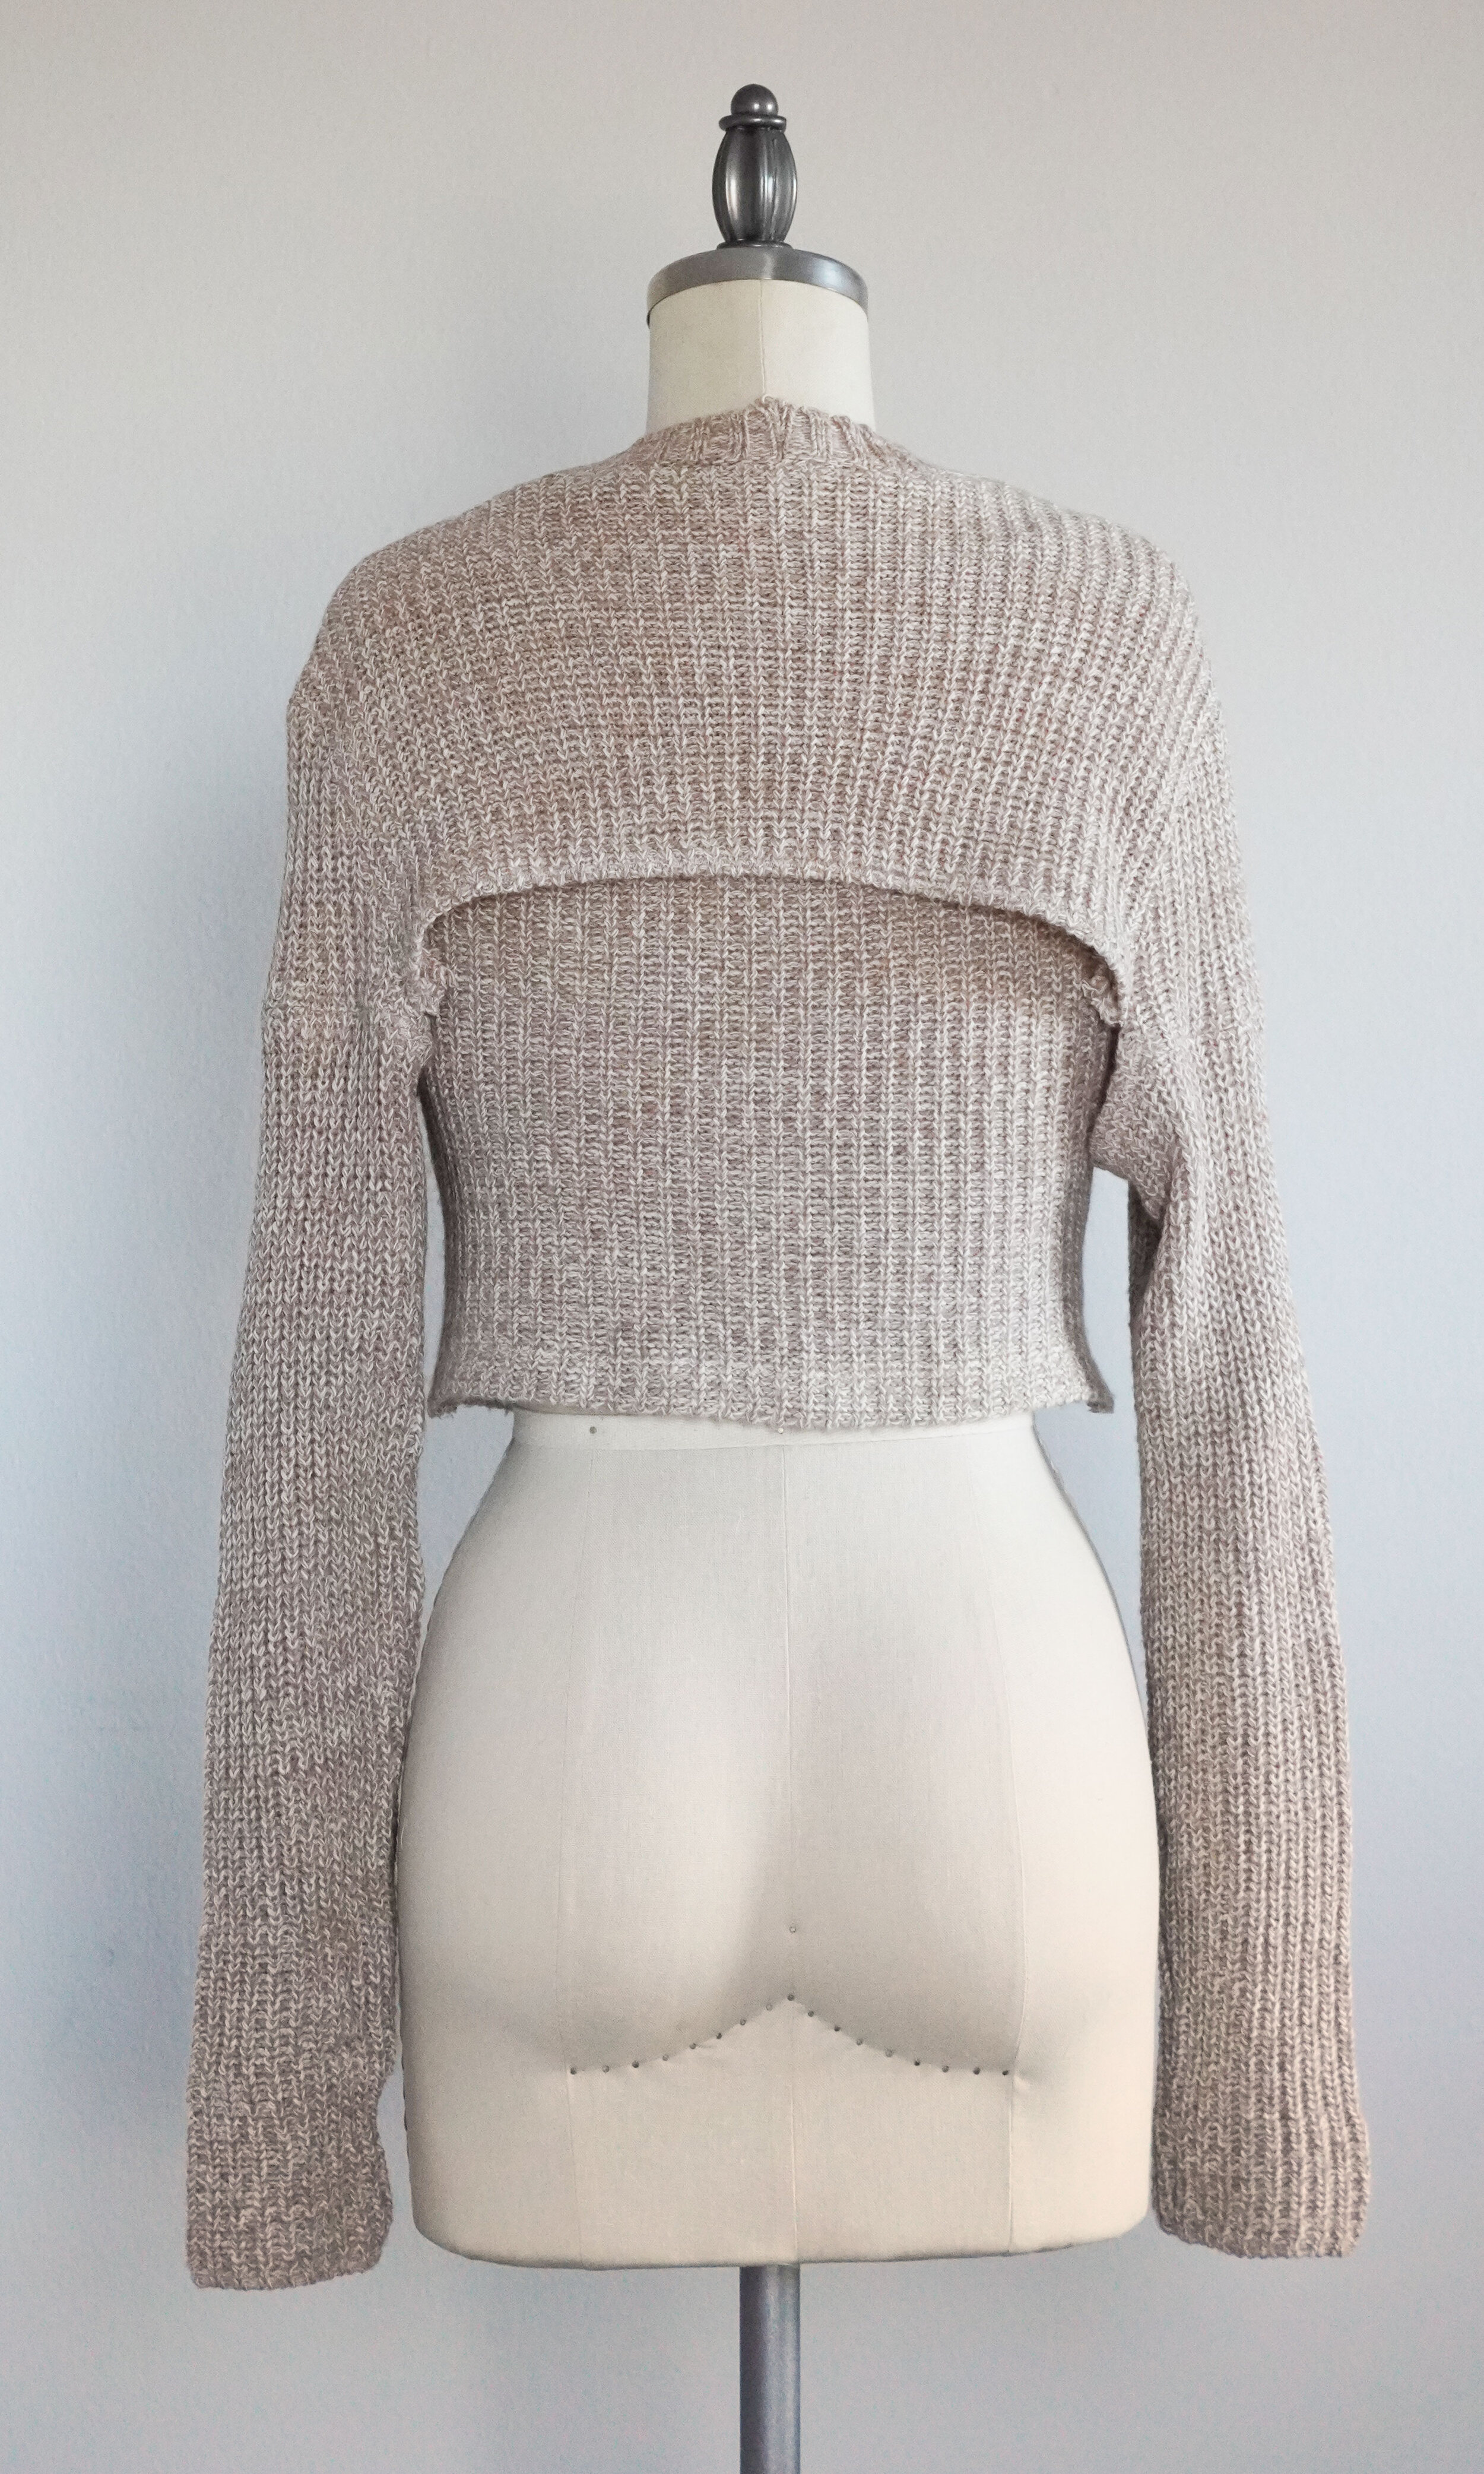
Overall, I’m thrilled that I was able to give my old sweater dress a new lease on life and transform it into this trendy cropped cardigan. The sweater set is really comfortable and much warmer than I would have thought, considering it’s a tank top and cropped shrug. I’ve been wearing it lots of different ways - on shoulder, off shoulder, with just the shrug paired with other tank tops. I could imagine pairing it with a loose wide-legged pant in a soft cozy fabric (that’s my next project - to make these wide-legged pants out of some old linen sheets I have laying around). Best of all, it’s a bargain AND it’s good for the environment: instead of throwing away the sweater dress and spending $750 on a new Rosie Assoulin sweater set, I re-used my (free) old sweater dress and only spent $7 on the pattern and maybe a dollar on clear elastic. Double win!


Here are some dress form pics:

I encourage you to refashion your old sweaters into a cropped cardigan set as well - it is really a pretty simple sew that doesn’t require any specialized equipment (no, you don’t need a serger - check out this guide to sewing knit fabrics with a regular sewing machine). Knits have a reputation of being rather tricky to sew, but I think that is hugely overblown, as chunky knits can actually hide a multitude of sewing mistakes and steam can really work magic on wavy seams. Here are a few tips to keep in mind if you do decide to make this yourself:
If you can’t squeeze all of the pattern pieces out of one sweater, just use two sweaters in complementary colors and make the tank top out of one sweater and the cropped cardigan/shrug/bolero out of the other.
If you don’t already own a good sweater to refashion and you’re shopping for one at a thrift store, look for the biggest size you can find, to give yourself more fabric to work with. Also look for a sweater dress with a chunky knit (either ribbing or cables) - the cropped cardigan really needs that chunky texture to get that slouchy, cozy effect.
When cutting the fabric, try to use as many features of the existing sweater as possible - salvage the ribbing, keep the cables and use the bottom hem and sleeves.
Don’t forget to cut out an extra back bodice piece for the cropped cardigan.
Don’t forget to trim the neckline and armholes of the tank top. This will make the tank top much more comfortable to wear.
You might need to take in the cropped cardigan to make it more fitted to your body. (I ended up pinching out quite a lot of excess at the shoulder seam and bringing the sleeve in a bit.)
Are you inspired to make your own cropped cardigan set? Let me know in the comments!