
If you’re just beginning to get into sewing, you might be wondering whether you can sew stretchy fabrics using a sewing machine, and if so, what settings you should use on your sewing machine.
You definitely can successfully sew stretchy fabrics using a basic home sewing machine. Here is a table summarizing my sewing machine setting recommendations for the Janome 5124. Note that different sewing machine models use different numbering systems, so always experiment with the settings on scrap pieces of fabric before beginning your project.
| Light-weight (e.g. sheer tissue knits) | Medium-weight (e.g. jersey) | Heavy-weight (e.g. sweater knits, double knits or neoprene) | |
|---|---|---|---|
| Presser foot pressure |
Use a walking foot if possible. If using standard foot, reduce pressure to 1. |
Use a walking foot if possible. If using standard foot, reduce pressure to 1 or 2. |
Use a walking foot if possible. If using standard foot, reduce pressure to 3. |
| Stitch - sewing seams |
Triple zigzag stitch Width: 6 Length: 1 |
Zigzag stitch Width: 6 Length: 1.5 |
Lightning stitch Width: 0.5 Length: 4 |
| Stitch - hemming and topstitching |
Lightning stitch Width: 0.5 Length: 4 |
Triple stretch stitch Width: 0 Length: 4 |
Triple stretch stitch Width: 0 Length: 4 |
Why can’t you use ordinary sewing machine settings when sewing stretchy fabric?
You may be wondering why you need to change your sewing machine settings when stitching stretchy fabric. The main reason is that when sewing woven fabrics, we typically use a straight stitch, and straight stitches can’t stretch so they will ‘pop’ and break when the fabric is stretched. We therefore need to use a stitch that can stretch with the fabric, like a zig zag stitch.
We also need to reduce the pressure on the presser foot, to ensure that the fabric is guided through the machine without stretching it out. If the presser foot is pressing down too hard, it will prevent the feed dogs on the bottom from pulling the fabric away from the needle area smoothly, thereby causing the fabric to stretch out. With woven fabrics, this is less of an issue because woven fabrics are usually stable and the presser foot is not capable of dragging them along.
Sewing machine settings for stretchy fabric
Presser foot pressure
First off, I highly recommend using a walking foot when sewing knit fabrics. If you don’t have one, invest in one -- it’s a little more expensive than your average sewing machine foot, but it is the foot that I use the most (in fact, at this point, it’s pretty much the default foot on my sewing machine). The walking foot helps ensure that all layers of the fabric are being fed into the machine evenly, without dragging the top layer of fabric. Using the walking foot helps eliminate the ripples that frequently appear if you sew knit fabrics with a standard foot:
On the left: stitching done with regular foot. Note the waviness in the seam.
On the right: stitching done with walking foot. The fabric lays perfectly flat.
I find that if I use my walking foot, I don’t have to adjust the presser foot pressure because the walking foot does all the work of ensuring that the fabric feeds in evenly. If, however, you don’t have a walking foot and you are just using a standard sewing machine foot, then you will probably need to reduce the presser foot pressure a few levels when sewing knit fabrics. Different sewing machines have different numbering systems, so I can’t say what number the presser foot pressure should be set to for every machine. However, as an example, on my Janome 5124, the typical presser foot setting for woven fabrics is 3, and I set it to 1 when I work with stretchy knit fabrics. If I am working with something only slightly stretchy, I’ll set it to 2, and if I’m working with a stable knit fabric like a double knit, I will keep the presser foot pressure at 3. Just play around with the different pressure settings on scrap pieces of fabric until you hit on the right settings for your sewing machine.
One quick note: Make sure you are adjusting the presser foot pressure and not your thread tension dial! (I’ve made this mistake in the past.) Check your manual to see where the presser foot dial is located on your machine – it is usually on the top somewhere. On my Janome 5124, it is a black dial on the top of my machine, towards the left:

Stitch settings
There are tons of different stretch stitches available on sewing machines these days, so it is not possible for me to cover them all. Instead, I will only walk through the most common stitch types that can be found on most home sewing machines.
Zigzag stitch
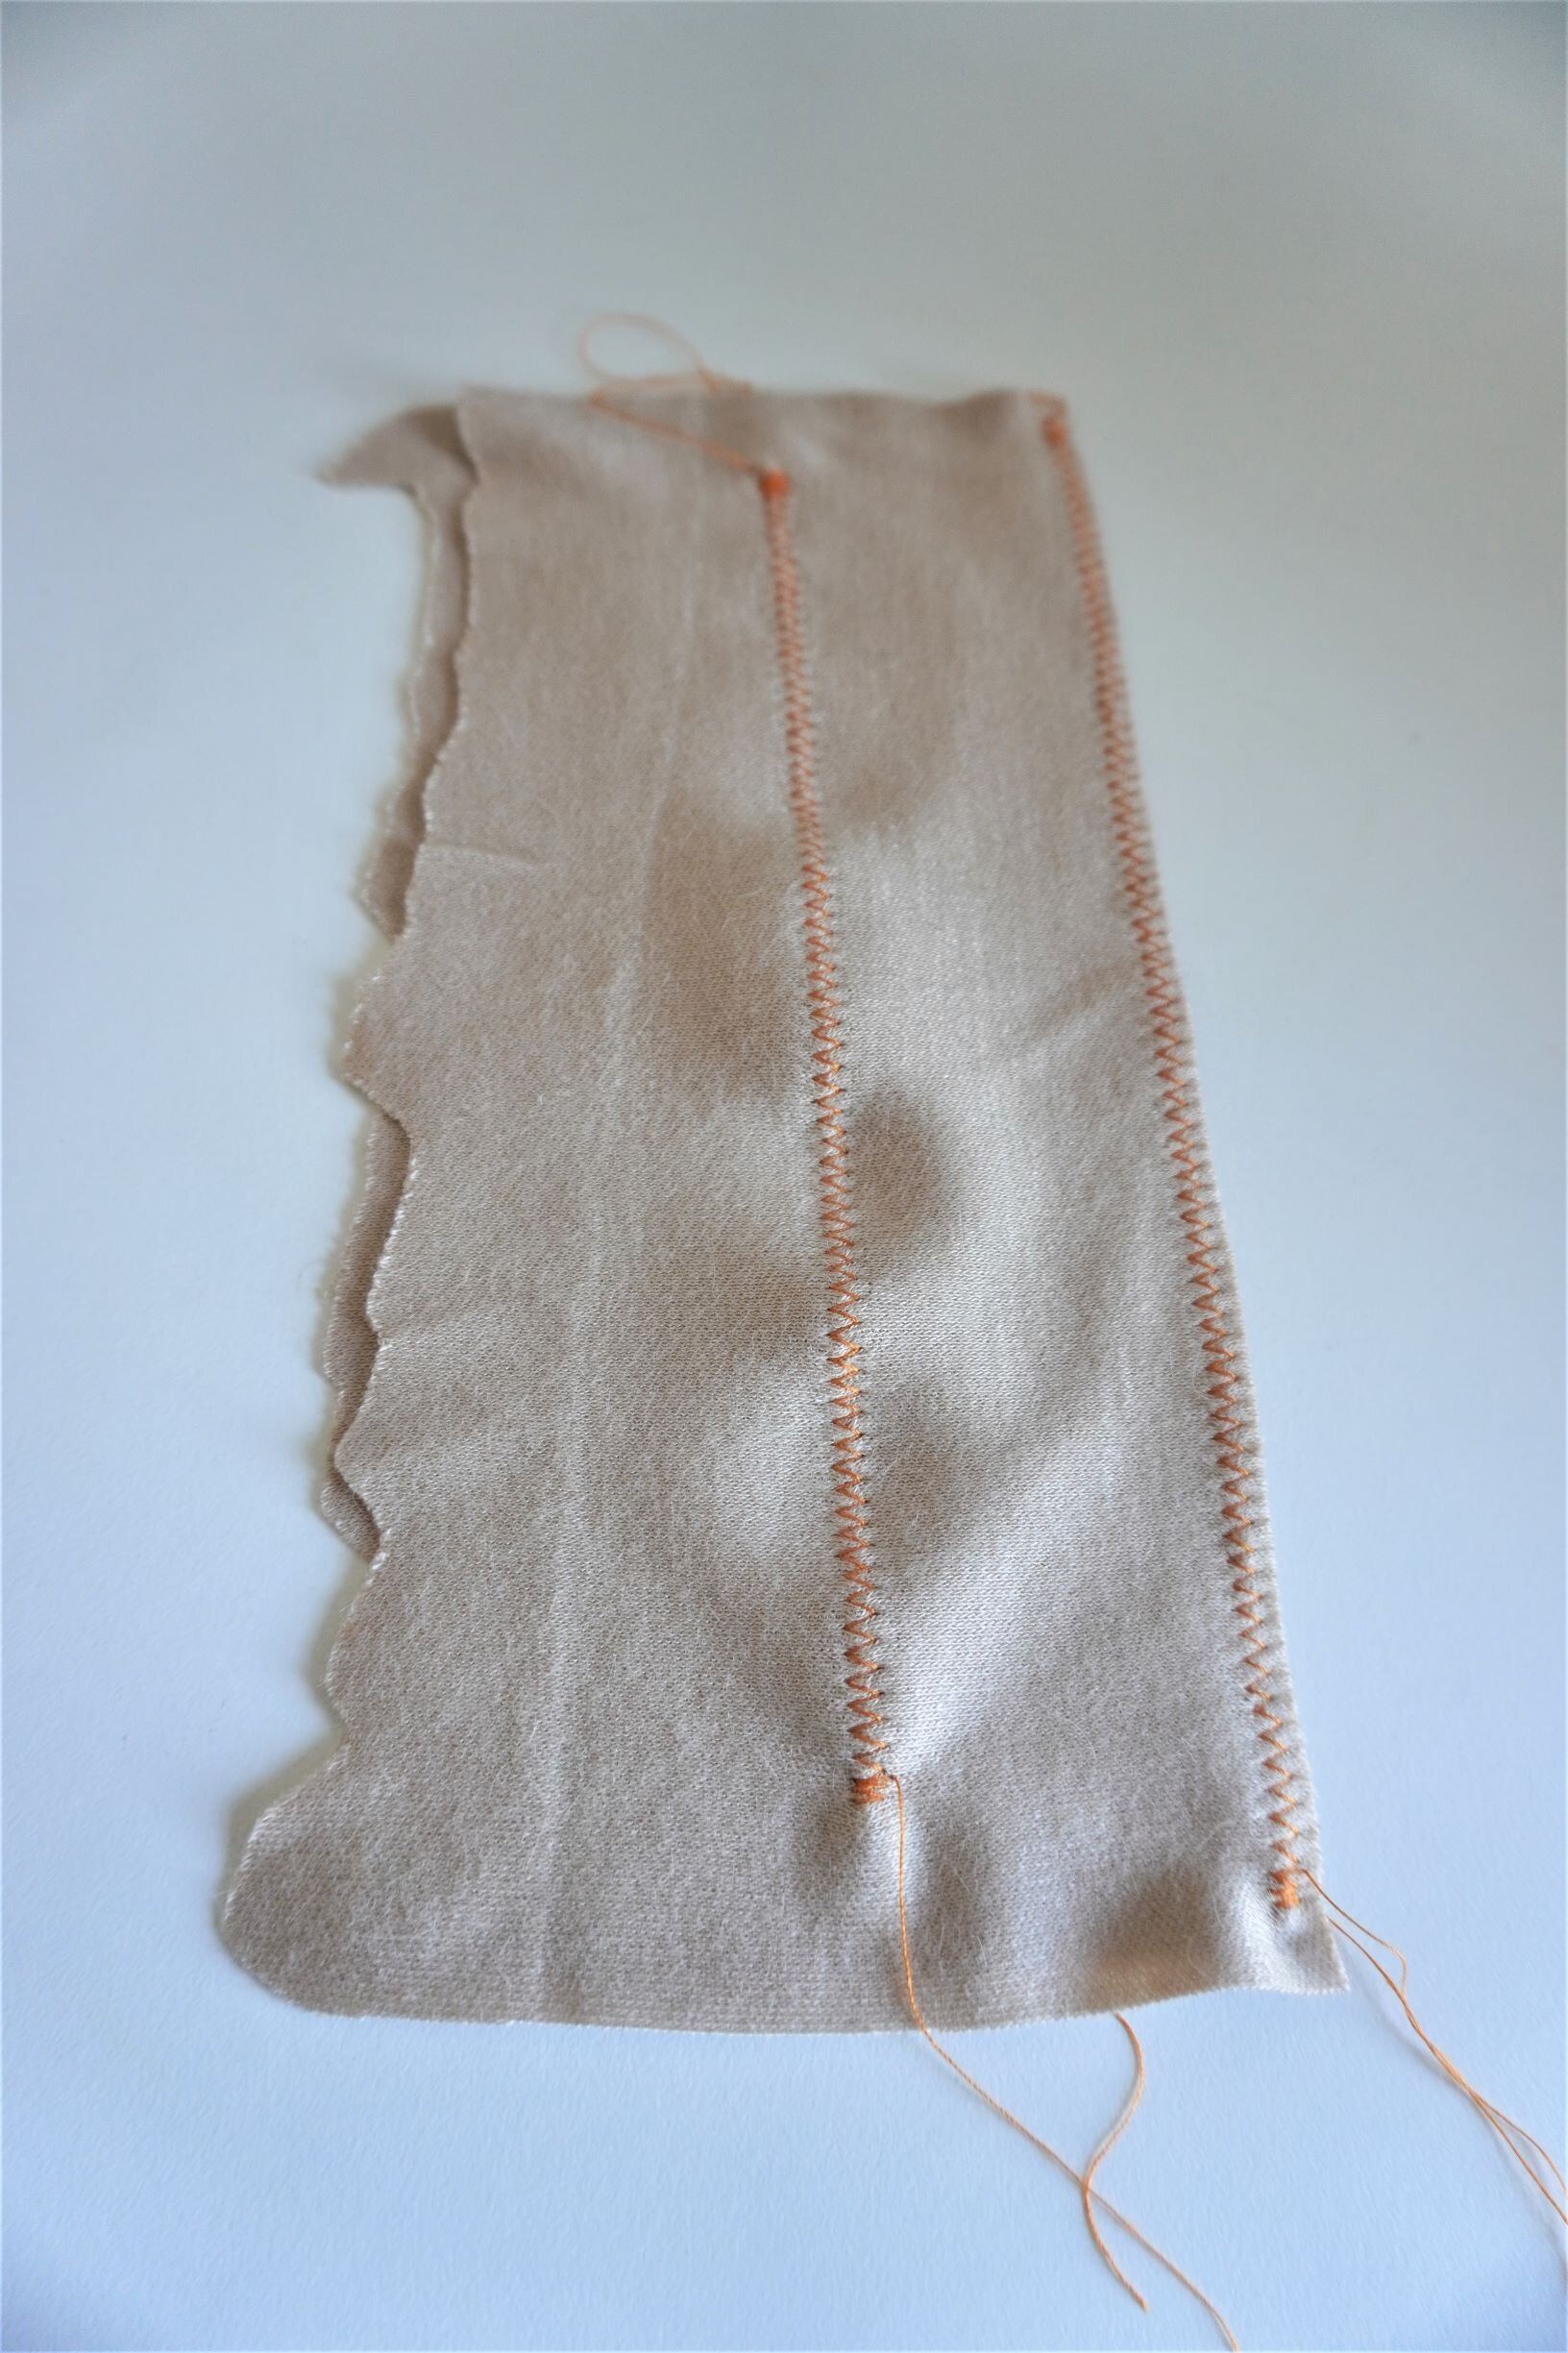
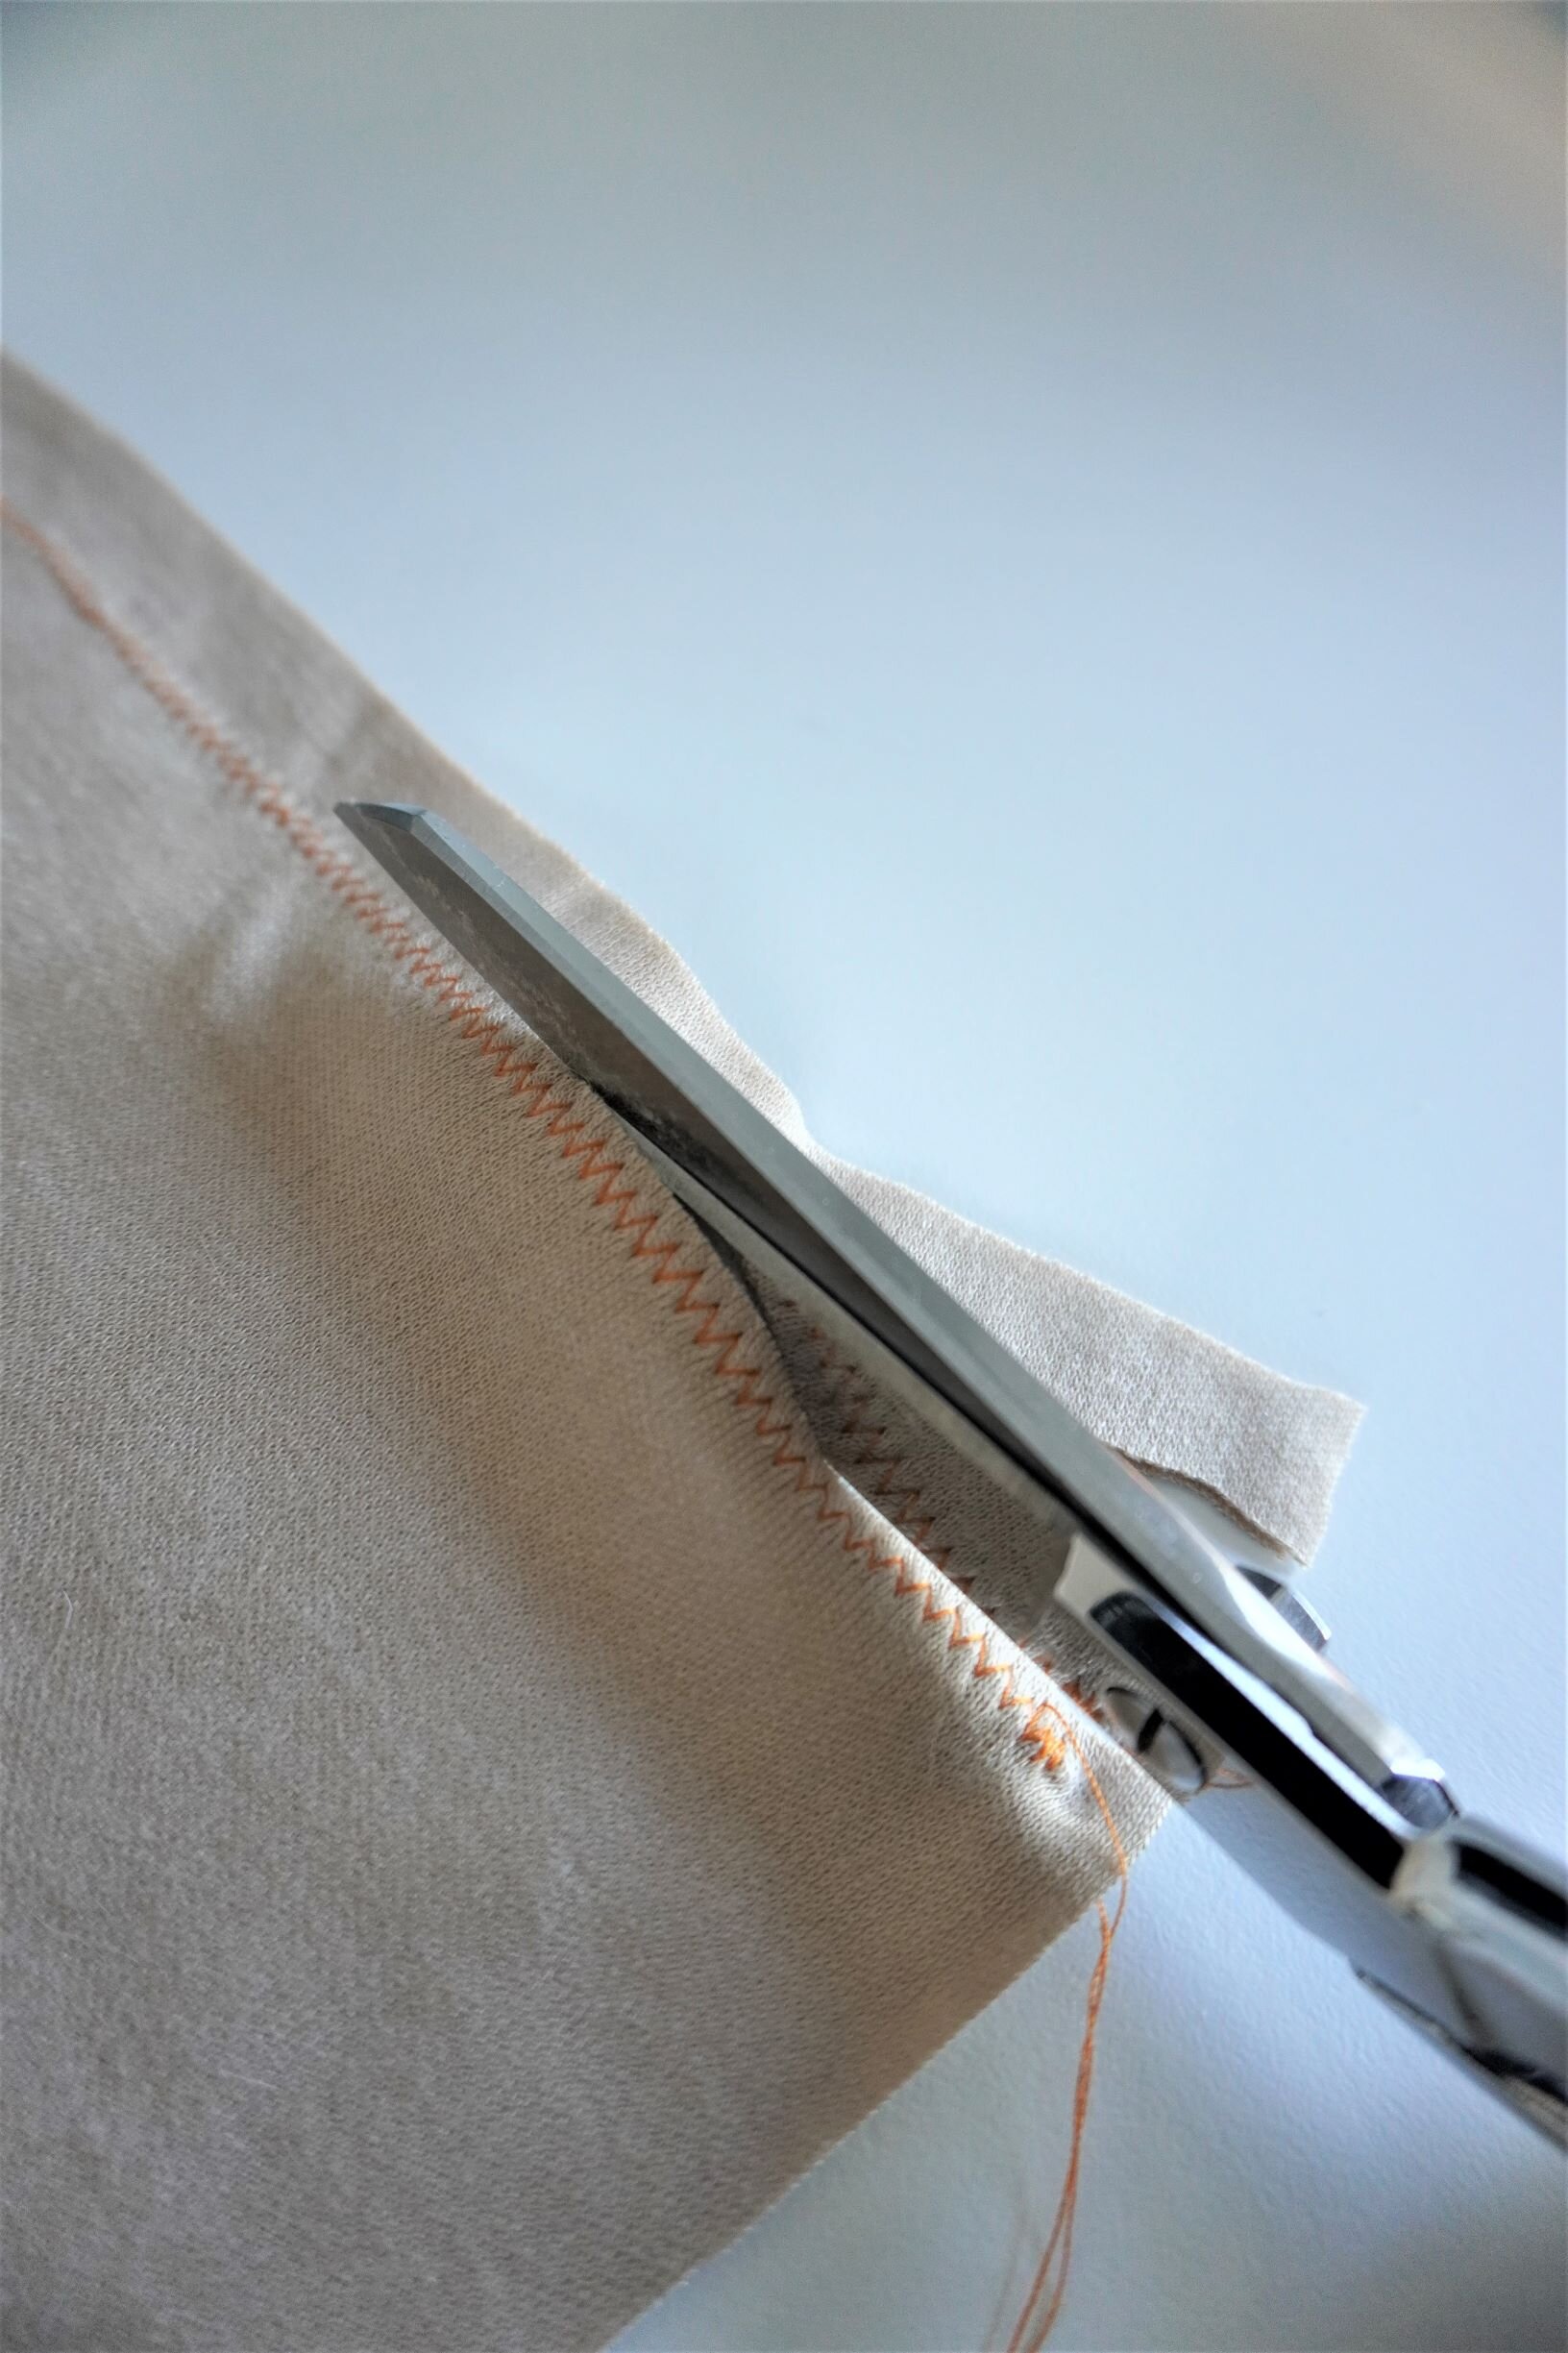
The basic zigzag stitch is a great choice for sewing seams, as it roughly approximates the look of a serged or overcast edge. I set my zigzag to a width of 6 and length of 1.5, as this gives me a fairly dense zig zag that is about the same width as the stitching I would get if I used my serger. I then simply sew along the seam as I would if I were sewing a straight stitch, then trim the fabric close to the stitching.
Quick tip: When sewing with the zigzag stitch (or any stitch that has some width), make sure you adjust the location of your seam guide. The seam guidelines shown on your metal throat plate reflect the distance from the center needle position. However, when sewing zigzag stitches, the needle is not in the center needle position, so you will need to make new guidelines that are the correct distance from the left side of your zigzag.
The zigzag stitch is a great option for sewing knit fabrics, but there are two main problems. First, this method does not work very well on light-weight fabrics as the zigzag will create a ‘ridge’ or ‘tunnel’ (shown below).
To avoid this ridge or tunnel, I use the triple zigzag stitch when sewing lightweight knit fabrics, which I discuss below.
The other problem is you will not be able to press your seam allowances open, because the zigzag stitch creates a single seam allowance made up of a double layer of fabric. This might be a problem if you are sewing with a bulkier, heavy-weight fabric, because the double thick seam allowance may create a ridge underneath your garment. This is why I use the lightning stitch (discussed below) whenever I am sewing with thick knit fabrics like bulky sweater knits.
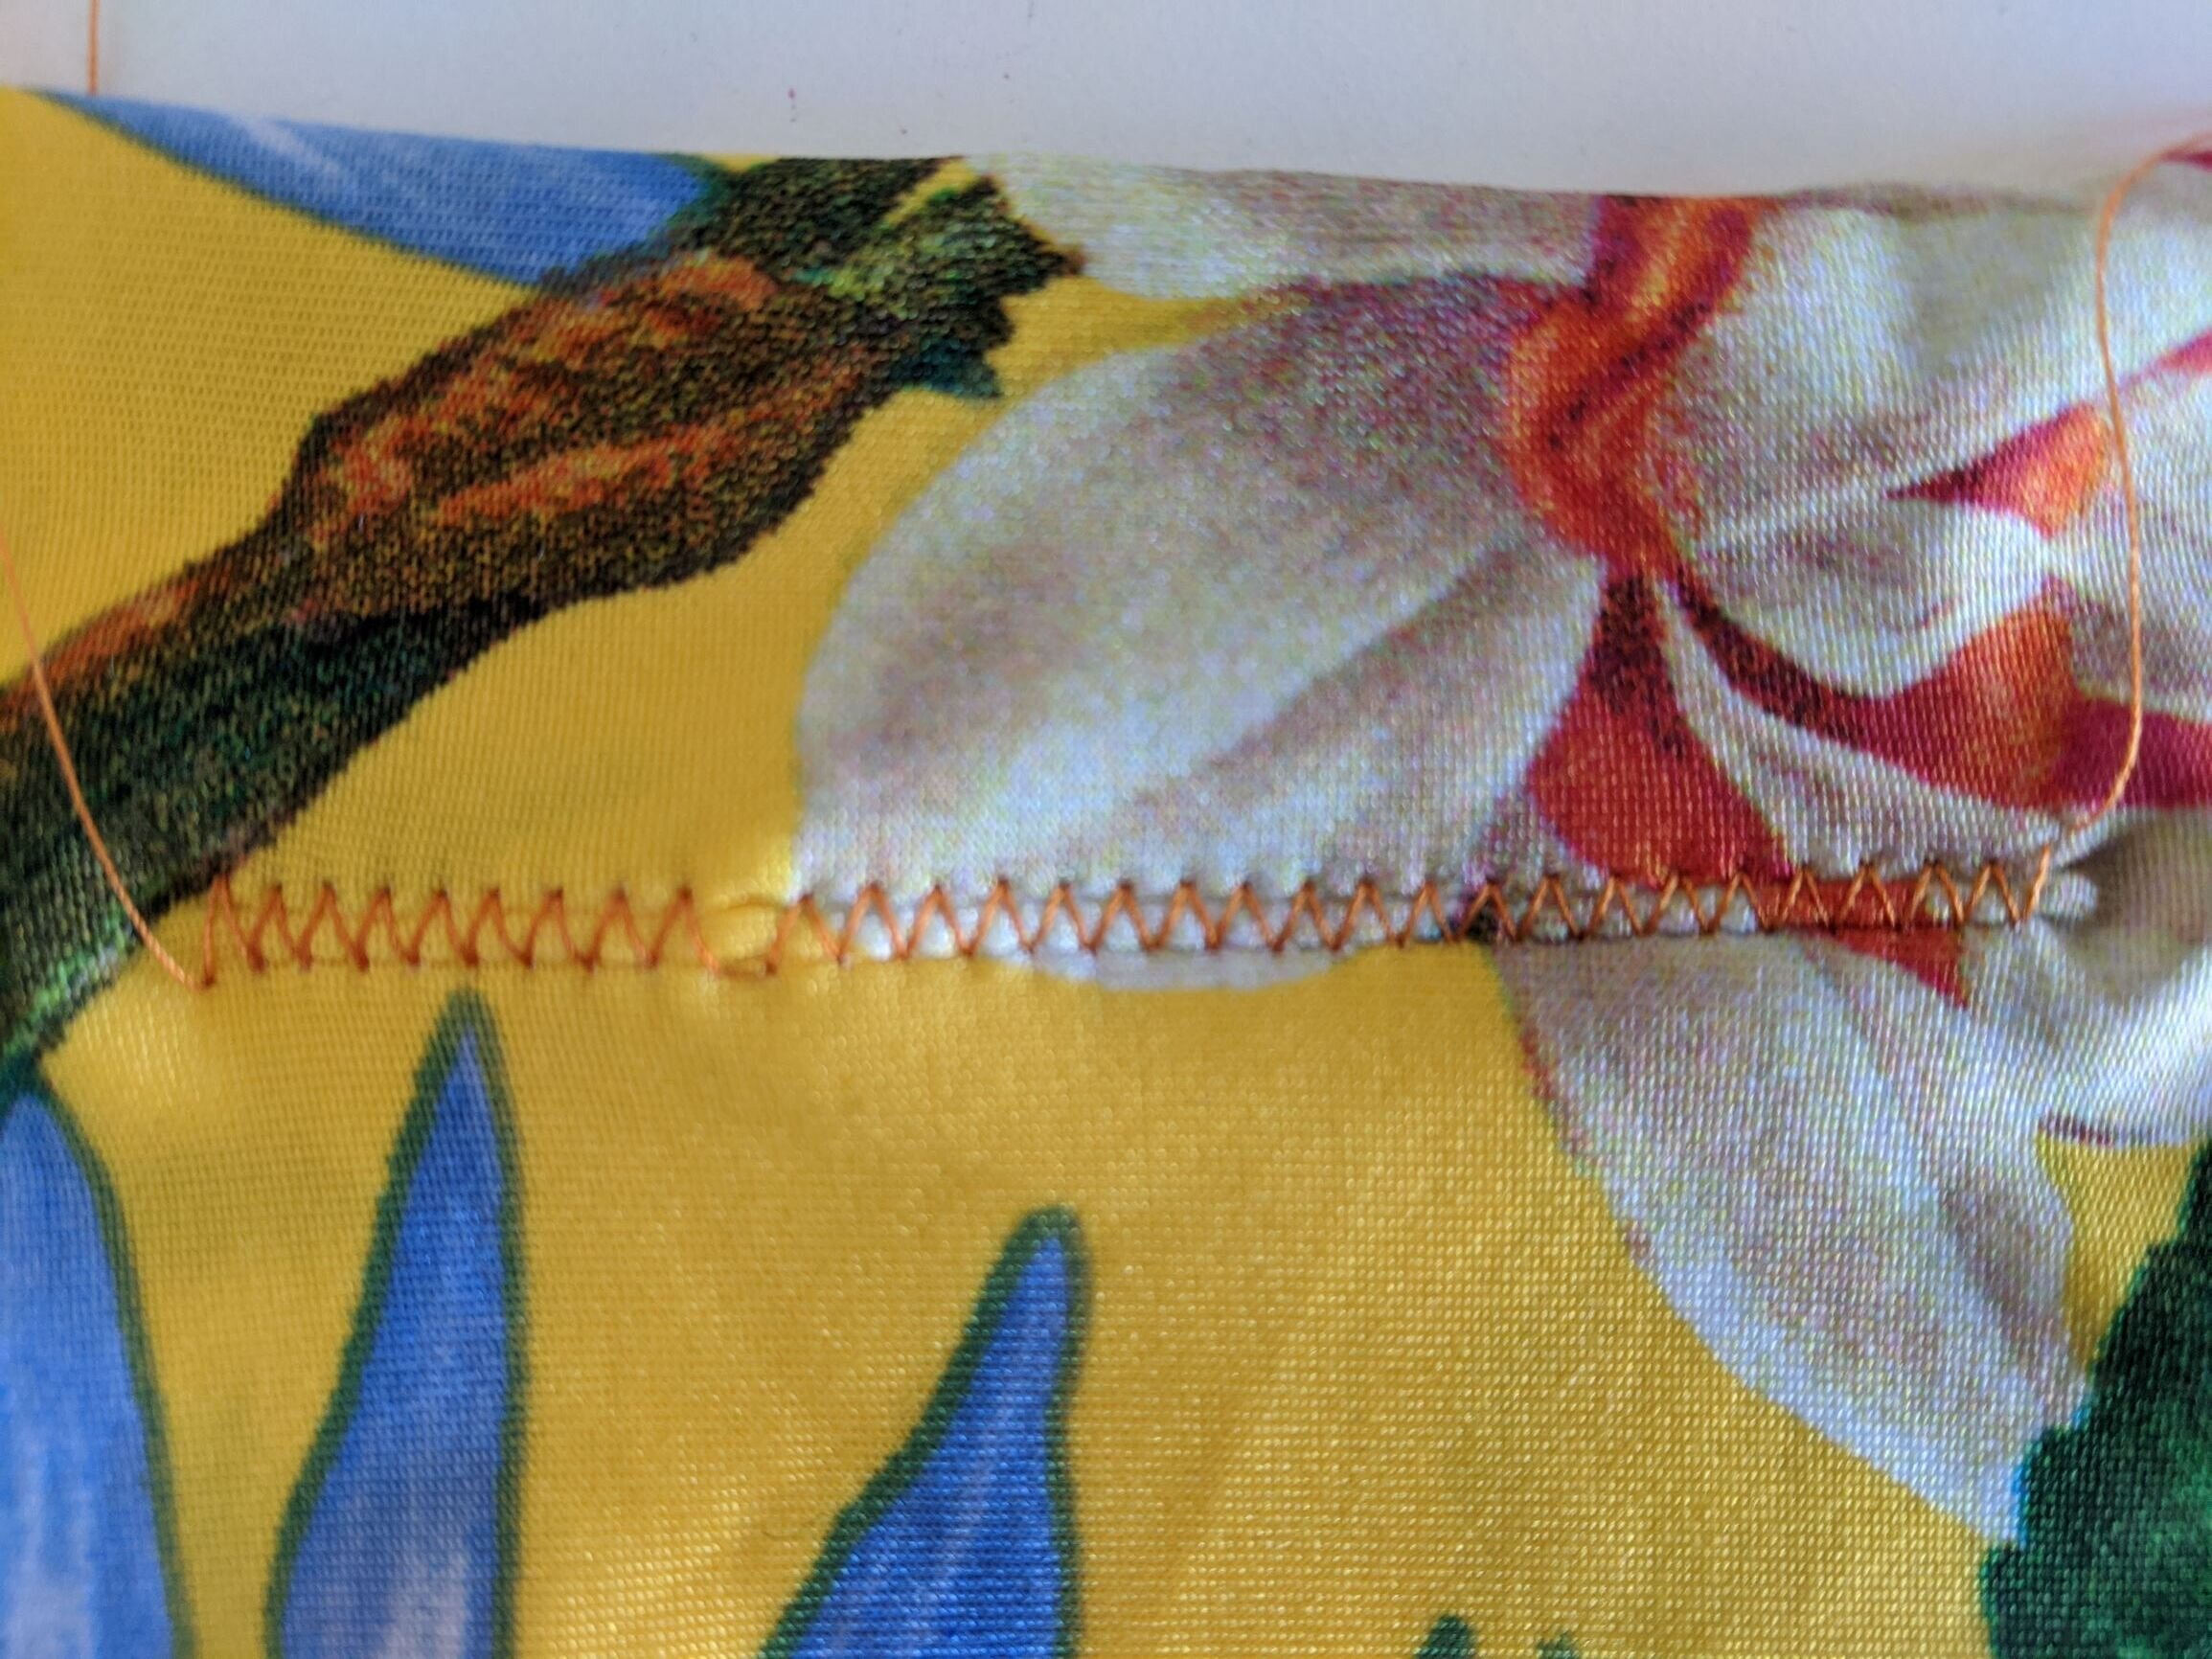
Three-step zigzag or tricot stitch
A close cousin of the zigzag stitch, the three-step or tricot stitch is a great choice when you are sewing light-weight fabrics, because it does not create a ‘ridge’ or ‘tunnel’:

When I use this stitch, I like to set the width to 6 and length to 1. (In my experience, any stitch length shorter than 1 ends up bunching up the fabric.) Then I simply sew along the seam line and trim the fabric close to the stitching, just as I would if I were stitching with the classic zigzag stitch.
Remember that, as noted above, you will need to adjust your seam guide so that you get the right distance from the left side of your zigzag.
Lightning stitch
The lightning stitch is a zigzag stitch with one long side and one short side. The resulting stitch looks almost like a straight line, but it still allows the fabric to stretch.

To use this stitch for seaming, simply sew along the seam in the same way you would sew a straight stitch. The lightning stitch is a great choice for sewing bulky fabrics, when you want to be able to press open the seam allowance. (As I explained above, the classic zigzag or triple zigzag stitches aren’t so good for bulky fabrics because they create a single seam allowance with a double layer of fabric, which can be bulky and create a ridge underneath your garments.)
The lightning stitch is also a good choice for hemming and topstitching because it looks very close to a straight stitch. Personally, I hate using a zigzag stitch on the hem because I think it makes the garment look homemade, so I always use either the lightning stitch or the triple straight stitch (discussed below) when hemming.
Triple straight stitch
The triple straight stitch (a.k.a. the triple strength stitch or triple stretch stitch) is a very strong stitch that is created by stitching forward, then backward, then forward again. It looks very close to a straight line, except slightly thicker and more pronounced.

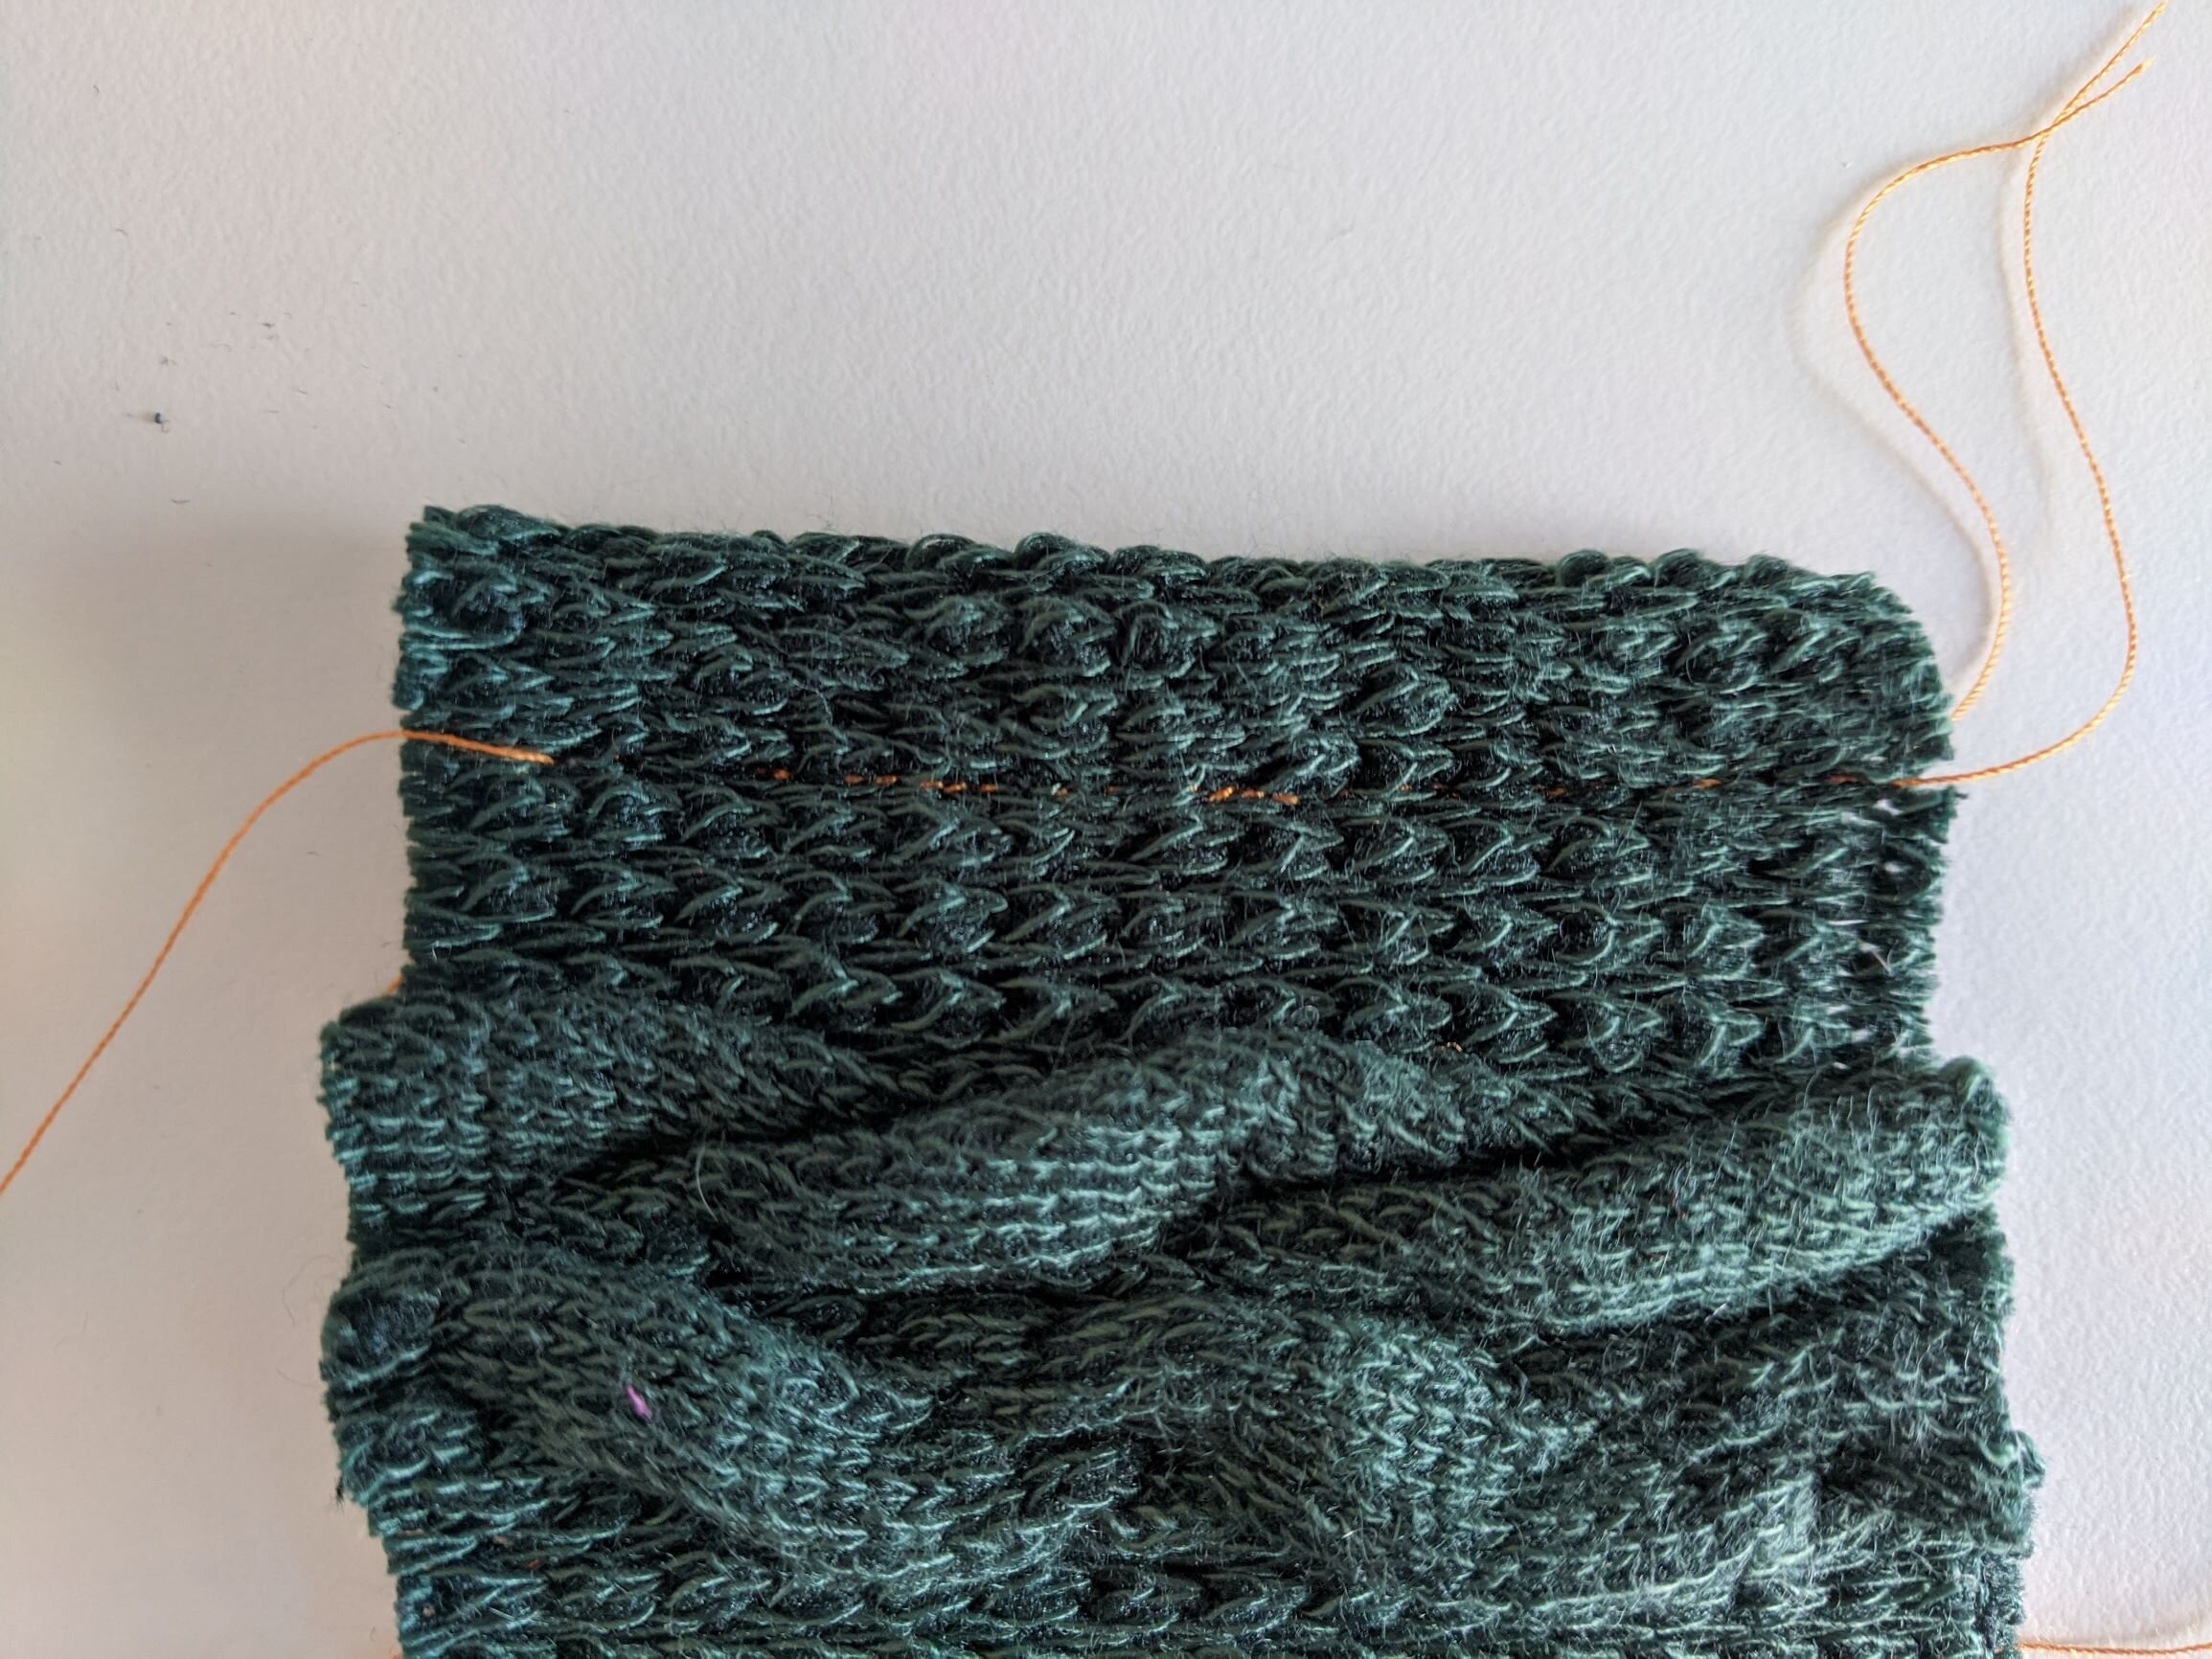
I like to use it when hemming or topstitching stable medium-weight knit fabrics and I want a pronounced stitching line. For example, if you are working with a really textured sweater knit, the triple straight stitch may be the only way to get a stitching line that is actually visible (the lightning stitch just disappears into the texture of the fabric). In the photos below, I have sewn with the triple straight stitch (shown on the left side) and lightning stitch (shown on the right side) on a dark green sweater knit fabric – see how the lightning stitch disappears into the fabric?

The triple straight stitch does not work well on light-weight or stretchy knit fabrics, as it will cause the fabric to pucker or bunch up. (For me, I often find that the fabric won’t advance through the feed dogs at all, so I end up stitching a knotted lump of thread into the fabric.)
Other tips for sewing stretchy fabrics
Now that your sewing machine is set to all the right settings, you are almost ready to start sewing your stretchy fabric! Just bear in mind the following four additional tips:
Use ballpoint needles (if your fabric is moderately stretchy) or stretch needles (if your fabric is really stretchy). These needles have a round tip so they won’t damage your fabric. If you are experiencing skipped stitches, switching to a ballpoint or stretch needle will frequently fix the problem.
Make sure you feed the fabric into the machine smoothly. Don’t pull or push the fabric as it goes through the machine, and don’t have large pieces of the fabric hanging off the edge of your machine, as this will cause the fabric to stretch. Make sure you have sufficient space on the table around your sewing machine to lay the fabric flat.
If you are really having trouble feeding the fabric through the sewing machine without stretching it out, try pinning your fabric to tissue paper and then sewing through the fabric and tissue paper together. After you have finished sewing, carefully peel the tissue paper away. The tissue paper helps stabilize the fabric so you can’t stretch it as it goes through the sewing machine.
If you accidentally stretch your fabric when sewing and end up with wavy seams, try ironing the seam with a lot of steam. In many cases, this will eliminate the waviness and make the seam lay flat. It really is a magical cure for wavy seams, as you can see from this video:
I hope this guide to sewing machine settings for stretchy fabrics helps you with your next knit sewing project. Happy sewing!


