
When we first start sewing, many of us are taught to backstitch at the beginning and end of all seams to ‘lock in’ the stitching so the stitches don’t unravel. Prompted by those early lessons, many of us instinctively backstitch every single seam without stopping to consider whether it is really necessary or appropriate for the particular sewing project at hand. Below I answer some common questions about backstitching that beginners frequently ask, including when backstitching is necessary. I also list some alternatives to backstitching that might be better choices, depending on the type of fabric you are working with.
What is backstitching?
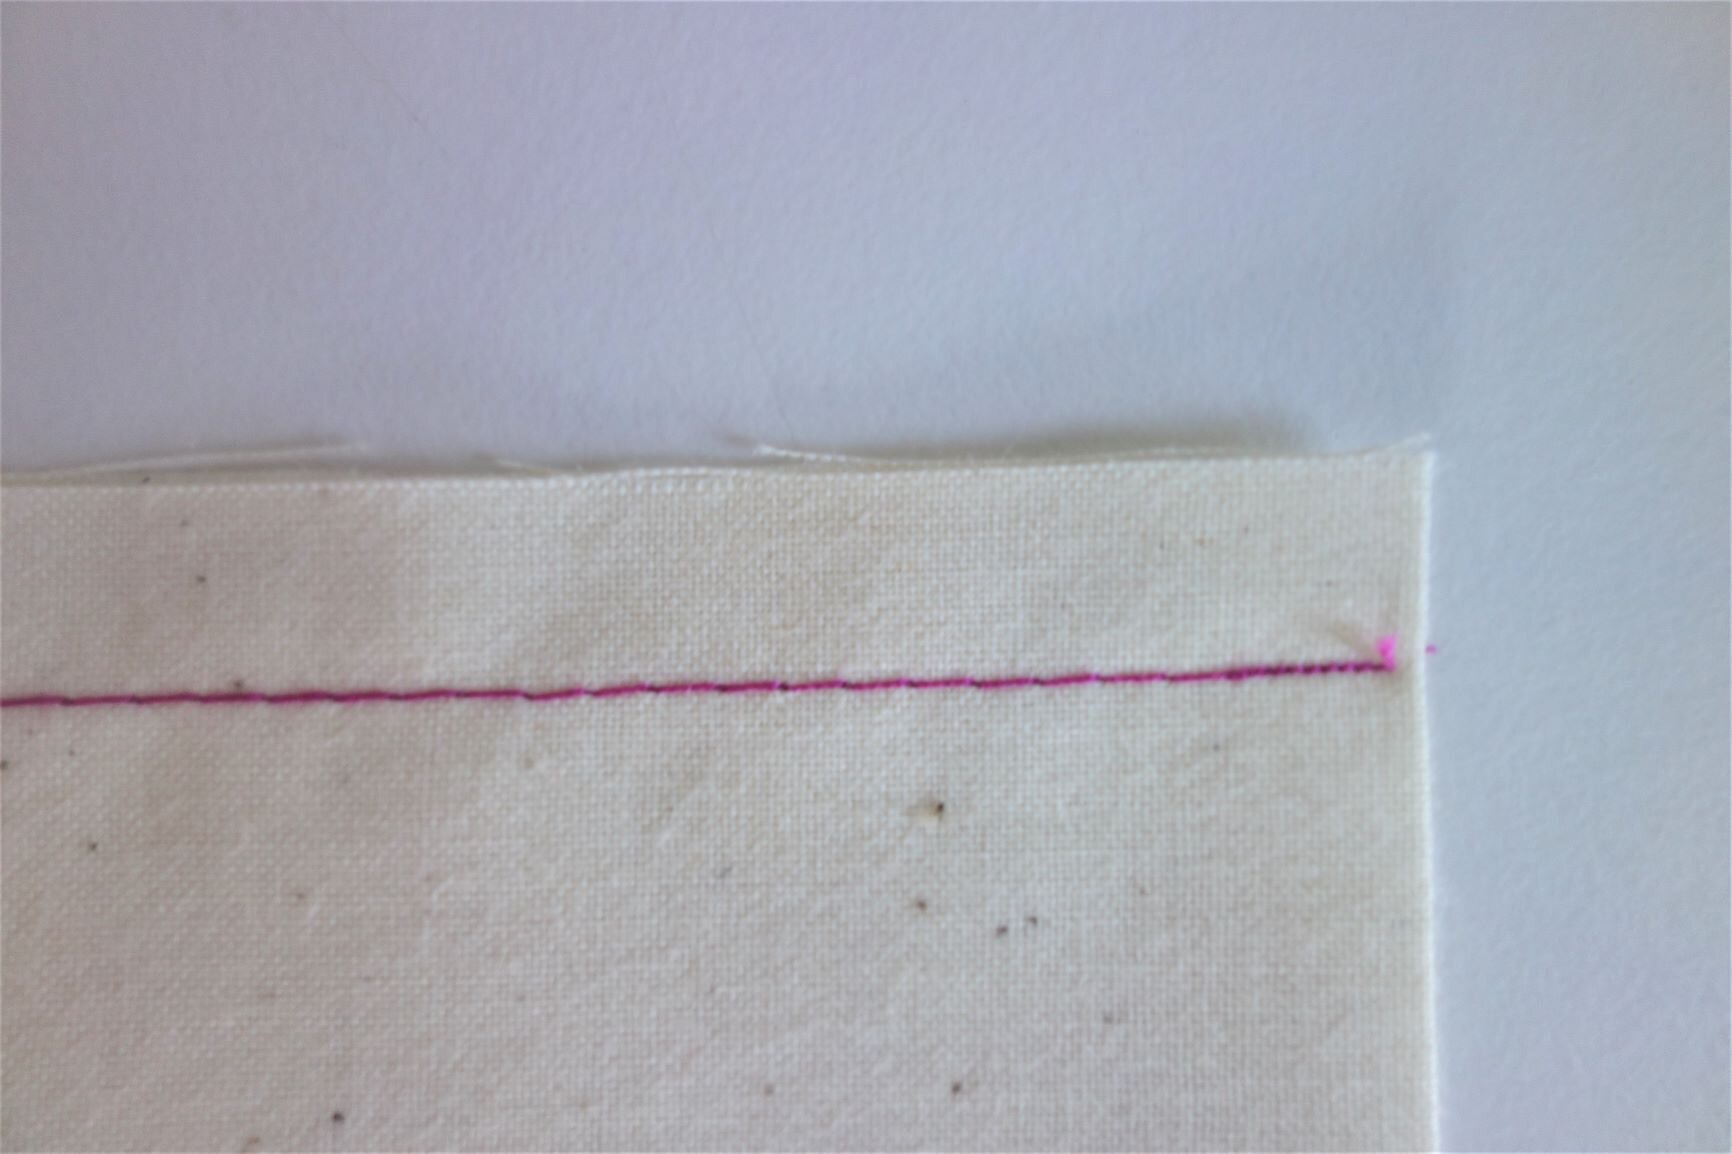
Backstitching is when you sew a few stitches forwards at the beginning or the end of the seam, then sew a few stitches backwards, then return to sewing forwards to finish sewing the rest of the seam. This is very simple to do if you have a reverse function on your sewing machine. (See video demo below.)

The act of stitching forwards, then backwards, then forwards again results in three lines of stitching in the same area, which effectively ‘locks in’ the stitches and prevents them from unravelling. You can test this out by trying to pull apart the two pieces of fabric at the beginning of the seam — if you don’t backstitch, the stitches should unravel from the stress placed on the seam, whereas if you do backstitch, the stitches should be locked and they will not unravel even if the two pieces are pulled apart with some force.
The downside to backstitching is the three lines of stitching forms an unsightly ‘clump’ of stitching at the beginning and end of seams. (See pics below.) This is perfectly fine if you are just sewing a regular seam where the stitches will be hidden within the seam allowance, but it is a problem if you are stitching somewhere that is visible from the right side of the garment (e.g., if you are topstitching).


The three lines of stitching created by backstitching can also add a lot of bulk. This may be particularly problematic if there are multiple overlapping seams in the same area, which may create a lump that can be felt even on the right side of the garment.
One last downside to backstitching is that it can cause fabric to be bunched up and jammed down the throat plate of the sewing machine. This is particularly likely to happen when the fabric is lightweight (e.g., crepe de chine, chiffon, georgette and charmeuse).
How do you backstitch without the reverse function?
But how do you backstitch if your sewing machine does not have a reverse function? To backstitch without reverse, simply turn your fabric around 180 degrees and sew a few stitches, then turn the fabric back to the original position and continue sewing the rest of your seam. (See video demo below.)

Alternatively, you can also lock in your stitches by sewing a few stitches at the beginning of your seam, then lifting your needle and repositioning the fabric so that the needle is back at the beginning of your seam. Stitch over your existing stitches and then continue with the rest of your seam. Stitching over the stitches twice locks them in and prevents them from unravelling. (See video demo below.)

The resulting stitches look quite similar to regular backstitching — the multiple lines of stitching cause a ‘clump’ to form at the beginning and end of the seam, which may not be desirable if you are stitching something that will be visible on the right side of the garment.

Do you have to backstitch a zigzag stitch?
You should backstitch zigzag stitches to prevent the stitches from unravelling. To do this, simply use the reverse function on your sewing machine to stitch a few stitches backwards, then continue sewing forwards again. You can backstitch a zigzag stitch using a regular presser foot or even a walking foot. (There are some sources online that say you cannot backstitch a zigzag stitch using a walking foot, but honestly, these sources are wrong – are you can see from the video below, you can backstitch a zigzag stitch using a walking foot.)

Note, however, that backstitching a zigzag stitch does result in an unsightly ‘clump’ of stitches where the backstitching is done, so this method may not be appropriate if you are zigzag stitching somewhere that will be visible on the right side of the fabric (for example, if you are using the zigzag stitch to hem a stretch fabric).

Do you have to backstitch lightning stitches, three-step zigzag stitches or triple stretch stitches?
You do not have to backstitch when sewing with the lightning stitch, three-step zigzag stitch or triple stretch stitch, because these types of stitches will not unravel when the seam is put under stress. The lightning and three-step zigzag stitches do not unravel because these stitches move from side to side and it is more difficult for them to unravel than a straight stitch. The triple stretch stitch does not unravel because this stitch consists of the sewing machine stitching over the same stitch three times, and this repeated stitching ‘locks in’ the stitches so they do not unravel.

Top: three-step zigzag stitch. Middle: lightning stitch. Bottom: triple stretch stitch.
As you can see from the below video demo, the lightning stitch does not unravel even when I try to pull apart the two pieces of fabric:

Do you have to backstitch when stay stitching?
You can backstitch when stay stitching, but it may not be necessary because these stay stitches will be caught in the seam allowance and they are unlikely to unravel. These stitches are also frequently caught in another seam, which will also prevent these stitches from unravelling.
Do you have to backstitch when overcasting?
You do not have to backstitch zigzag or other overcasting stitches that are being used to finish the edge of the fabric (rather than to sew a seam). (See overcast stitches in pic below.) This is because these overcasting stitches are not subject to stress, and they are therefore much less likely to unravel. By contrast, in seams, there is stress on the stitching at the beginning and end of a seam whenever the two pieces of fabric are pulled apart, so backstitching is necessary to prevent the stitches from unravelling.

What are some alternatives to backstitching?
There are three main alternatives to backstitching: manually tying a double knot, stitching in place, or sewing short stitches at the beginning and end of seams. All three options can be better than backstitching because they do not result in ‘clumps’ or ‘lumps’ in the backstitched area, and they won’t cause fabric to gather and bunch.
1. Manually tie the loose threads into a double knot. When starting and ending a seam, leave long tails of thread and manually tie the loose threads into a double knot to secure. I like to pull the bobbin thread through to the other side of the fabric so that both thread tails are on the same side of the fabric, then tie a double knot. That way the knot lies flat on one side of the fabric, rather than dangling at the edge by both layers of fabric. (See video demo below.)

This method works well if you are working with slippery fabrics like crepe or charmeuse that will bunch up with regular backstitching. It also works really well on the points of darts, because you can sew off the edge of the fabric and then knot the loose thread ends. Tying a knot is preferable to backstitching because backstitching can create a ‘lump’ of thread at the apex of the dart, preventing the dart from pressing out nice and smooth. Note, however, that this method of securing your stitches will still result in a visible knot (see pics below), which might be ok if the knot will be hidden on the wrong side of the fabric, but it’s not ideal if the knot will show on the right side of the fabric.


2. Sew a few stitches in place using your sewing machine. If your sewing machine allows you to sew with a stitch length of 0, or you can drop the feed dogs on your machine, then try sewing a few stitches in place at the beginning and end of the seam to ‘lock in’ your stitches. The act of sewing multiple stitches in place essentially creates a knot that prevents your stitching from unravelling. (See video demo below.)

The advantage of this method is that the knot is not visible and will not show on the right side of the fabric, so you’ll get a nice clean line of stitching without the unsightly ‘clump’ of stitches you would get with backstitches. (See pic below.) On the other hand, this method may not work on lightweight fabrics, which may get pulled down into the throat plate of your sewing machine if you try to sew several stitches in place.

3. Sew a few very short stitches at the beginning and end of the seam. If your machine is not capable of stitching in place, then consider instead sewing a few very short stitches at the beginning and end of your seam. To do this, simply reduce your stitch length to the shortest length available on your machine (on my machine, that is 0.5), then sew a few stitches at that length before increasing the stitch length to the length to be used for the rest of the seam. Do the same at the end of the seam. (See video demo below.)

This method is simple and fast, but unlike method #2 above, it does result in stitching that is visibly different from the rest of the stitching line, which may not be desirable if the stitching will show on the right side of the garment (e.g., when topstitching). (See pic below.)
How to backstitch on a serger
For years, I was taught to secure the beginning and end of seams sewn with a serger by manually tucking the thread tails into the ‘channel’ of stitching created by the serger. This was tedious and time-consuming, so I was very relieved to learn that there is a faster way to secure the ends of serged seams. Check out the video below for a demonstration of how to backstitch on a serger.
1. To secure the beginning of a seam: stitch a few stitches into the fabric, then raise the presser foot and pull the thread tail until the stitches come off the stitch finger. Pull the thread tail to the front so it falls in between the needles and the blade. Lower the presser foot and serge. The thread tail should be encased in the stitching.
2. To secure the end of a seam: stitch a few stitches past the end of the fabric, then raise the presser foot and pull the threads until the stitches come off the stitch finger. Flip the fabric over and place it under the presser foot. Serge about an inch or so (you will be sewing back over the area that you already serged) then serge off the fabric at an angle to exit the seam.
What’s your favorite method of ‘locking in’ stitches? Let me know in the comments! My go-to method up until now was to manually tie a double knot, but I might pivot to sewing several stitches in place instead because I love how clean the stitching line is when you use that method.