
When I first started sewing, one of my biggest pet peeves was making a mistake and having to unpick my stitches. I’ve lost track of the number of times I have stitched fabric pieces together right side to wrong side, and then had to waste tons of time laboriously unpicking every individual stitch with my seam ripper.
It wasn’t until many months later that I learned there are faster ways of unpicking your stitches. Also, by that point, I had learned to make friends with my seam ripper, which not only helped me unpick my stitching mistakes, but also had a number of other handy uses, including cutting open buttonholes and cutting slits to install hardware. Below I set out a few different ways to quickly unpick different types of stitches, and also discuss a few other uses for your seam ripper.
How to unpick machine stitches quickly
The general concept behind unpicking stitches quickly is to avoid unpicking each and every individual stitch, as this is time-consuming and results in lots of little tiny pieces of thread that you then have to pick out of the seam by hand.
Instead, I recommend unpicking stitches more quickly using one of the following two methods:
Method 1
Note that this method will not work if you have a very heavyweight fabric, as the density of the weave in the fabric will make it impossible to pull the bobbin thread out.
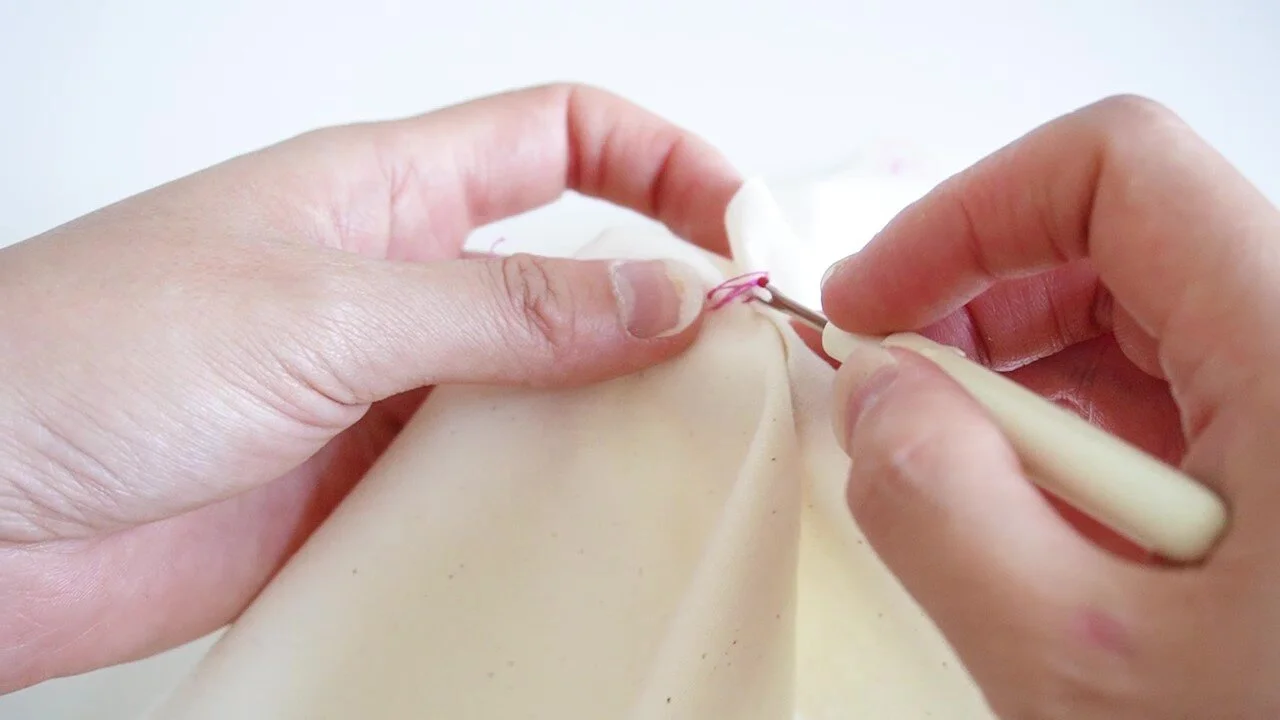
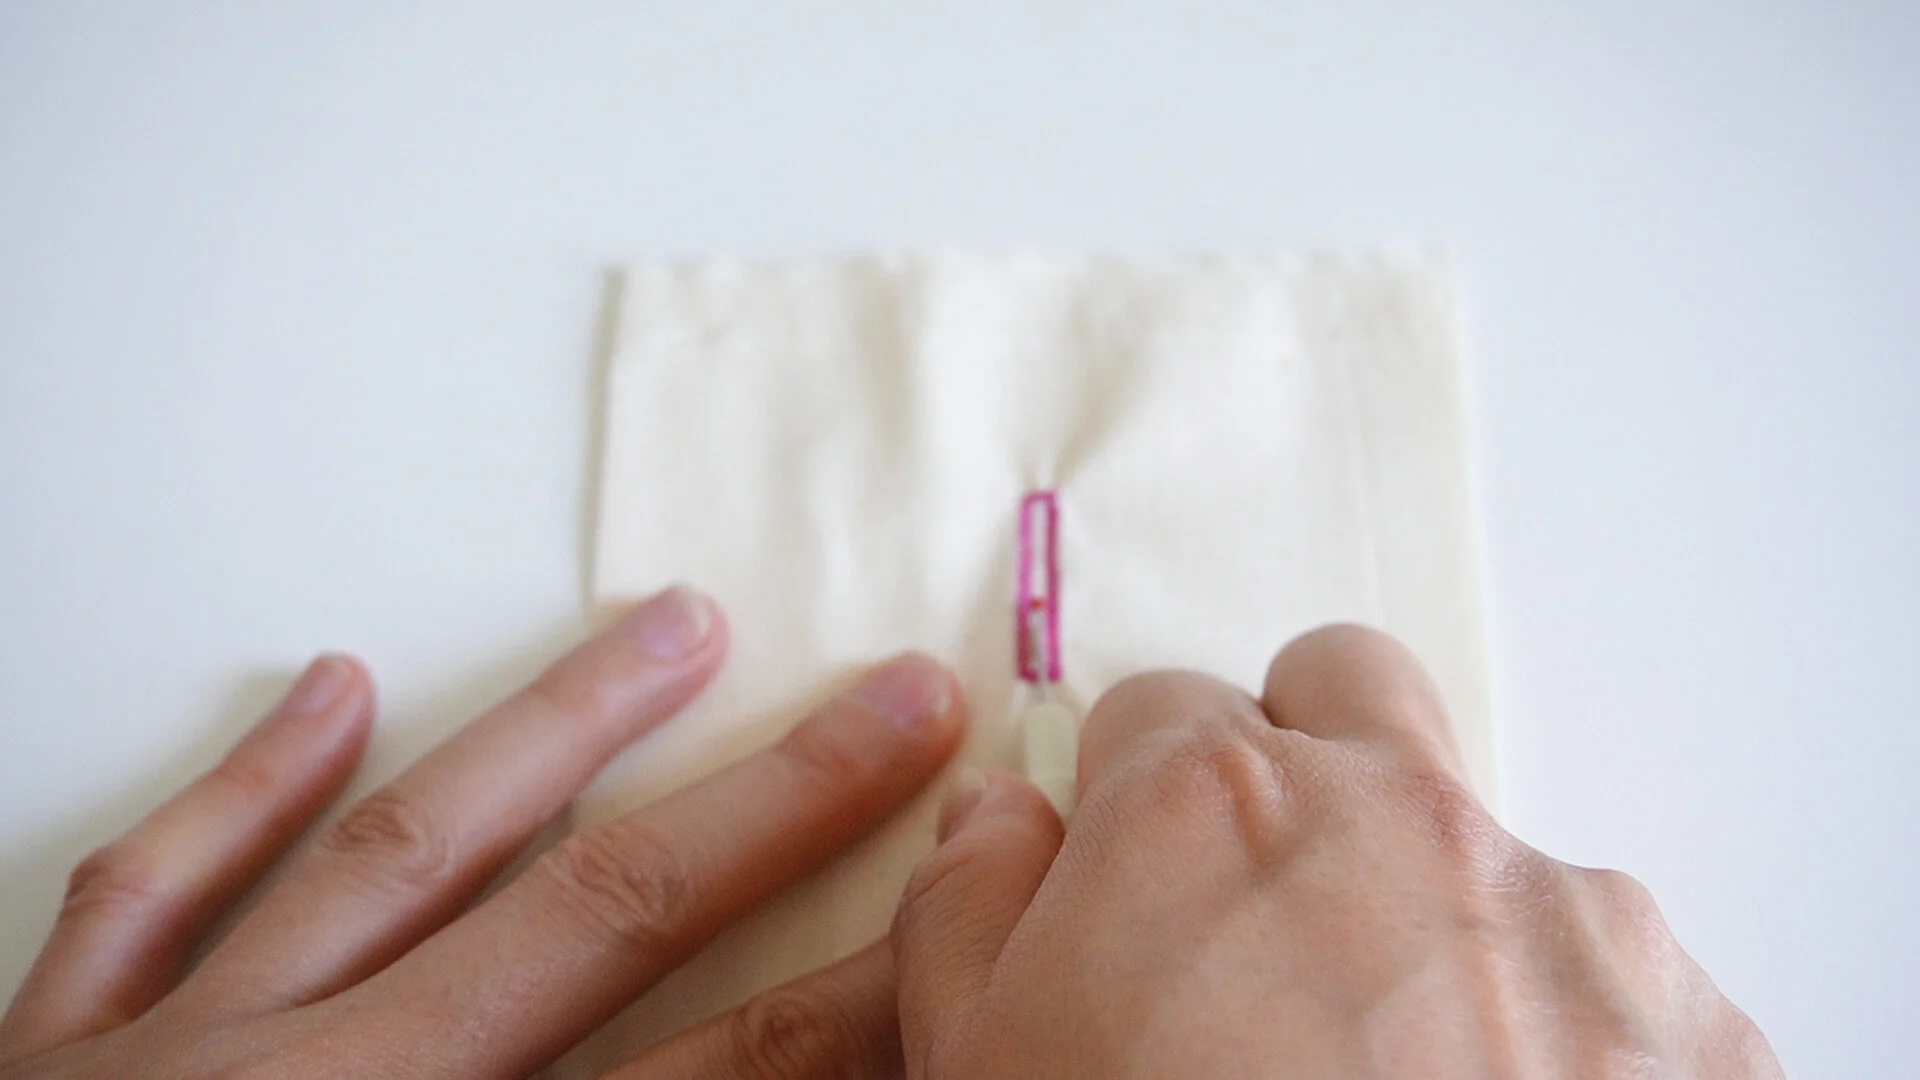
1. With the fabric laid flat, unpick the first few backstitched stitches at the beginning of the seam.
2. After you have unpicked all of the backstitched stitches, continue using the seam ripper to slice open stitches every inch or so along the seam.
3. Turn the fabric over and unpick a few more stitches, about three inches or so apart. Next, use the seam ripper to release the end of the bobbin thread, then pull that bobbin thread out to release the stitches on the other side of the fabric. If you can’t pull the bobbin thread out, go back to step 2 and slice open a few more stitches, then try pulling the bobbin thread out again.

Method 2
Note that this method will not work on delicate fabrics, as the fabric will tear when you try to rip apart the stitches.
1. Unpick the first few backstitched stitches of the seam. This should release the stitches at the beginning of the seam.
2. Pick up the fabric and pull apart the two pieces of fabric at the seam. This should release several stitches. Don’t be afraid to really pull the fabric with a decent amount of force.
3. Unpick the next stitch and pull apart again to release the next group of stitches. Repeat until you have unpicked the entire seam.
How to unpick zigzag stitches
It is easy to quickly unpick zigzag stitches – simply slice through the diagonal threads in the zigzag, then turn the fabric over and pull out the bobbin thread to unravel the stitches. Pick out the remaining loose threads with your fingers or use some packing tape wrapped round your fingers.

How to unpick serger stitches
For years, I unpicked serger stitches by unpicking the looper threads that run back and forth between the edge of the fabric and the line of stitching, only to be frustrated that this did not release the serger stitches and left me with a mess of short pieces of thread.
I eventually learned that the trick is to unpick the straight stitches at the base of the stitching, not the looper threads. You should unpick the straight stitches, leaving about an inch between each unpicked stitch. Next, flip the fabric over and pull on the looper threads to unravel all of the serger stitches. Pick out the remaining loose threads with your fingers or some tape. Easy peasy!

How to unpick stitches without a seam ripper
First of all, double check the accessories that came with your sewing machine – many sewing machines come with a seam ripper included, so you might have a seam ripper and not even know it!
If you’ve double checked and you’re sure you don’t have a seam ripper, you can use a pair of embroidery scissors (or any pair of scissors with a small sharp point) to cut through stitches in the same way you would with a seam ripper. Simply insert the tip of the scissors underneath the stitch and cut, taking care not to cut into the underlying fabric accidentally. My personal favorite embroidery scissors are these delicate gold-handle scissors by Gingher.
Other uses for seam rippers
In addition to unpicking stitches, seam rippers have a variety of other uses when sewing garments. Try using your humble seam ripper to do the following:
1. Cutting open buttonholes. Seam rippers have tiny sharp blades and are perfect for slicing open the fabric in buttonholes. Simply insert the seam ripper in one end of the buttonhole and slice to the other end. Be careful you don’t accidentally slice into the stitching at the other end of the buttonhole!
2. Cutting slits for hardware. Some types of bag hardware, such as swivel locks, are installed by inserting the metal prongs into slits in the fabric. The seam ripper is perfect for cutting these short slits, as the tiny sharp blade gives you a lot of control when cutting the slit.

3. Turning out sharp corners. The sharp pointy end of the seam ripper is invaluable when turning out sharp corners in your sewing projects. For example, when I sew button-down shirts I frequently use my seam ripper to help me get a nice crisp point on my collars.
So tell me - do you hate unpicking seams? Do you have a magical fast way to unpick stitches? Let me know in the comments!