
Looking for the perfect bag to pair with your casual wardrobe? Download this free pattern for a slouchy crescent-shaped sling bag. It’s very easy to make and it’ll add a nice polished touch to your athleisure wardrobe.
Read MoreFree Pattern: Large Leather Tote Bag
Want to take your sewing obsession to the next level? Learn to sew bags out of genuine or faux leather. Make this sleek, roomy leather tote bag with my free downloadable pattern.
Read MoreTranslating the Trends (and Free Pattern): Napkin Tops
The skin-baring backless napkin top, last seen in the 90’s and early 2000s, is making a comeback. Made from tiny scraps of fabric held up with the thinnest possible straps, these little numbers are sexy yet also surprisingly polished and refined. Make your own napkin top with my free downloadable pattern.
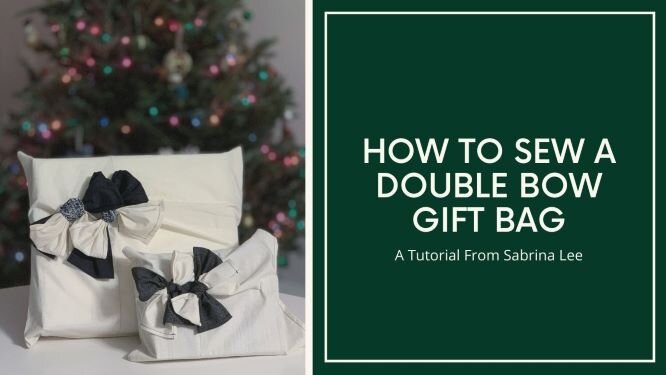
Read MoreFree Pattern: Fabric Gift Bag With A Double Bow
The Christmas season is rapidly approaching, so I thought I would share my pattern for a unique fabric gift bag with a double bow. This is a gorgeous way both to reduce waste from gift wrap and use up leftover fabric from past projects.


To make this pattern, I adapted the technique shown in Pattern Magic, a series of Japanese pattern drafting books that show you how to add amazing sculptural details into your garments. The book shows you how to add this bow detail to a bodice, but I’m too old to be wearing giant bows on my shirts, so I decided to add it to a bag instead. To get the pattern, scroll down to the bottom of this post and click on the link. But before you do that, read on for some important notes on assembly, fabric choice and construction.
Assembling the Pattern
The pattern consists of 14 pages. Make sure you print out the pattern at actual size (not “scale to fit”), so make sure you check your printer settings before hitting print. On page 8, there’s a test square that should measure 4 inches by 4 inches - print that out first and measure it to make sure that everything is printing to the correct scale. If the test square looks good, assemble the pattern by laying out the pages in two rows of seven pages each, then matching up the triangles with the letters. Your pattern should now look like this:
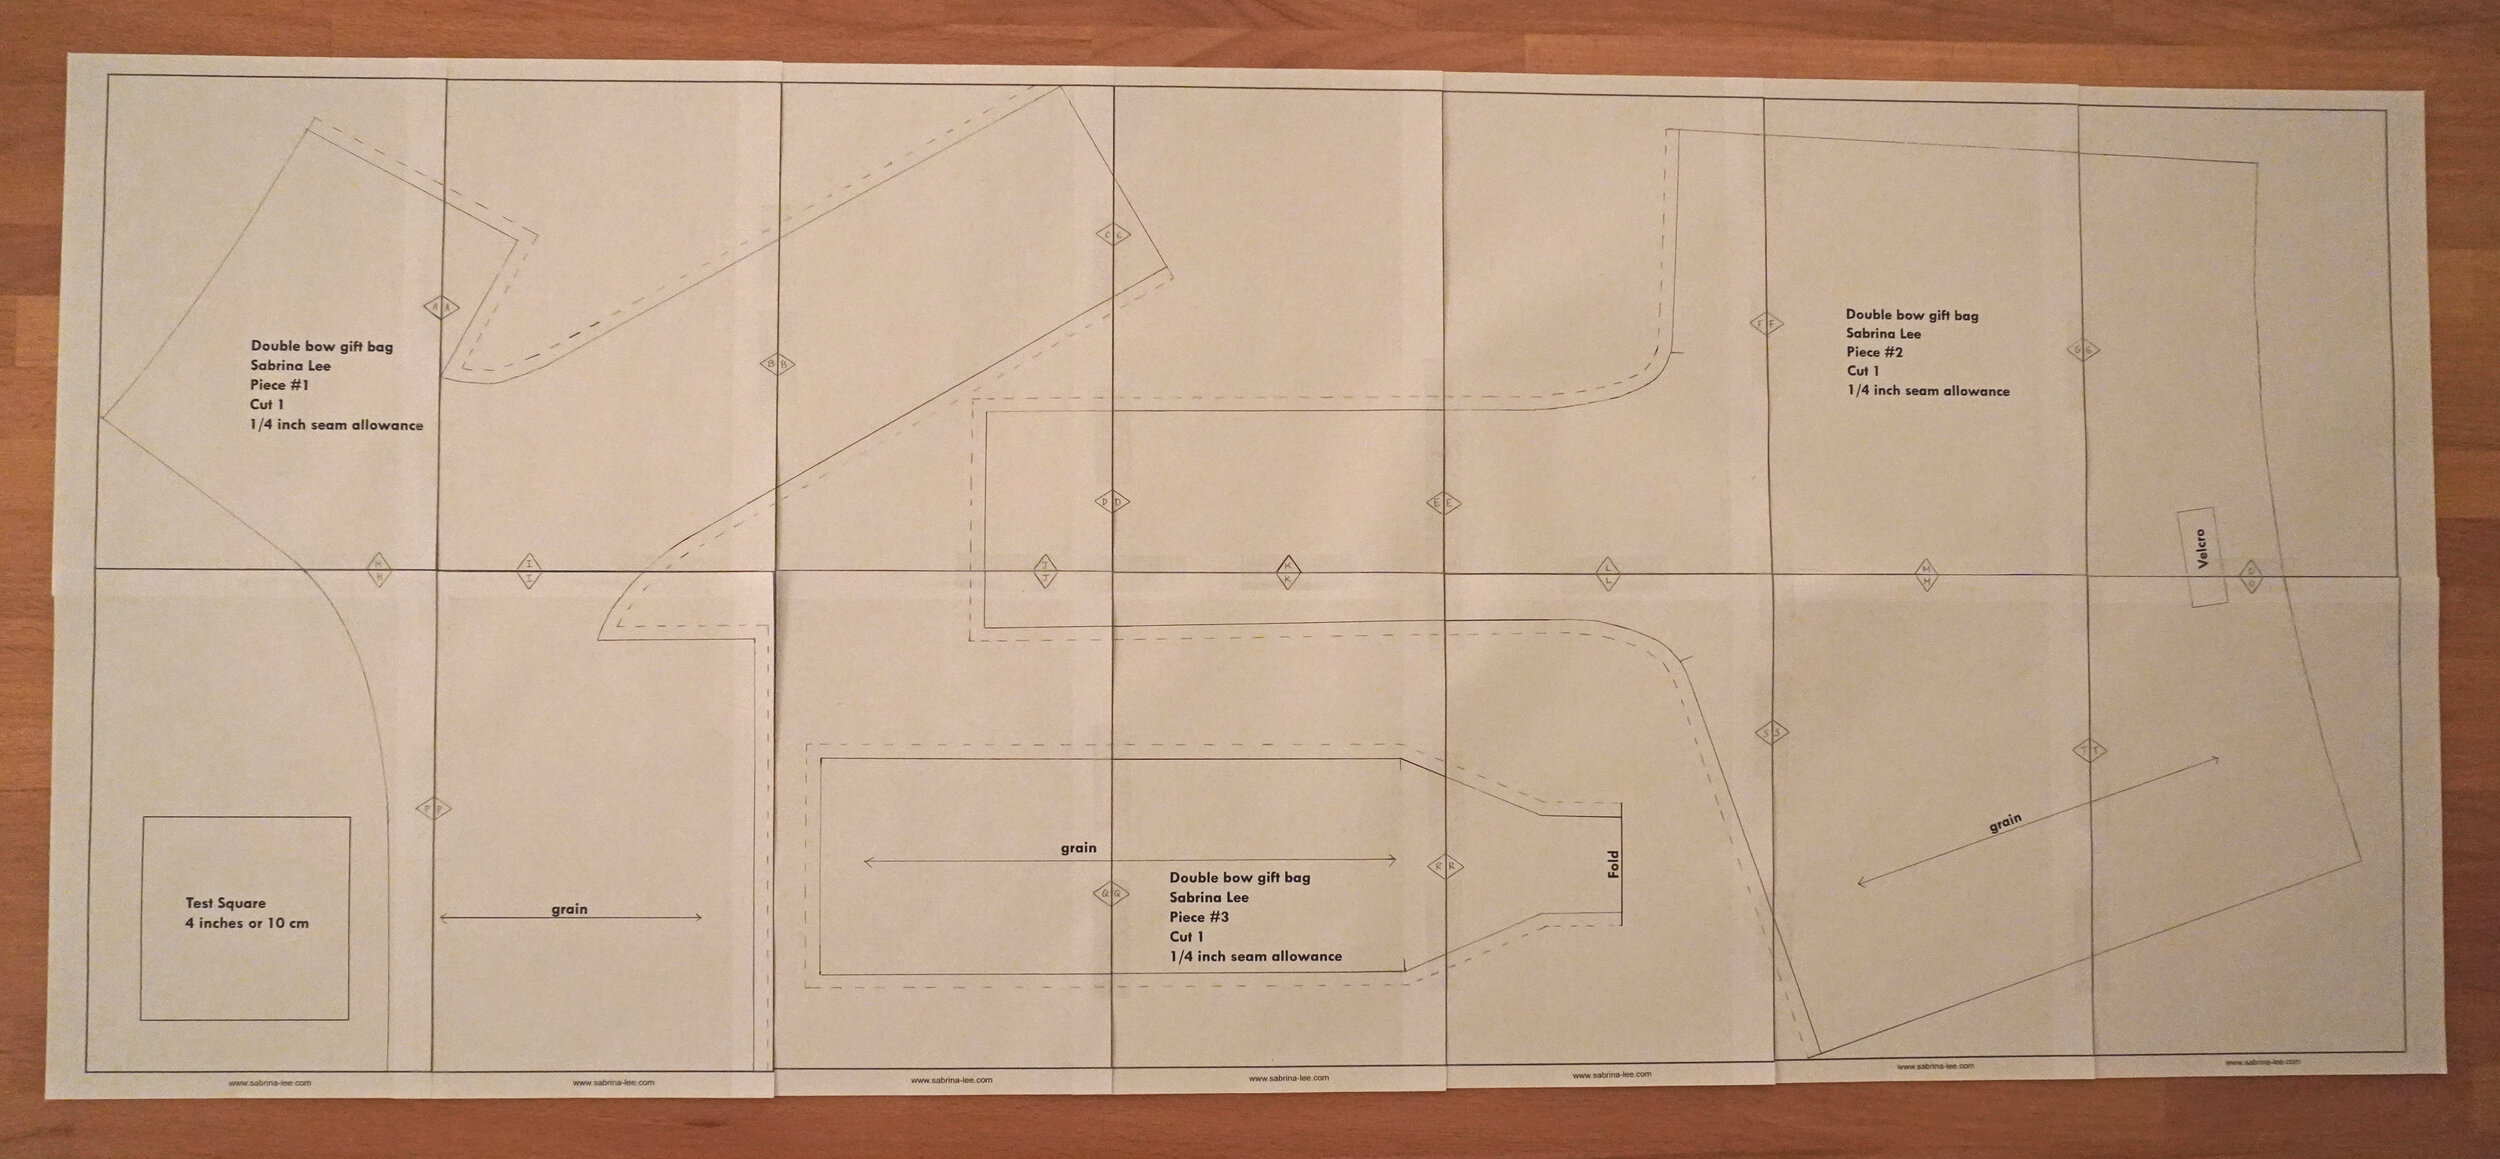
If you’ve never worked with a PDF pattern before and you want more detailed instructions, check out Colette’s several years old but still useful blog post here.
Now that the pattern is assembled, cut out the three pattern pieces (which are the front left half of bag, front right half of bag and extra bow piece, respectively). I have added 1/4 inch seam allowance to the bow ‘arms’ and the extra bow piece - this is shown by the dotted line, so be sure to cut on that line instead of the solid line on that part of the pattern. I didn’t add seam allowance on the outside edge of the bag, and that’s why you don’t see a dotted line on that part of the pattern.
In addition to the three pieces indicated in the pattern, you’ll also need to cut an additional rectangle for the back of the bag. I cut a 14 3/4 inch by 18 5/8 inch rectangle.
The full sized pattern makes a bag that is roughly 14 inches tall by 18 inches wide (to give you some context, that’s big enough to hold a board game box). If you want to make a smaller version, just print the pattern at a smaller scale - for example, the smaller bag in the picture above was made using a version of the pattern printed at 67%, and it makes a finished bag that is about 9.5 inches tall by 12.5 inches wide (big enough to hold some books). If you make this scaled-down version, you’ll need to cut a 10 inch by 13 1/4 inch rectangle for the back of the bag.
Fabric choice
Use a light- to middle-weight woven fabric - it is difficult to tie the bows if you use a bulkier fabric (trust me, I tried making the bag with some leftover wool coating and it was a total disaster). One of my favorite things about this project is you can use fabric scraps from past projects in the extra bow piece. For example, I had some fabric swatches that were donated to me a few years ago by a fashion brand here in NYC, and I pieced them together to make the extra bow piece. It’s a great way to showcase fabrics that have gorgeous patterns or textures, but where you don’t have enough of the fabric to make a full garment.
Construction
The construction on this is fairly straightforward - in essence, you stitch the two halves of the front together, finish the edges of the bow arms, then stitch the second bow onto the hole in the front of the bag and stitch the entire front to the back of the bag. Need more detail? Check out the video tutorial below.
Ready to make your own double bow gift bag? Click on the link below to get the pattern. Happy sewing, and please send me pics if you end up making it!


