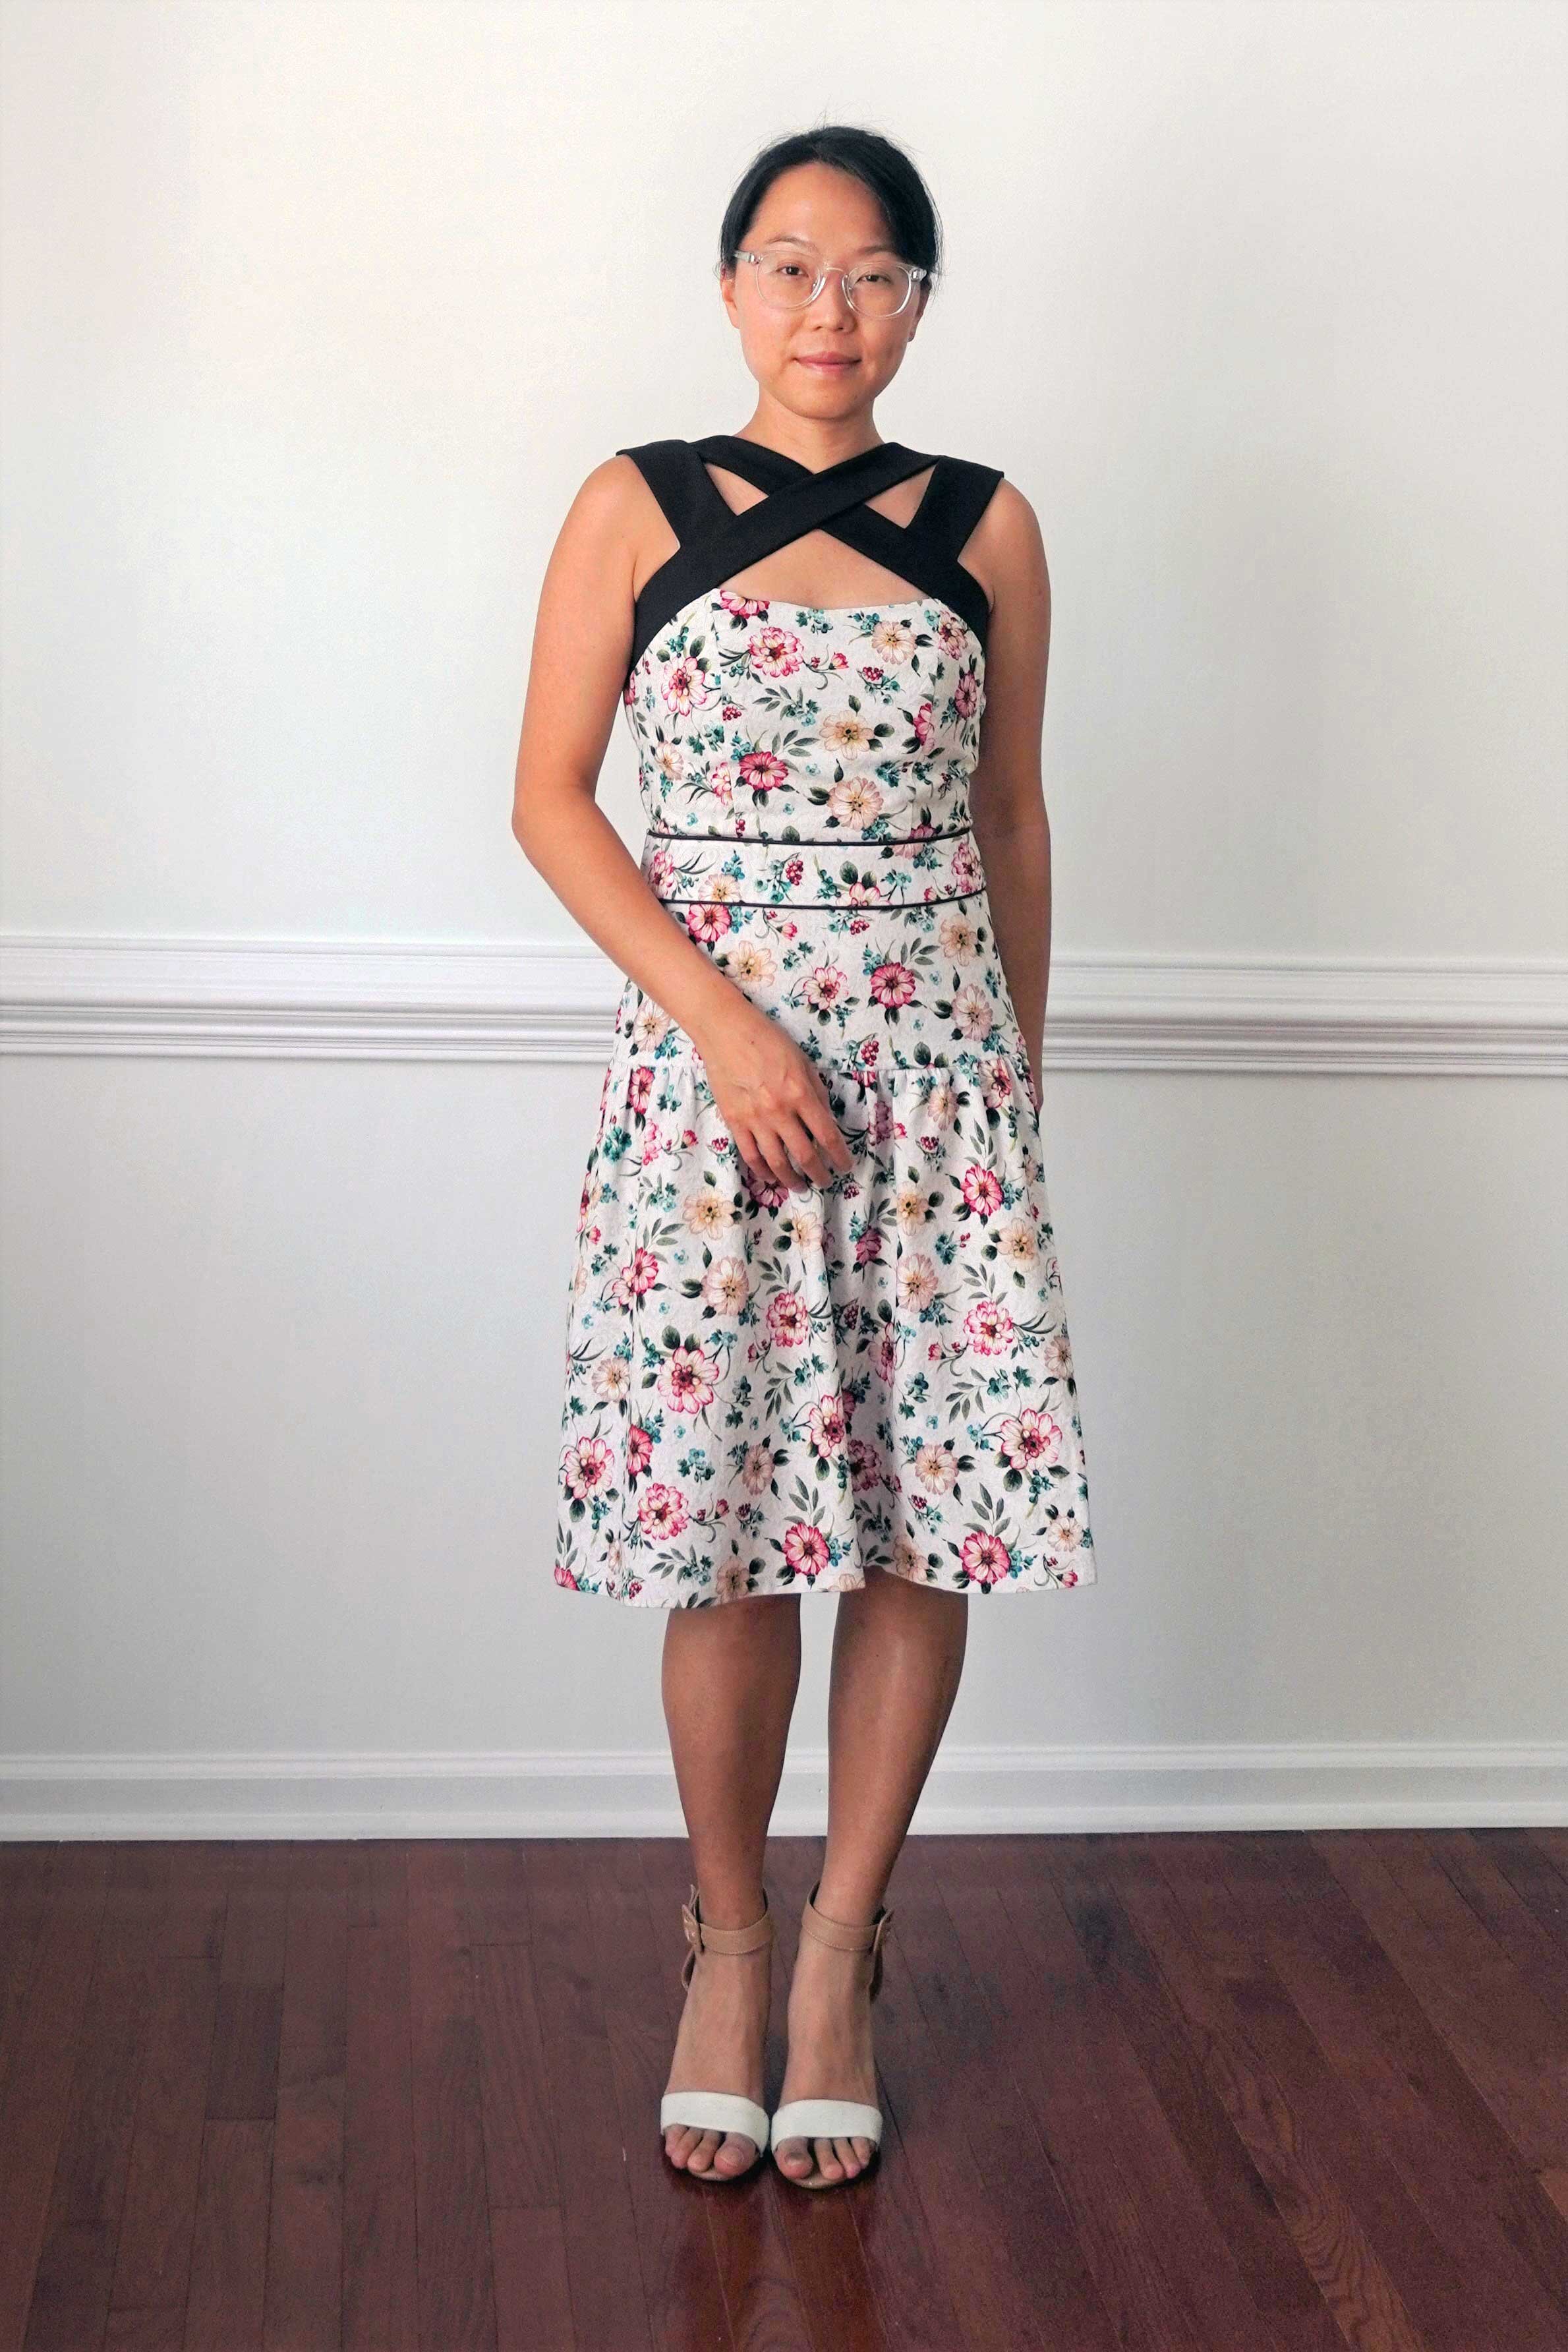
I’ve had Simplicity 1607, a flirty Cynthia Rowley dress, in my stash for several years now, but I’ve never gotten around to actually making it until now. The dress is made out of printed floral cotton poplin and dark brown polyester twill, both from my stash. I tried to tie the top and bottom halves of the dress together by adding some dark brown piping around the waistband:
Fitting Adjustments
For the most part, I sewed the pattern as-is, and I made only a few adjustments:
I cut a size 10 in the bust and hip area, and graded to a size 12 in the waist to accommodate my thick waistline.
I reduced the seam allowance at the waistband to 3/8 inch (instead of 5/8 inch). This had the effect of moving the waistband down a bit, which I needed to accommodate my slightly longer torso.
I reduced the seam allowance at the zipper to 1/4 inch because the bodice was a bit too tight.
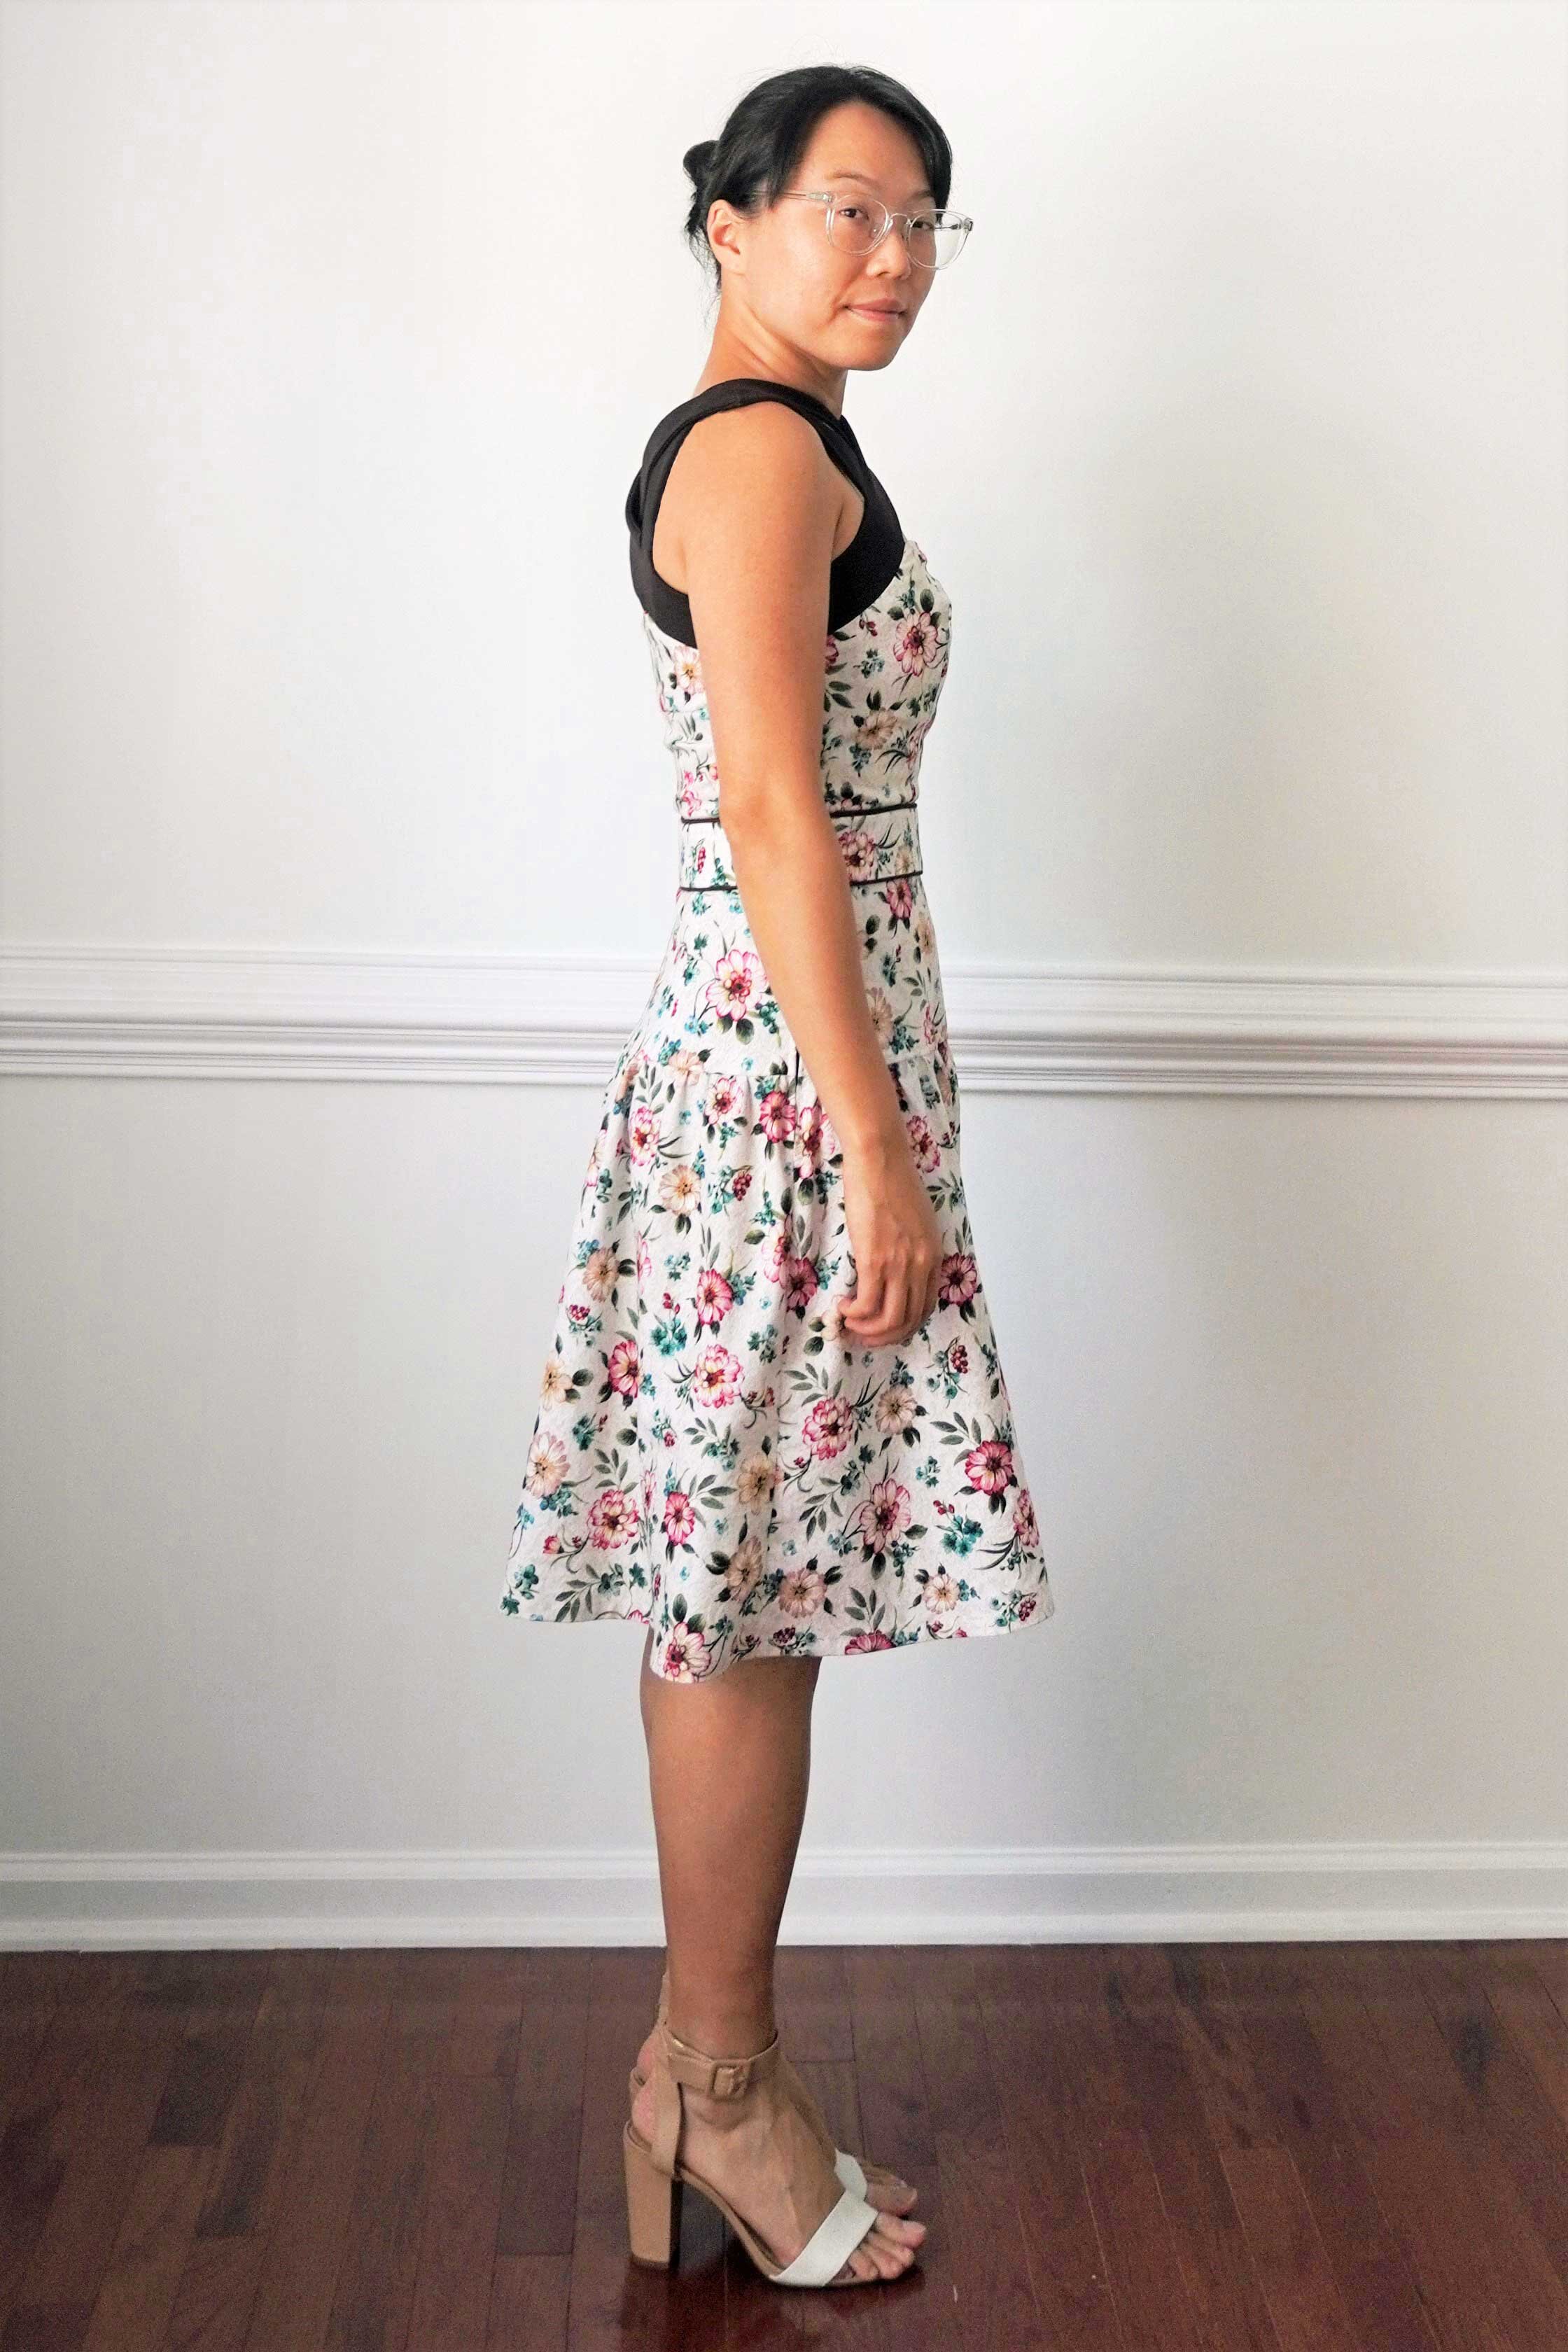
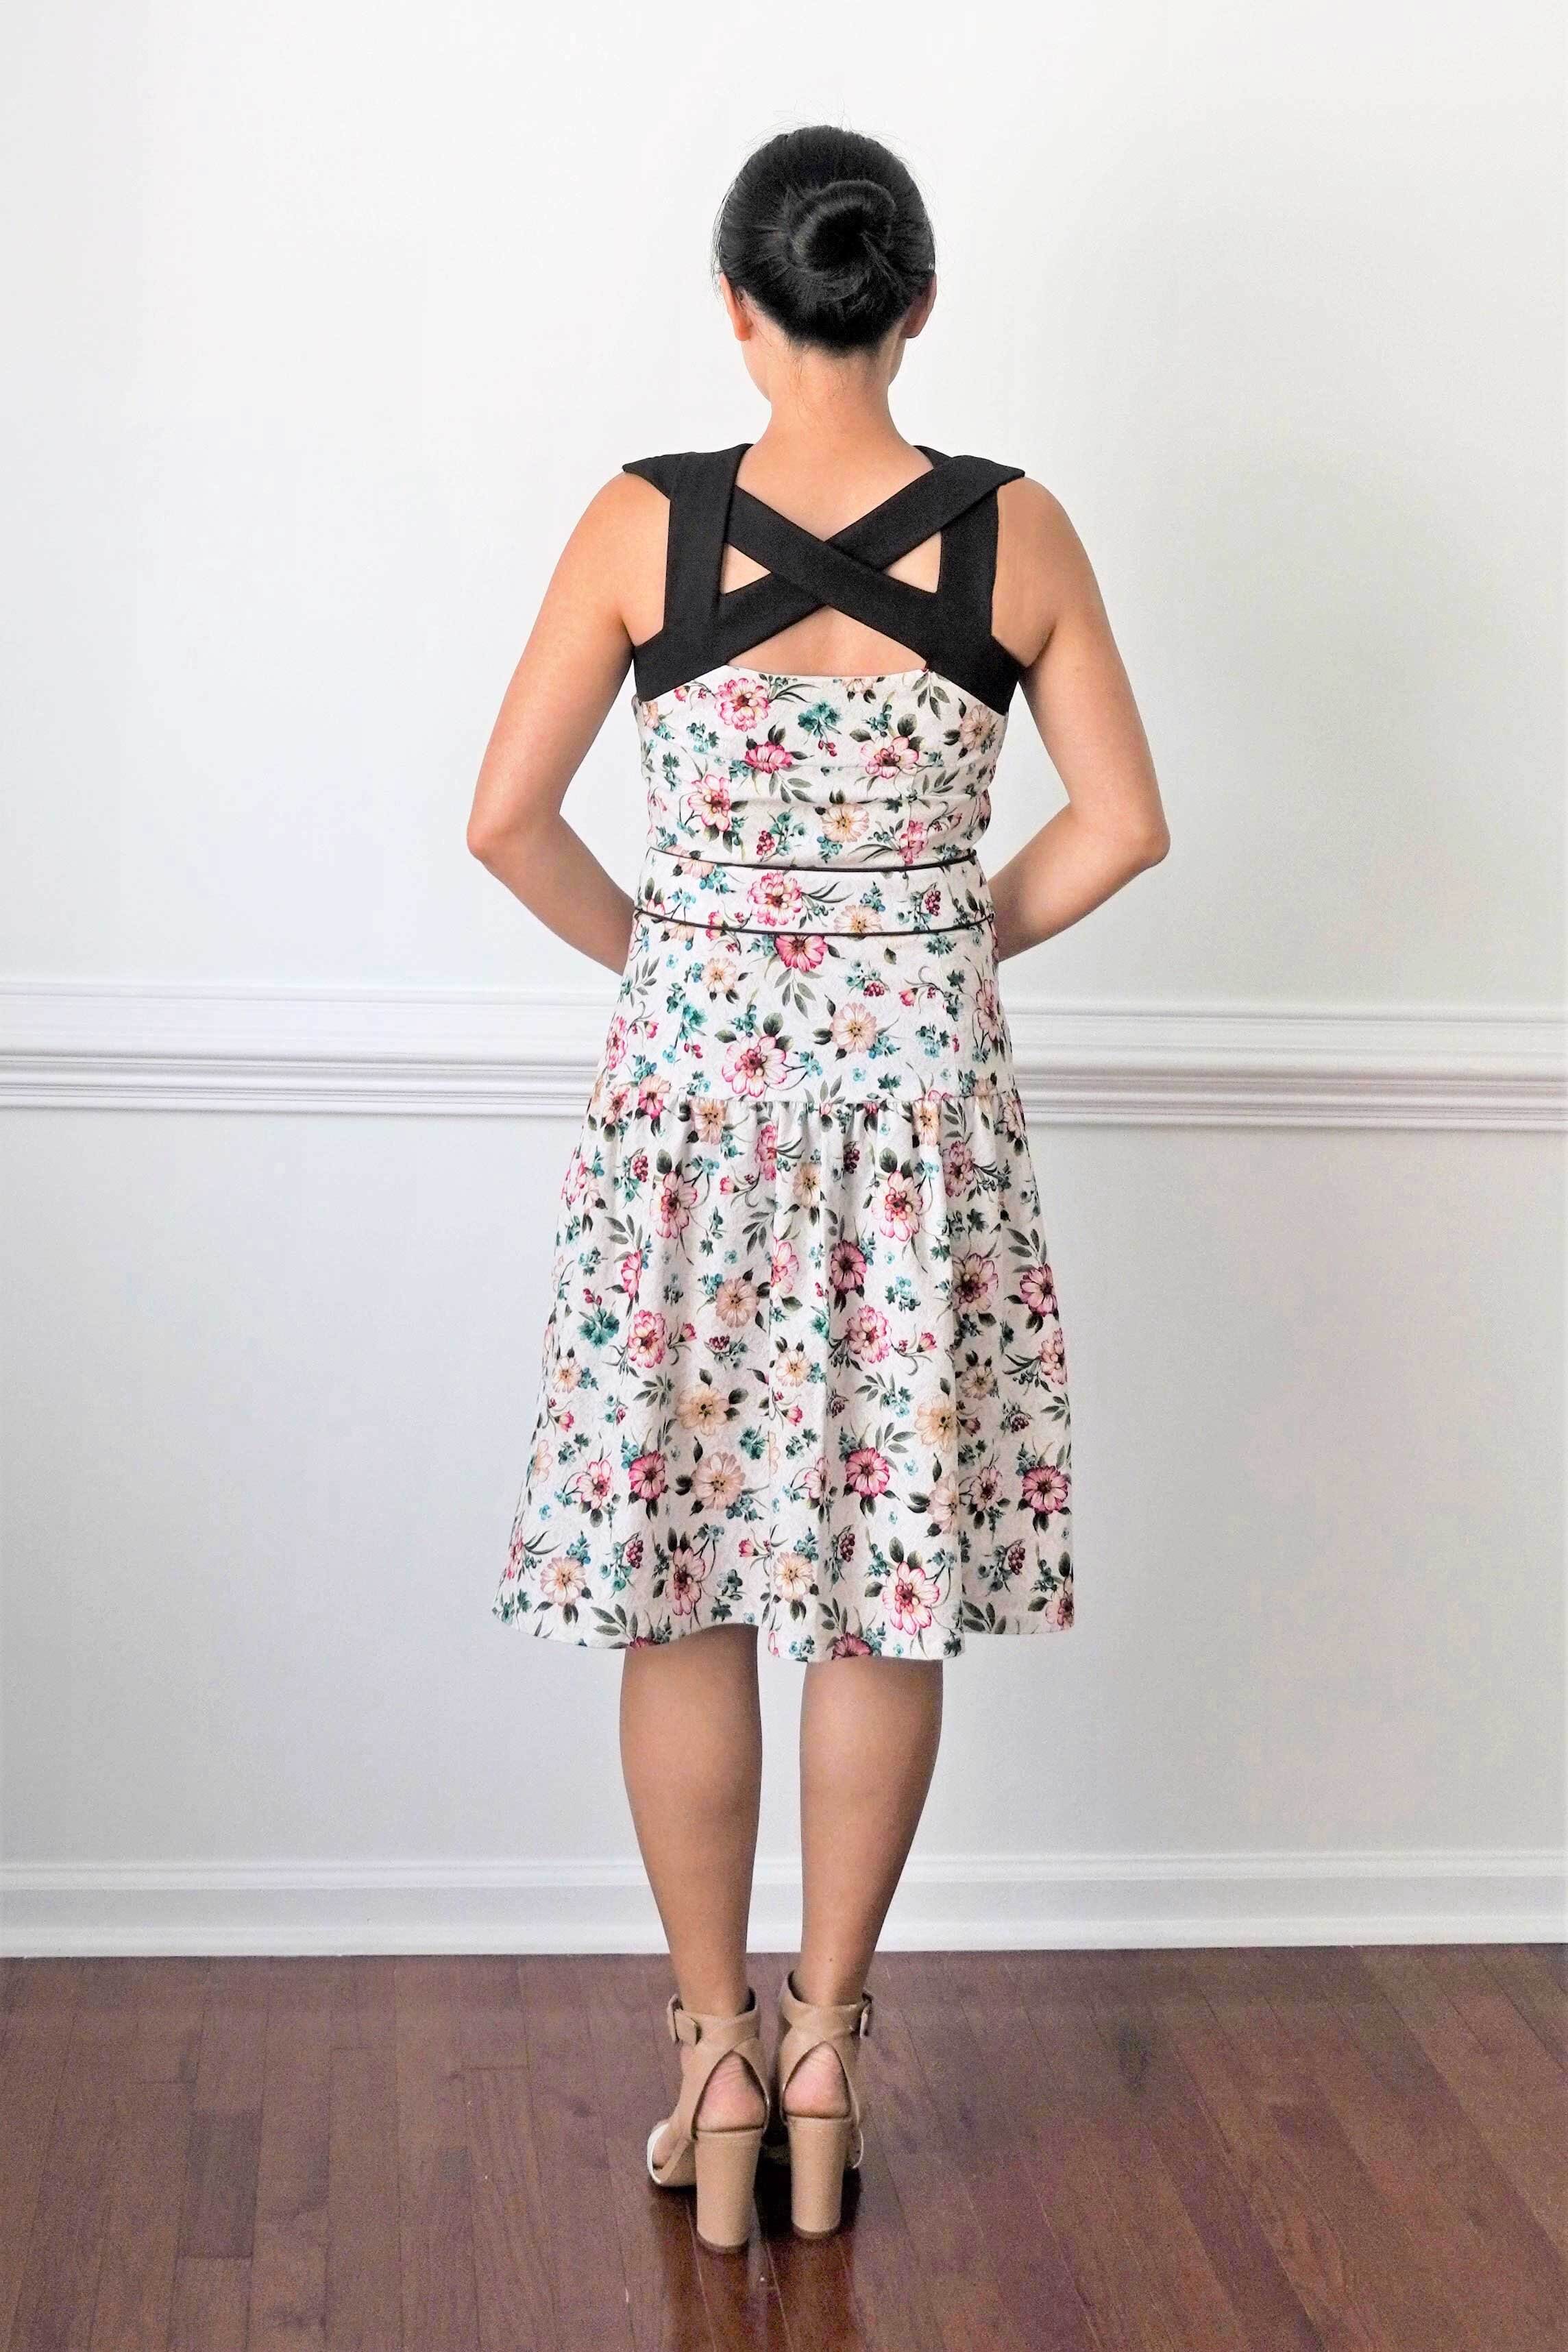
In all honesty, the fit of this dress is not as good as I would like. I usually sew with Vogue/McCall’s/Butterick patterns, and I know from experience that there are a set of fitting adjustments that I always need to make with their patterns. However, despite knowing that Simplicity patterns are based on the same basic sloper as Vogue/McCall’s/Butterick patterns, I decided (out of pure laziness) not to make those adjustments before cutting. Big mistake — in retrospect, I absolutely should have made the small bust adjustment and straight back adjustments that I normally make with Big Four patterns. I was able to make the straight back adjustment retroactively by hand-sewing a 1/2 inch tuck in the back bodice piece, which is not ideal because there’s an odd horizontal line in the back bodice now, but at least that part of the dress fits okay. I can’t say the same for the front bodice, which is still a bit of a mess. I was too lazy to unpick the entire front bodice to make adjustments, so I tried unpicking the upper part of the princess seam (where it curves over the bust), folding in the excess fabric and hand-sewing the seam closed. That sort of worked, except that I couldn’t really tuck in the excess fabric right at the top where the strap meets the bodice, so there is now an odd ‘bubble’ of fabric there.
I would also note that this pattern seems to have less ease than is typical of the Big Four. I cut the same sizes that I would normally cut in Vogue/McCall’s/Butterick patterns, but that resulted in a bodice and waistband that was slightly too snug, so I ended up having to let out the side seam slightly.
My advice to other sewists is to try on the straps and bodice to check fit before you sew everything (including the lining) together. This requires deviating slightly from the pattern instructions, but I think it’s worthwhile, otherwise you’ll have to unpick everything to alter the fit. Specifically, I would:
Baste the front bodice pieces together as shown in step 1 of the instructions. Sew the back darts as shown in step 2 of the instructions. I would then baste the side seam together and baste in a zipper, so you can try on the bodice for fit. Make alterations as needed along the princess seams and side seams. Carry those alterations through to the bodice lining pieces.
Baste together the shoulder seams of the straps as shown in steps 4 and 5 of the instructions. Pin those straps to the bodice as shown in step 19 of the instructions, then try the entire bodice on. Make alterations to the straps as needed. Carry those alterations through to the other set of strap facing pieces.
Construction
I usually don’t read pattern instructions, but the straps of this dress are pretty unique and you really need to pay close attention to the instructions to get them right. It is very important to label your straps before you start sewing because it is easy to get the straps mixed up and end up sewing the wrong ends of the straps together.
Aside from the straps, the rest of the dress is a pretty straightforward sew, and the only thing I did differently was to add some piping to the waistband. That said, here are a few construction notes for other sewists to consider when planning their garments:
It is important to use a very lightweight interfacing for the straps; otherwise the straps will be too chunky and they won’t lay nicely across the chest. I used some sheer stretch fusible interfacing for my stash, which I initially thought would be too lightweight but ended up being just enough to give the straps structure without adding too much bulk.
The front bodice is lined with some white Bemberg lining, and the waistband is self-faced. The skirt is unlined. If I were to make this again, I might consider lining the skirt yoke section as well, to give the interior a cleaner finish. Right now, the seam where the skirt is gathered and sewn to the yoke shows, which I think is a pity because all of the other seams in the dress are hidden away nicely by the lining or the waistband facing.
The zipper goes down the side of the body, so use a lightweight zipper otherwise the zipper might end up adding unsightly bulges to the waist and hip areas.
The Final Verdict
Despite the myriad fit issues, I actually do love the design of this dress, which is very sweet and different from the rest of my wardrobe. The straps are really unique and eye-catching, although the downside is I need to maintain excellent posture while I am wearing the dress. I definitely don’t need two of these dresses in my wardrobe, but there is a part of me that kind of wants to make this again now that I have worked out my fit issues! We’ll see what happens in the next few months…

The only thing left to do is to try to figure out where I, a middle-aged woman, am going to wear this (very young-looking) dress. Why don’t they have prom for 40-year-olds?